

 Published sources
 Product details checked
Choose a wired horse trailer camera for a permanent installation when you can protect the cable between the trailer and truck. Choose wireless when you need to move the camera between trailers or avoid a long video cable, provided the picture stays live through your actual trailer. A wireless kit with its own monitor keeps the camera display separate from your phone. An app camera is convenient for portable checks, but its local connection, phone settings and both devices’ batteries become part of the setup.
Decide on the video connection and the power supply separately. A wireless camera can still need a power cable. A wired camera can lose its picture when the ignition turns off. For either type, the useful test is a clear, current view of the horse for the whole period you need to monitor.
In this guide
- Compare wired, wireless monitor and app systems
- Measure and test the signal path
- Plan power and battery runtime
- Choose the display
- Check night vision and mounting
- Compare documented camera systems
- Find the cause of a failed picture
- Run the pre-trip checklist
Compare the three camera setups
| Decision | Wired camera with monitor | Wireless camera with monitor | Local app camera |
|---|---|---|---|
| Video path | Cable from camera to monitor | Radio link to a dedicated receiver or monitor | Local wireless link to a phone or tablet |
| Main reason to choose it | A fixed installation with no radio path through the trailer | Removable equipment with a separate display | Portable viewing with little equipment to install |
| Installation work | Route and secure cable through the trailer, hitch area and tow vehicle | Secure camera, antenna and monitor; provide their power | Secure camera, pair the app and provide phone power |
| Dependence on trailer metal | No radio signal to obstruct; protect cable at metal edges | Camera and receiver placement can determine whether it works | Trailer structure and the phone’s position can limit the connection |
| Power | Usually vehicle power through the system’s harness | Camera may use vehicle power or a rechargeable battery; monitor needs its own supply | Camera and phone each need enough charge or an approved power supply |
| Dependence on mobile coverage | None for the direct video connection | None for a direct camera-to-monitor kit | None for a local camera hotspot; a cellular app camera is different |
| Main upkeep | Inspect hitch connector, cable, mounts and power connections | Check battery or power, mounts, antennas and pairing | Check camera charge, app compatibility, permissions and phone connection |
| Typical reason to reject it | No safe cable route or frequent changes of tow vehicle | Picture freezes with doors closed or power cannot cover the trip | Phone cannot maintain the feed from the cab or is needed for other tasks |
A long gooseneck or living-quarters trailer is a strong reason to investigate wired equipment first. Distance, partitions and the truck cab make the wireless installation more demanding. A wireless kit remains an option if it passes the tests in your rig; a wired kit still needs a sound cable route and power supply.
For an occasional trip in a smaller trailer, a removable camera may be the more practical choice. If you already own a camera that passes the view, connection and power tests below, repositioning or maintaining it may solve the problem without buying another system.
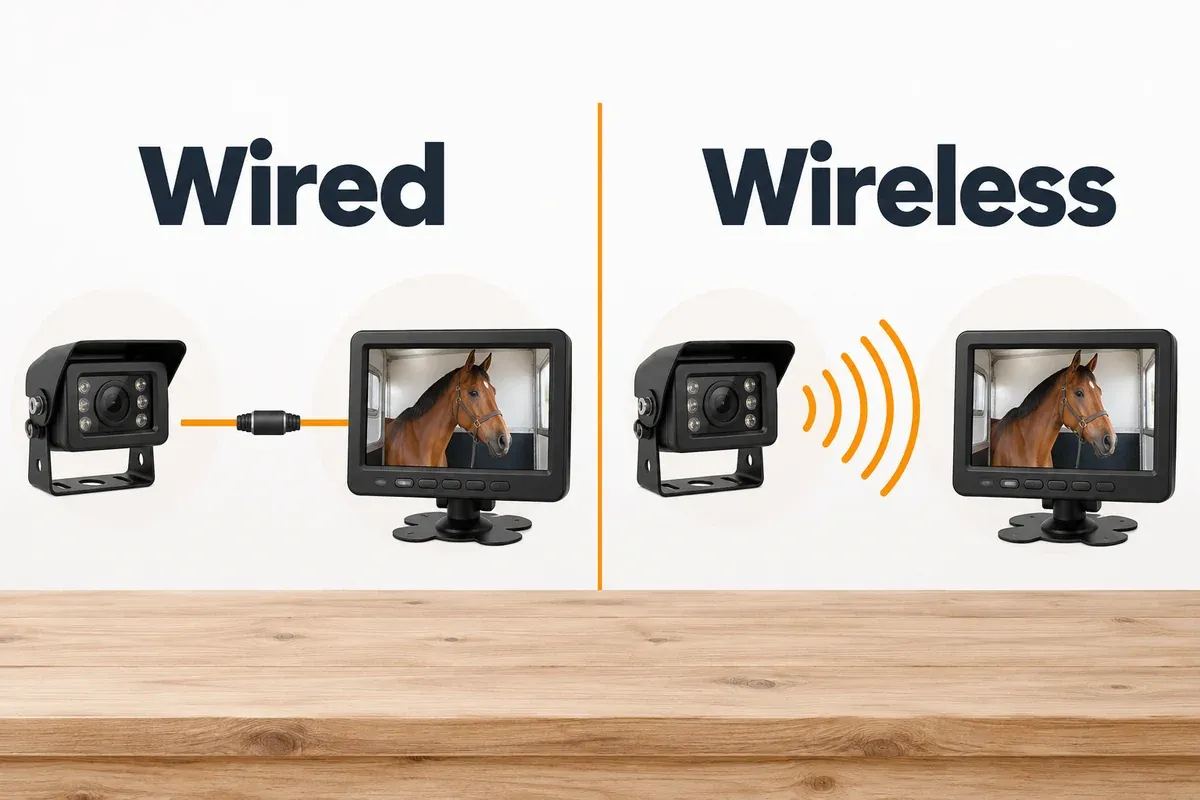
The comparison below shows the video path. Use the exact kit’s instructions to plan power, connectors and safe mounting separately.
What “wireless” actually means
The word describes several different connections. Before comparing specifications, identify which one the camera uses.
Dedicated digital wireless: the camera sends video directly to a matched monitor or receiver. You install no video cable across that radio link. Camera power, monitor power and sometimes a short receiver cable are still necessary.
Local app connection: the phone connects to the camera’s own network. The camera and phone must remain within usable local range. This can work away from cell towers because the picture does not need to travel over the internet.
Cellular app connection: a SIM-equipped camera sends video through a mobile network. It can support remote viewing, but coverage and data service become requirements. For example, Equine Eye Vision uses a data SIM, while Voyager uses a local connection. A cellular model’s standby or occasional-check battery figure cannot be treated as continuous towing runtime.
Wired video: the camera connects to the display through a cable. Some systems carry camera power in that same harness; others have separate power connections. The kit’s wiring diagram determines which arrangement you have.
These distinctions explain why two products described as wireless may behave differently on the same route. A lost local camera connection calls for a placement or pairing check. A cellular camera going offline may need coverage or account troubleshooting instead.
Measure the path from the horse to the cab
Trailer length alone is a poor measure of camera range. The important distance runs from the intended camera or transmitter position to the receiver. For an app camera, the receiver is the phone where it will actually sit.
Start with the trailer hitched to the tow vehicle you use. Park securely and record the following before ordering a kit or drilling a mount:
| What to record | Why it affects the choice |
|---|---|
| Camera position to the planned display or receiver position | Establishes the actual wireless path |
| Horse-area partitions, tack-room wall and living-quarters bulkhead | Identifies barriers between transmitter and receiver |
| Cable route along the trailer and truck | Determines wired cable length; the protected route may be longer than a straight measurement |
| Movement across the hitch during turns | Determines where an approved flexible cable or disconnect must fit |
| Available mounting surfaces and the horse’s reach | Determines whether a camera can stay secure without becoming a contact hazard |
| Camera and display power sources | Reveals whether the feed can work while driving and during stops |
Metal shielding is a placement problem
A short distance with several metal barriers can be harder for a wireless kit than a longer unobstructed distance. Garmin’s BC 50 installation instructions explain that dense metal in the transmission path reduces range and recommend testing transmitter placement before permanent mounting. Those instructions concern the BC 50; its numerical range is not a specification for the cameras compared here.
Apply the placement principle to your trailer. A camera behind a solid partition and a receiver low in the cab deserve a closer test than a camera with a clearer path toward the front. Moving a supported external antenna or separate transmitter can help, but only use the accessories and cable lengths approved for your kit. A longer antenna fitted at random is not a dependable repair.
Keep the horse view as the first requirement. Moving a camera toward an opening is unhelpful if a partition then hides the horse. You need a position that provides both a useful image and a dependable connection.
Test in stages before making the installation permanent
- Establish a close-range baseline. Pair camera and display on the manufacturer’s recommended supply. Confirm that you can see movement in the picture. If pairing fails beside the camera, resolve that before testing through the trailer.
- Test the proposed positions. Temporarily secure the camera safely, put the receiver or phone in its intended position and close the doors. Check from inside the cab while stationary.
- Add the normal equipment. Close the tack-room door, set the dividers and place gear where it travels. Change one position at a time if the picture fails, so you can identify what helped.
- Confirm the horse view during normal loading. Once the mount is secure, check whether the horse or loaded equipment blocks the lens. Avoid keeping a horse waiting in a hot, closed trailer for a prolonged equipment test.
- Check normal travel operation. On an appropriate initial trip, have a passenger observe connection interruptions and record where they occur. If travelling alone, inspect recordings or settings only after stopping safely.
A driveway test establishes that the proposed arrangement works while stationary. It does not prove that vibration, turns, changing obstructions or the full journey will cause no interruptions. Repeat the relevant checks when you change the tow vehicle, trailer, camera position or receiver position.
Plan power for the whole trip
For horse observation, define when the picture must be available: loading, forward travel, a fuel stop, waiting at a venue or unloading. Each period can have a different power state.
Forward travel needs power beyond the reverse-light circuit
A reversing camera connected only to reverse-lamp power will go off when you select a forward gear. That arrangement does not provide an interior horse view throughout the journey.
Choose an installation that supports observation on a suitable powered circuit, with the correct fuse, connectors and switching. The camera’s power supply and a monitor’s reverse trigger are separate functions on many kits. The trigger may simply switch the display to another channel; it does not necessarily supply camera power.
Have a competent vehicle or trailer installer identify the circuit if you are unsure. Wire colors, fuse ratings and trailer-plug functions vary. Use the diagram for the exact kit and vehicle instead of transferring a wiring recipe from another camera.
The seven-pin trailer connection also serves towing functions. Camera wiring must preserve brakes, lights and the breakaway system. An auxiliary pin may be switched, inactive without vehicle configuration or connected to a trailer battery. Its presence alone does not establish an approved camera supply.
Check what happens when you stop
An ignition-powered monitor may turn off at a fuel stop even while a battery camera continues running. Conversely, a monitor can stay lit while a trailer camera loses power. Test both ends.
With the rig parked safely, check the feed with ignition on, engine running and ignition off. Confirm the expected behavior when the trailer is disconnected, without leaving a horse unattended for the test. If parked viewing matters, arrange an approved supply for both camera and display and a way to isolate it afterward. Leaving a system on indefinitely can discharge its power source.
For a battery camera, check whether it sleeps after inactivity, whether continuous live viewing keeps it awake and whether it reconnects without someone touching the camera. A hitch camera intended for brief checks needs particular attention here.
Measure continuous runtime instead of relying on standby figures
Plan around the time the camera will be awake. A claim based on motion-triggered clips or a few daily checks describes a different workload from a live view throughout a journey.
Run the camera fully charged in the intended position with the actual display and viewing mode. Include the night-vision mode if you travel after dark. Record the start time, battery indication if available, temperature, interruptions and end time. Carry out a long stationary runtime test without keeping a horse confined for its duration.
Keep camera runtime and display runtime separate. A phone may need charging sooner than the camera; a vehicle-powered monitor still needs a working socket. Use only approved charging equipment, and establish whether the camera supports operation while charging before making that part of the plan.
Hypothetical trip-planning example: a camera has completed a six-hour continuous test in your setup. Your next trip includes four hours driving, 30 minutes of loading checks, an hour waiting and 15 minutes unloading. That is 5 hours 45 minutes of viewing. Allowing an additional hour for delay brings the requirement to 6 hours 45 minutes. The tested battery runtime does not cover that plan. Shorten the monitoring period, provide approved continuous power or choose a system with more tested capacity.
The delay allowance in that example is a planning choice. There is no universal battery reserve percentage that makes every trip safe.
Why mAh alone cannot tell you the runtime
Milliamp-hours describe battery charge capacity. To compare stored energy, you also need battery voltage:
nominal energy in watt-hours = battery voltage × capacity in amp-hours
For example, EWAY’s EW-B502APP specifications give 2,800 mAh at 3.7 V. That is 2.8 Ah × 3.7 V = 10.36 Wh. Dividing by the specified 1.6 W consumption gives about 6.5 hours in an idealized calculation, before losses and changes in operating conditions. EWAY rates working time at six hours. Use a continuous test to establish what your camera actually delivers.
A USB input marked 5 V is the charging input, not necessarily the battery’s internal voltage. Multiplying capacity by that input voltage can overstate stored energy. If battery voltage or operating consumption is missing, you cannot make a meaningful runtime calculation from mAh alone.
Solar needs exposure and a charging plan
A solar panel mounted inside an enclosed horse trailer may receive too little sunlight to make a useful charging contribution. Even an exterior panel’s contribution depends on exposure, weather and how much energy the camera consumes. Solar assistance is useful only when the panel can collect enough energy in its actual mounting position.
For an interior camera, plan charging independently of solar unless a manufacturer-approved external arrangement supplies it. Inspect any panel cable as carefully as other trailer wiring. Do not assume that a solar label, a large battery number or a daytime charge will cover an overnight live feed.
Dedicated monitor or phone app?
A dedicated monitor keeps the camera display available
A direct camera-to-monitor kit lets a passenger view the horse without taking over the phone used for calls or navigation. It also avoids app permissions and phone-network switching. You still need to check display power, brightness and where it can be mounted.
A camera advertised as 1080p does not guarantee a 1080p screen. The EWAY EW-502KIT2 monitor is 800 × 480; the OverView DMOV-H7Q monitor is 1024 × 600. The camera can supply more detail than either panel can display at once. Split-screen viewing reduces the area available to each horse view further.
Check readability from the intended passenger position in bright daylight, then reduce brightness for night travel. Keep mounts clear of airbags, vehicle controls and the road view. Set camera selection and display preferences before departure.
A dedicated screen can still distract the driver. NHTSA’s explanation of distracted driving includes looking away from the road and operating in-vehicle systems. Let a passenger monitor the horse while moving; stop safely to investigate a problem or adjust equipment. Follow the applicable rules for screens in your vehicle and location.
A local app camera needs a working phone connection
For a local camera, confirm that the phone remains connected to its camera network even if the phone labels it as having no internet. App permissions, automatic network selection and the phone’s operating system can affect access to the feed.
Before travelling, test the exact phone you will use. Open the live view, try the other phone functions you need and return to the camera. Check what happens after the screen locks, a call arrives or the app goes into the background. If picture-in-picture viewing is supported, confirm it works on that phone rather than assuming every handset behaves alike.
A compatible spare phone or tablet can serve as the display, but it still needs mounting, power and the same connection checks. Make sure a frozen image cannot be mistaken for a calm horse. When stationary, have someone move within the view and confirm that the displayed action follows; a connection icon alone is not proof of a current picture.
An app that works beside the trailer but loses the feed in the cab has failed the placement test for that use. A different phone holder cannot necessarily overcome the trailer’s structure. Move approved components, change the installation or use a wired connection if the useful viewing position remains unreliable.
Get a useful view in daylight and darkness
Connection quality is only useful if the image answers your question. A clear picture of the ceiling or a close-up of a divider tells you little about how the horse is travelling.
Frame the horse and account for partitions
Choose a position that shows the horse’s head, body and stance as far as the trailer layout allows. Check what remains hidden behind a breast bar, divider or hay bag. With multiple horses, verify each occupied space; a wide-angle camera may show several heads while hiding the rest of their bodies.
Mounting higher can broaden the view, but moving farther away makes the horse smaller on the screen. Assess the final image at normal display size. For a divided trailer, a second camera may be more useful than a higher resolution camera looking across the same blocked view.
Keep the lens clear of rubbing, feed dust and equipment that moves during travel. Verify image orientation while stationary. A mirrored view can make it harder for a passenger to tell which side of the horse or trailer they are seeing. The OverView monitor manual provides per-channel mirroring and display controls; use the equivalent instructions for your model.
Test infrared with the trailer arranged for travel
Infrared illumination helps a camera produce an image in darkness. It does not measure the horse’s temperature or replace a physical examination. The OverView camera manual identifies infrared LEDs and warns that low-light viewing has limits.
Reflections can spoil the image even when the camera has working night vision. Arlo’s guidance on hazy infrared video explains how nearby reflective surfaces can send infrared light back toward the camera. In a trailer, inspect the view for a bright divider, close wall or window that overwhelms the horse area.
Test with the doors closed and lights in their normal travel state. Check whether you can identify the horse’s position and see movement in darker parts of the stall. If a foreground object is bright while the horse is dark, change the angle or position and retest. Increasing screen brightness cannot recover detail that the camera did not capture.
Inspect and clean the lens as the manufacturer directs. Keep checking the mount after cleaning and after journeys; a slightly rotated camera can lose the useful view without losing the wireless connection.
Secure the camera to a suitable surface
Magnets attach to suitable steel surfaces; they do not attach directly to aluminum, fiberglass or plastic. Test the actual surface rather than assuming that a metal-looking trailer panel is suitable. If the kit needs a mounting plate or adhesive mount, use an approved arrangement and follow preparation and curing instructions.
A camera above a horse needs a secure mount that tolerates the trailer’s movement. Keep protruding brackets, cables and accessible loose loops out of the horse’s reach. An adhesive pad suitable for a static indoor surface should not be assumed suitable for that location.
Housing protection and connector protection are separate checks. A camera’s IP68 or IP69 rating does not give an open charging port, cable joint or cab monitor the same protection. Close covers as directed, protect connections and follow cleaning instructions instead of assuming the assembled installation can be pressure-washed.
Camera systems to compare
These examples cover wired video, a dedicated wireless monitor and local phone viewing. The comparison uses manufacturer specifications and manuals, with suitability assessed for a horse trailer installation. Camera counts, screen resolution and runtime refer to the named models, rather than to every product sold under the brand.
| System | Connection and display | Camera power | Main condition for choosing it |
|---|---|---|---|
| Dakota Micro OverView DMOV-H7QC1 | Wired; one camera and 7-inch quad monitor | Powered harness with supplied 12 V adapter | You can protect the cable route and provide a suitable hitch connection |
| EWAY EW-502KIT2 | 2.4 GHz digital wireless; two cameras and 5-inch monitor | Rechargeable; specified external camera inputs | Confirm continuous operation and usable range in your trailer |
| Equine Eye Voyager | Local camera-to-phone connection; iPhone or Android app | Rechargeable; advertised up to eight hours | The phone holds the live view from its intended position |
| EWAY EW-B502APP | Local phone connection; hitch/reversing camera | Rechargeable; rated six hours | Primarily a portable hitch-view option; test before using for interior observation |
Dakota Micro OverView DMOV-H7QC1: a wired starting point
For a fixed trailer installation, the OverView DMOV-H7QC1 kit provides one 1080p AHD camera, a 7-inch 1024 × 600 quad monitor, a 12 V power adapter and a 40-foot power/video extension cable. The camera has an 82° horizontal field of view, infrared illumination and an IP69 housing. Dakota Micro also describes OverView installations for horse trailers.
The wired path removes the radio connection between the camera and display. The supplied 40 feet, about 12.2 m, is cable length; it is not a promise that the kit covers every truck and trailer route. Measure the protected route through both vehicles and allow for the hitch arrangement before choosing extensions or adapters. The single-camera kit does not automatically provide separate horse and rear views.
Use the DMOV-H7Q monitor instructions for mounting, power and display setup. Match replacement equipment carefully: the DMOV-HC camera instructions warn that the AHD camera will not display on a CVBS-only monitor. CVBS is the older standard-definition analog video format. A connector that fits physically is not sufficient evidence of compatibility.
Best fit: a permanent installation where you can route cable securely and maintain the hitch connection. Installation effort is its main compromise. A removable wireless kit is worth considering if you change trailers often and it passes the same viewing and power checks.
EWAY EW-502KIT2: wireless with a separate monitor
The EW-502KIT2 specifications identify two EW-B502 cameras and an EW-M5001 5-inch monitor. Camera resolution is 1920 × 1080; screen resolution is 800 × 480. The digital wireless link uses 2.4 GHz and has an advertised range of 656 feet, or 200 m. That figure comes without a loaded horse-trailer test condition and cannot establish performance inside your trailer.
Camera inputs are specified as 12–32 V DC or 5 V Type-C; monitor input is 12–24 V DC. The same EW-B502 camera is described with infrared night vision in EWAY’s single-camera monitor kit. Keep the camera supply and monitor supply within their respective limits.
The EW-502KIT2 specification sheet does not give a continuous battery-runtime figure. Before choosing it for an entire journey, get confirmation for the exact kit’s battery operation, sleep behavior and use on external power. Then perform your own timed test. Do not transfer the EW-B502APP’s six-hour figure to these cameras.
Best fit: a removable two-camera installation where a passenger wants a dedicated screen. The separate display is useful, but the kit needs a satisfactory power plan and trailer test before it can be relied on for sustained interior viewing.
Check current price on Amazon →Equine Eye Voyager: portable phone viewing
Equine Eye Voyager sends live video and audio to its iPhone or Android app through a local camera connection. It has night vision and a magnetic mount, with a supplied adhesive-backed mounting accessory for other surfaces. It does not require a SIM or cellular coverage for local viewing.
Equine Eye advertises up to eight hours of battery life under favorable conditions and gives no guaranteed connection distance for every trailer. The practical limits are the phone’s position and the barriers between it and the camera. The manufacturer’s setup instructions connect the phone to the camera’s hotspot; comparisons with Bluetooth describe proximity, rather than establishing a Bluetooth video connection.
Best fit: portable viewing when the phone can hold a live connection from its intended position. Use measured continuous runtime to decide whether it covers your trip. For a long truck-and-trailer combination, resolve range before depending on extra battery capacity or app features.
Check current price on Amazon →EWAY EW-B502APP: distinguish hitching from horse observation
The EW-B502APP is a local phone-view hitch and reversing camera. Its specified image is 640 × 480, with infrared night vision, an IP68 housing and a 2,800 mAh battery. EWAY gives a six-hour working time and 70 m, about 230 feet, of open-area transmission distance. These are model specifications, not measured trailer results.
Best fit: a portable view while aligning the hitch or making a short stationary check. Its app dependence and intended hitching use mean that continuous interior viewing, camera placement and sleep behavior need confirmation first. For regular horse observation, compare Voyager’s video and audio setup or a dedicated-monitor kit that meets your trip’s power requirements.
Check current price on Amazon →Install and maintain a wired trailer connection
A wired system moves the main reliability task to the cable route and its connectors. Plan that route before permanent installation.
Run cable where the horse cannot reach it and where doors, ramps, hinges and dividers cannot pinch it. Use suitable protection at metal edges and strain relief so a connector does not carry the cable’s weight. Keep wiring away from moving or hot vehicle parts. Check the far side of a panel before drilling, and have the trailer manufacturer or installer approve work near structural members.
Across the hitch, use a compatible connection designed for the vehicle and trailer’s movement. Confirm slack through turns without allowing cable to drag, snag or enter a pinch point. Do not leave a rigid video cable stretched between moving vehicles. Unplug the camera connection as part of the unhitching routine, and protect the disconnected ends from water and dirt.
Before adding cable length, verify the manufacturer’s maximum run and the required cable type. Cable length, connector pinout and video format must all match. An adapter bought solely because it has four pins can create a power or picture fault.
After installation, inspect the route and verify the towing systems still work. Before subsequent trips, check the hitch connector and visible cable sections for wear, moisture and looseness. If a picture cuts out as a connector moves, repair that fault before adding another camera or replacing the monitor.
Troubleshoot a black, frozen or intermittent picture
Start while parked. Determine whether you have lost display power, lost the video connection or kept an image that is no longer updating. Stop safely before investigating a problem that appears during travel.
| Symptom | First check | Next step if it persists |
|---|---|---|
| Monitor has no power or backlight | Socket, plug and the correct fuse | Have supply voltage and ground checked at the monitor |
| Monitor is on but shows no image | Selected camera channel and camera power | Check pairing for wireless; inspect cable and connectors for wired |
| Wireless works close by but fails in the cab | Actual receiver position with doors closed | Reposition approved components; choose wired if no useful position works |
| Feed fails only when a door or divider closes | Repeat the open/closed comparison | Find a view with a clearer transmission path without losing sight of the horse |
| One of two camera views fails | Charge or supply, channel selection and that camera’s position | Swap approved camera positions or inputs to see whether the fault follows the camera |
| Video looks normal but movement has stopped updating | Confirm live movement while stationary | Reconnect the feed; do not treat the retained frame as current |
| Picture stops when selecting a forward gear | Reverse-only camera power or display switching | Arrange the kit’s approved observation power and trigger setup |
| Picture stops when ignition turns off | Power state of both display and camera | Provide an approved parked-view supply if you need that function |
| App disconnects after another phone task | Camera-network connection and app access | Repeat the phone test; use a separate display if interruptions remain |
| Image becomes white or hazy at night | Lens cleanliness and nearby reflective surfaces | Change the angle and repeat the closed-trailer night test |
| Wired image cuts out on bumps or at the hitch | Connector security, chafe and strain | Repair damaged wiring or connections; verify before the next trip |
Change one thing at a time and record the result. For wireless, note camera position, receiver position, doors, loaded equipment and charge. For wired, note the channel, cable section, power state and whether a compatible known-working camera or cable changes the result.
If a fuse repeatedly blows, wiring becomes hot or you smell burning, isolate the system and have the fault repaired. Replacing a fuse with a higher rating does not fix the cause. Avoid probing unfamiliar powered wiring or disturbing the trailer’s braking circuits while troubleshooting the camera.
What to budget beyond the camera kit
Include the equipment needed to complete your installation when comparing camera kits.
- Wired: compatible extensions, a suitable hitch connection, cable protection, mounting hardware and any professional installation work. Establish what the supplied cable actually covers.
- Wireless monitor: approved antenna accessories if needed, monitor mounting and power, camera charging equipment or approved external power, and a suitable camera mount.
- Local app: a compatible display device, secure holder and charging supply. There is no cellular data requirement for the local video link, but app and phone compatibility still matter.
- Cellular camera: a compatible SIM, network coverage and the data service used by that model. Cloud storage, if chosen, can be a separate service.
Check replacement cable, connector and mount availability before committing to a permanent system. For removable equipment, confirm whether the mount can be reused between trailers or needs a fresh adhesive accessory. These practical details affect how easily you can keep the camera usable.
Before you travel
Treat camera preparation as part of trailer preparation. Extension Horses’ trailering guidance emphasizes sound floors, padding, ventilation and maintained towing equipment. A camera does not replace those checks.
- Inspect the mount and wiring. Nothing can drop onto, rub against or entangle the horse. Connections are secure and protected.
- Confirm each occupied stall is visible. Adjust angles before loading where possible; verify the final view without delaying the horse unnecessarily.
- Check that the image is current. Movement in the trailer appears on the display; the feed is not a retained frame.
- Close the doors and use the normal display position. Confirm the final wireless installation or wired hitch connection.
- Verify the required power states. Forward travel works; parked viewing behaves as planned. Camera and display each have sufficient power.
- Check night mode if needed. You can identify the horse’s position without glare hiding the view.
- Set the display before departure. The passenger can view it, the mount stays clear of vehicle safety equipment and the driver can concentrate on the road.
- Keep the physical-check plan. Camera availability does not determine when the horse needs water, rest or an inspection.
Know what the camera cannot establish
A horse that looks quiet on a screen may still be uncomfortable, hot or standing in a poorly ventilated space. The USDA study of a four-horse slant-load trailer found that internal thermal conditions depended on ventilation, speed and the presence of horses. Its results concern that trailer design; they do not provide a universal temperature rule for every trailer.
Use the feed to notice a change that needs attention. If a horse appears down, trapped, injured or persistently distressed, stop at a suitable safe place and arrange a physical assessment. Seek veterinary help for suspected injury or illness. Do not unload into an unsafe roadside area to investigate a camera image. If the feed is unclear, make a safe check instead of guessing what the horse is doing.
Frequently asked questions
Does a long trailer always need a wired camera?
Length is one factor. Trailer construction, camera position and receiver position also matter. Wired equipment is a practical first choice for a permanent long-trailer installation because it removes the radio path. A wireless kit remains an option if the actual mounted system passes the connection and power checks.
Can a wireless camera work inside an aluminum horse trailer?
It can, but the result depends on the installation. Test with the doors and partitions in their travel positions and the receiver inside the actual tow vehicle. Aluminum also prevents direct attachment of a magnetic mount, so establish the approved mounting method separately from signal performance.
Can I view two horses and the back of the trailer with one camera?
A camera shows the area covered by its lens from its mounting position. It cannot show through partitions or provide an interior and exterior view at the same time. Choose the required camera positions first, then select a display with enough compatible inputs and useful screen layouts.
Will a four-pin camera work with my existing monitor?
Pin count alone is insufficient. Check the connector and pinout, camera supply voltage, video format and monitor support. The OverView AHD camera, for example, needs an AHD-capable display; a CVBS-only monitor will not show its image. Use a confirmed compatible replacement or adapter.
Can I monitor a horse parked far away at a show?
A local app or direct wireless monitor has a limited camera-to-receiver connection. Test the position where you intend to view it. A cellular camera supports a different remote-viewing arrangement but needs suitable network coverage and service. Camera access also leaves ventilation, supervision and physical welfare checks necessary.
Is the camera useful if I usually tow alone?
It can help with stationary checks and, where supported, recordings you review after stopping. Complete setup before moving and pull over safely to inspect anything concerning. Choose how you will use the feed without adding a task that competes with driving.
Sources and manuals
- Dakota Micro OverView DMOV-H7QC1 specifications, DMOV-H7Q monitor manual and DMOV-HC camera manual.
- EWAY EW-502KIT2 specifications, EW-B502 infrared features and EW-B502APP specifications.
- Equine Eye Voyager features and setup FAQ and Vision cellular connection requirements.
- Garmin BC 50 installation instructions and Arlo infrared-reflection troubleshooting.
- NHTSA distracted-driving guidance, Extension Horses trailering guidance and USDA trailer thermal-environment study.