

 Published sources
 Product details checked
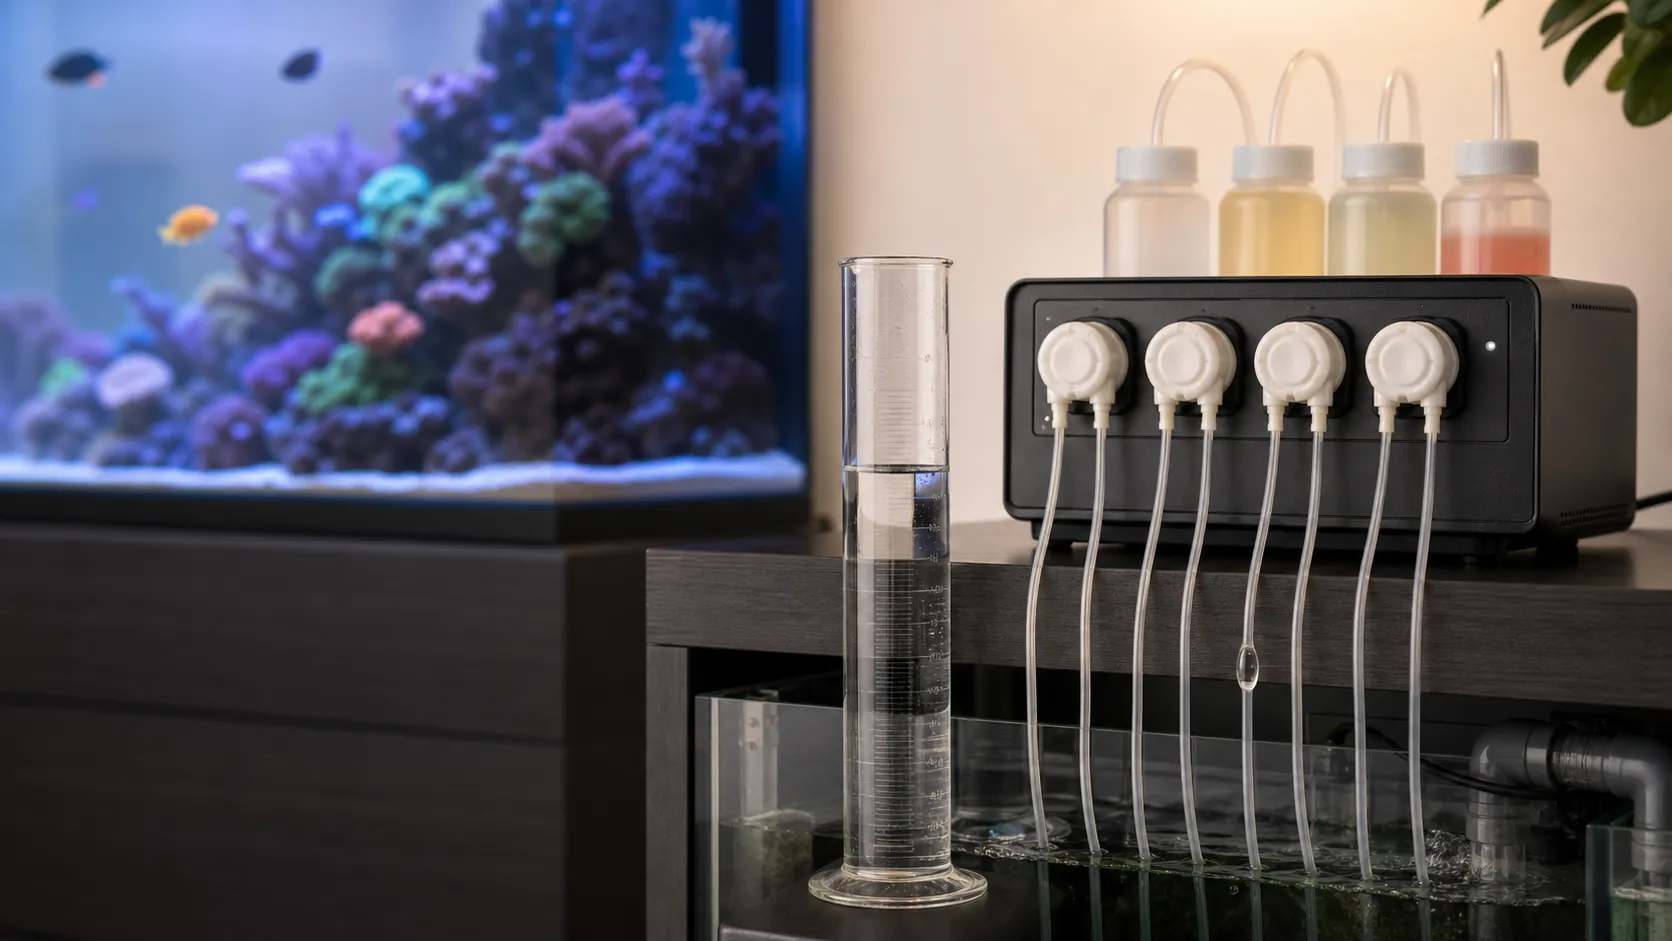
To calibrate an aquarium dosing pump, prime the complete line, run the calibration procedure for your exact model, enter or save the measurement it requests, then check several normal doses at the installed outlet. Keep the reservoir, tubing, outlet height and liquid temperature as close to everyday conditions as the procedure allows. A motor that runs on schedule can still deliver the wrong amount.
The input matters. Red Sea ReefDose asks for the collected volume. The original Neptune DŌS procedure also uses measured milliliters after a timed run. A Jebao/Jecod DP-4 instead records a calibration run that you stop at 100 mL. Putting a percentage into a field intended for milliliters can make a dosing error worse.
If output changes substantially between identical runs, find the air leak, restriction, worn tube or siphon before calibrating. Calibration can correct a consistent relationship between pump movement and liquid volume; it cannot make an unstable liquid path reliable.
If an overdose may already have reached the reef: Stop the affected channel, test the water parameters relevant to that supplement, and follow the additive manufacturer’s response instructions. Keep calibration and priming liquid out of the aquarium. Do not add a guessed catch-up dose or another chemical to counteract an uncertain amount.
Go straight to the instructions for your pump or the blank measurement worksheet.
Check what is wrong before changing the calibration
Start with the programmed volume per event, the number of events, and the daily total. Some controllers divide one daily volume across several doses; others ask you to program each event separately. Check manual doses, duplicate schedules and missed-dose handling as well.
For example, a daily total of 24 mL divided into 12 equal events means 2 mL per event. This is an arithmetic example, not a recommended reef dose. Testing one event against 24 mL would falsely suggest a severe underdose. Your aquarium’s supplement requirement is a separate question from the pump’s calibration.
Next, catch a known event in a clean measuring cylinder. Keep the outlet at its normal height, use a container large enough for the whole dose, and observe what happens after the motor stops. This checks the liquid that arrives, rather than the amount the controller calculates in its log.
| What you observe | Likely area to investigate | Next check |
|---|---|---|
| Similar low or high output on repeated runs | Calibration, measuring technique or the wrong liquid conditions | Verify the reading and the model’s required input |
| Large differences between identical runs | Air, a leak, a restriction or a pump-head fault | Inspect and prime before recalibrating |
| A good first run followed by poor output after a pause | Loss of prime or slow backflow | Watch the line during the normal interval between doses |
| Liquid keeps moving after the motor stops | Siphoning, drain-down or incomplete tube sealing | Compare reservoir and outlet levels; inspect the head |
| Each event measures correctly, but the daily total is wrong | Schedule, event count or extra manual dosing | Add up all programmed and completed events |
| Milliliters are correct, but aquarium chemistry still changes unexpectedly | Supplement strength, changing demand or a water-testing issue | Review the supplement preparation and tank measurements |
An apparent decrease in reservoir level is only a rough cross-check. Container markings, evaporation, priming and test doses can all affect that reading. An outlet measurement is more useful for identifying the size and direction of a dosing error.
Prepare the installed line and measuring equipment
You need the pump’s manual, a suitable graduated cylinder, a waste container and a way to record results. A ruler or tape measure helps preserve the reservoir, pump and outlet heights. Use a scale only when you can convert the supplement’s mass to volume correctly.
Pause automatic dosing while you work and confirm that the affected channel cannot run unexpectedly. Keep electrical connections dry and follow the manual before opening a head. Label the reservoir and channel so the liquid you measure belongs to the calibration you save.
Keep the test outlet at the real dosing height
Mount the pump in its normal position and retain the final inlet and outlet tubes, connectors and any approved valve. Support the measuring cylinder underneath the normal dosing tip. Avoid lowering the tip to a bucket on the floor or shortening the tube just to make collection easier.
Record the liquid level in the reservoir as well as the pump and outlet heights. The height difference from the reservoir’s liquid surface to the pump affects suction; the difference from the pump to the outlet affects the discharge side. A test with a full reservoir may not reveal a fault that appears as the pickup approaches the bottom.
If you must move the outlet for access, hold it at the same elevation and preserve the route without kinking the tube. Retest after restoring the holder. Neptune’s DŌS setup guide, pages 4–5 places mounting and final tubing preparation before calibration and calls for recalibration when tubing orientation or fluid changes.
Choose a cylinder that can resolve the sample
A large cylinder with coarse markings is a poor tool for a small reef dose. Select a capacity that holds the entire calibration run and graduations fine enough to distinguish the difference you are checking. A supplied cylinder may suit one calibration mode but overflow during a faster or longer run.
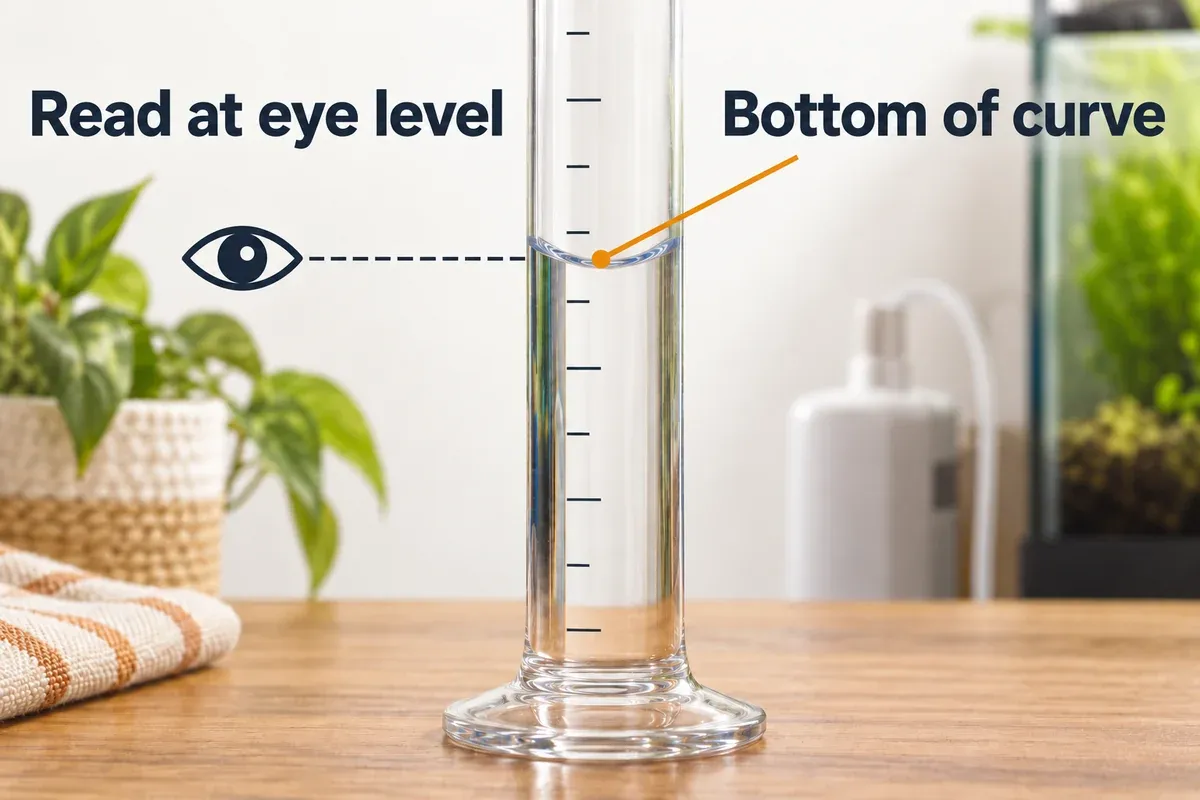
Read the liquid surface at eye level after it settles. For the clear liquids with a concave meniscus described in the ReefDose and DŌS manuals, read the bottom of the curve. Keep the dosing tip centered so drops do not cling to the cylinder wall. Residual liquid counts toward the next reading, so start each separate measurement with a clean, dry cylinder.
Measurement resolution limits what you can conclude. Illustrative example: a 0.1 mL difference is 20% of a 0.5 mL dose, but 1% of a 10 mL dose. A coarse cylinder cannot establish tiny-dose accuracy just because its reading looks close.
A fine scale helps only when you read it consistently. The close-up below shows the meniscus check; empty and dry the cylinder before each separate sample.
Weighing liquid requires its density
For a mass-based check, tare the empty collection container and use the density of the actual solution at the relevant temperature:
volume (mL) = net liquid mass (g) ÷ liquid density (g/mL)Hypothetical example: If a supplement’s verified density were 1.20 g/mL, a collected mass of 6.00 g would equal 5.00 mL. Treating that mass as 6.00 mL would introduce a 20% error. These numbers do not describe a particular supplement.
Do not assume that concentrated reef additives have the same density as water. If no reliable density is available, use a suitable cylinder. Displaying many decimal places on a scale also does not prove that the scale measures a small sample accurately.
Fix air, tubing and siphoning before calibration
Use the checks below in order. They address faults that can survive an apparently successful calibration screen.
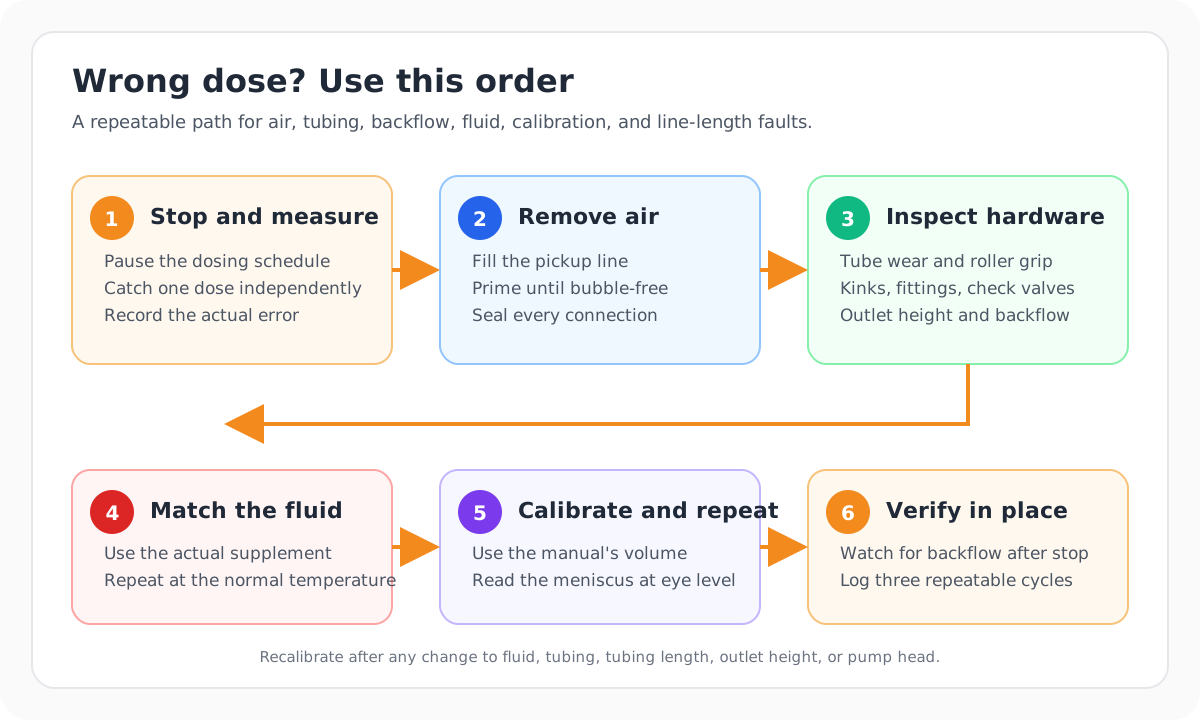
1. Remove air and find why it returns
Priming fills the pump head and the entire line with liquid. Seeing liquid leave the head is insufficient if the outlet tube still contains air. Both the ReefDose manual, head setup section and the DŌS calibration instructions require priming before measurement.
Check that the pickup stays submerged, the reservoir can admit replacement air as intended, and the suction connections are secure. Look for cracked tubing, a loose cap connection and a high loop where an air pocket remains. A suction-side leak can pull in air without leaving an obvious puddle.
Prime into waste until the full route is liquid-filled. If a bubble reappears after the pump rests, investigate that connection or loss of prime before repeating the calibration. Increasing the dose to compensate for a recurring bubble can produce an overdose when the line finally fills properly.
2. Inspect the tube inside the head
The short tube squeezed by the rollers is a consumable. Look for persistent flattening, cracks, swelling, stiffness, seepage or poor seating. Inspect the roller assembly and head attachment according to the manual; a damaged tube should be replaced before measuring again.
Use the specified internal tube assembly. The longer reservoir and outlet lines are separate parts, and their dimensions do not establish which tube belongs inside the head. The Masterflex tubing guide from VWR/Avantor explains how tubing dimensions, recovery after compression and chemical compatibility affect pump performance.
For external ReefDose lines, Red Sea specifies approximately 3 mm inside diameter and 5 mm outside diameter and recommends tubing with low air permeability; ordinary silicone airline can reduce accuracy. Its maintenance instructions, page 28 recommend replacing the internal tube about yearly with the original assembly. That interval belongs to ReefDose, not every dosing pump.
Prime and recalibrate after replacement. Follow the pump’s own instructions for running in a fresh tube; tube-conditioning procedures vary by equipment. Keep that liquid out of the aquarium.
3. Check both directions of unwanted flow
Two different height relationships matter:
- Aquarium water entering the line: Keep the dosing tip above the highest water level it can encounter, including sump rise when the return pump stops. Secure an air gap so the outlet cannot slip underwater.
- Supplement draining toward the aquarium: A full reservoir above a lower outlet can drive flow if the pump head fails to seal the tube. Where the installation permits, keep the reservoir liquid surface below the dosing outlet. A tip above the sump water alone does not remove this risk.
Do not rely on a high loop in a liquid-filled tube to break a siphon. A functioning peristaltic head normally closes the tube as part of its pumping action, but tube wear, an unsuitable replacement or an incorrectly assembled head can compromise that closure.
Collect a dose at the installed outlet and watch the line after stopping. A final hanging drop is different from continuing drips, a rising cylinder level or a liquid column retreating toward the reservoir. Record the behavior rather than ignoring everything that happens after the motor stops.
A check valve adds resistance and an opening-pressure requirement. Use one only if the pump and supplement permit it; it should not be the sole protection against a gravity-fed reservoir. If fitted, include it in the calibration and repeat the idle test. Replace a blocked or incompatible valve instead of calibrating around it.
4. Clear restrictions and preserve the route
Inspect the pickup, outlet tip, connectors and bends for crystals or narrowing. Follow the supplement and equipment instructions for cleaning; do not mix cleaners into the reservoir or flush an unknown residue into the aquarium. Restore the same tip and holder before the final check.
Longer tubing adds liquid volume and resistance, but it does not produce a universal proportional loss. Changing the height, diameter, fittings or route can affect priming and pressure even when the pump head itself is unchanged. Keep each channel’s installed line within its model’s limits and calibrate it separately.
If two-part deposits repeatedly reach nearby equipment, inspect the placement and actual dose as well as cleaning the deposits. Our protein skimmer overflow guide covers blocked air paths and venturi maintenance when deposits affect skimmer operation.
Water or supplement: use the correct calibration fluid
Follow the liquid specified by the device’s procedure. ReefDose calibrates the head for its supplement; the original DŌS guide demonstrates tap water, the DP-4 manual calls for RO/DI or distilled water, and the X1 PRO-T2 manual illustrates water. Water-based setup and supplement-based verification are distinct steps.
If you change from water to an additive, fill the complete line with the additive before checking normal doses. Collect the transition liquid outside the aquarium so the first sample is not a mixture. Use the supplement at its normal preparation strength and temperature, following any mixing instructions on the label.
Fluid viscosity, temperature, pump speed and tube aging can change the relationship between motor movement and volume. Ossila’s peristaltic-pump calibration guide explains those effects and recommends a reference liquid with viscosity similar to the working liquid where the procedure allows it.
A correct volume also cannot reveal the wrong supplement concentration. If a solution was mixed too strongly, diluted, allowed to evaporate or prepared with the wrong product, recalibrating milliliters will not correct its chemical strength. Resolve that preparation problem separately.
When water calibration passes but the supplement dose remains consistently wrong, use a calibration method approved for that pump and liquid. If the manual offers no supported adjustment, ask the manufacturer for the appropriate procedure. Keep the channel paused while the delivered volume is uncertain.
What to enter for ReefDose, DŌS, Kamoer and DP-4
These procedures refer to the models and manuals linked below. App labels can change. Identify whether the field requests collected milliliters, a run time, a flow rate or a stored calibration count before entering a value. None of these examples instructs you to paste a generic correction factor into an unspecified menu.
| Model and procedure | Calibration run | What you enter or save |
|---|---|---|
| Red Sea ReefDose 2/4 | Fixed head rotations produce roughly 4–5 mL; a 4 mL confirmation follows | Enter the actual collected mL, then check the confirmation |
| Original Neptune DŌS setup guide | Approximately 90 seconds; roughly 40 mL expected | Enter the actual collected mL, even if it differs from 40 |
| Kamoer X1 PRO-T2, local controls | Select calibration speed; fixed 60-second run | Enter the actual collected mL with the rotary control |
| Kamoer X1 PRO-T2, app procedure | Select speed and run time, prime, then run calibration | Enter the collected mL after the timed run |
| Jebao/Jecod DP-4 | Start calibration and stop when the cylinder reaches 100 mL | Save the controller’s recorded calibration count |
Red Sea ReefDose: enter the sample, then verify 4 mL
Prime with the supplement. Collect the initial 4–5 mL sample and enter its actual volume in ReefBeat. Empty and dry the cylinder before collecting the 4 mL confirmation. The ReefDose manual, page 19 specifies a confirmation range of 3.95–4.05 mL; repeat calibration if it falls outside that range.
Hypothetical example: An initial 4.40 mL sample means you enter 4.40 mL. It is not automatically a 10% overdose: this first run is expected to fall between 4 and 5 mL. If the separate 4 mL confirmation then measures 4.40 mL, it fails the stated check and needs repeating. Do not enter 1.10 into the volume field.
Neptune DŌS: enter what the timed run actually collected
The original DŌS setup guide, page 5 uses tap water, bubble-free priming and a run of approximately 90 seconds. Select the DŌS module and the correct head in the Display module or classic Apex configuration. Enter the actual cylinder reading; roughly 40 mL is an expectation, not a value to copy regardless of the result.
Hypothetical example: If that run collects 34.0 mL, enter 34.0 mL. Recording 40 mL would tell the controller that the same pump movement delivers more liquid than it actually does, so later calculated doses could be too small. Recording the lower measured volume corrects that relationship in the direction of more pump movement for a requested dose. Verify the result at the outlet.
This sequence describes the original manual. For DŌS QuietDrive or a different Fusion workflow, follow that unit’s calibration task and prompts rather than assuming the classic menu path and run length apply.
Kamoer X1 PRO-T2: separate local and app calibration
With the local rotary control, select the calibration speed, run the fixed 60-second calibration and enter the collected milliliters. In the app procedure, you select speed and calibration duration, prime the tube, collect the timed output and enter its volume. Both methods store a measured volume associated with a run, rather than a target-to-actual percentage. See Kamoer’s X1 PRO-T2 manufacturer manual, sections 3.4 and 4.5.
Choose a cylinder large enough for the selected speed and duration. Do not assume the small supplied measuring tube can hold every possible 60-second run. For continuous calcium-reactor use, verify output at the intended operating flow; for discrete supplement doses, also check the size of the events you plan to use.
Jebao/Jecod DP-4: stop at 100 mL and save the count
Prime with RO/DI or distilled water, then select the channel’s calibration mode. Collect the output in a graduated cylinder, start the calibration and stop it when 100 mL has actually been dispensed. Save the recorded value and repeat for each head. The manufacturer’s DP-4 manual, page 2 shows the calibration screen as 100ml = 200 before the run.
The number on that screen is a calibration count. The manual does not identify it as seconds or a percentage, so do not label it as either. You establish it by running to a known volume. If you overshoot the mark or miss the stop, repeat the procedure rather than saving a guessed correction. Check normal supplement doses after completing the water procedure.
Calculate the error and understand the correction direction
Use measurements from identical verification doses. The following formulas help interpret output; they do not replace the device-specific procedures above.
mean measured volume = sum of measured volumes ÷ number of runs
volume error (%) = (mean measured volume - requested volume) ÷ requested volume × 100
A negative error means underdelivery; a positive error means overdelivery. Calculate the mean only after checking the individual readings. Averaging a near-zero dose with a double dose can hide a serious fault.
Worked example: a repeatable underdose
All readings in this example are assumed for calculation. They are not pump tests or laboratory results. Suppose a requested 10.0 mL verification dose produces 8.4, 8.5 and 8.6 mL:
mean = (8.4 + 8.5 + 8.6) ÷ 3 = 8.5 mL
error = (8.5 - 10.0) ÷ 10.0 × 100 = -15%
The pump delivers 85% of the requested volume under those conditions. Four such 10 mL events would deliver 34 mL instead of 40 mL, a 6 mL daily shortfall. This arithmetic assumes the same relationship persists; your own repeated measurements must establish whether that is true.
For a simple fixed-speed timer that explicitly allows run-time adjustment:
new run time = old run time × requested volume ÷ mean measured volume
             = old run time × 10.0 ÷ 8.5
             ≈ old run time × 1.1765
That is about 17.65% more time, not 15%. A different controller might instead store estimated flow in mL/min. For that type of setting, an overestimated flow would need to decrease:
new stored flow = old stored flow × mean measured volume ÷ requested volume
                = old stored flow × 0.85
These directions are reciprocal because run time and estimated flow describe different things. Only use an editable flow or time formula when your controller’s documentation defines that setting. ReefDose and the original DŌS workflow ask for the measurement itself.
Worked example: a repeatable overdose
Hypothetical calculation: A requested 10.0 mL dose that repeatedly measures 11.0 mL has a +10% error. Under a simple fixed-speed model, the run-time multiplier would be 10 ÷ 11 ≈ 0.9091, or about 9.09% less time. An estimated-flow setting would move upward by a factor of 1.10.
Liquid that continues moving after shutdown invalidates this simple correction. Repair the siphon or sealing problem first. Do not use either multiplier to justify a large corrective dose into the aquarium.
Blank worksheet for your own calibration checks
Copy or print these tables and complete one set per channel. Use the same setup for the repeated readings. If you change the tubing, liquid or outlet height, start a new set so the results remain comparable.
Record the conditions
| Setup detail | Your value |
|---|---|
| Date, pump model, channel and controller version | ____________________ |
| Supplement and preparation strength | ____________________ |
| Liquid used in the built-in calibration | ____________________ |
| Supplement temperature during verification | __________ °C / °F |
| Internal tube part and installation date | ____________________ |
| External tube material, inside diameter and outside diameter | ____________________ |
| Inlet length / outlet length | __________ / __________ cm or in |
| Reservoir liquid surface / pump / outlet height, measured from one reference | __________ / __________ / __________ cm or in |
| Reservoir level and pickup position | ____________________ |
| Outlet air gap at the highest sump water level | ____________________ |
| Connectors or approved check valve in the tested route | ____________________ |
| Cylinder capacity and graduation spacing, or scale and verified density | ____________________ |
| Normal dose per event / events per day / daily total | __________ mL / __________ / __________ mL |
| Calibration input saved, with its unit or screen label | ____________________ |
Measure repeated normal doses
After saving the built-in calibration, test at least three identical doses of the size you normally dispense. Empty and dry the cylinder between separate samples. Keep the tip at its final height, with the actual supplement filling the full line.
| Run | Requested dose (mL) | Collected volume (mL) | Movement after stop | Bubbles, delay or other observations |
|---|---|---|---|---|
| 1 | __________ | __________ | __________ | ____________________ |
| 2 | __________ | __________ | __________ | ____________________ |
| 3 | __________ | __________ | __________ | ____________________ |
| 4, if needed | __________ | __________ | __________ | ____________________ |
| First dose after a normal idle interval | __________ | __________ | __________ | ____________________ |
Record the collection endpoint consistently. If liquid continues moving after shutdown, note both the immediate reading and later behavior and resolve that fault before calculating a calibration correction.
| Result or next action | Your value |
|---|---|
| Mean of identical repeat doses | __________ mL |
| Smallest / largest collected volume | __________ / __________ mL |
| Mean error against requested dose | __________ % |
| Idle interval before the restart check | __________ minutes / hours |
| Repair or calibration change made | ____________________ |
| Verification repeated after that change | ____________________ |
| Schedule checked and next output check planned | ____________________ |
When a dose is too small to read separately
Keep the manufacturer’s built-in calibration unchanged. For a separate verification, you can collect several identical small events together and divide the total by the event count, provided the pump allows that event size.
Illustrative example: Ten 0.5 mL events have an expected combined volume of 5.0 mL. Measure the combined output, divide by ten and record it as the mean per event. A single continuous 5 mL run is a different test because it removes the repeated starts and pauses.
Consecutive manual events show how the pump behaves during repeated starts. They do not prove that the line stays primed during an hourly schedule. Include the first dose after a normal idle interval, and remember that a combined total can conceal differences between individual events.
Decide whether the results are good enough to restart
Use the model’s stated verification limits where available. ReefDose’s 4 mL confirmation range applies to that confirmation procedure; it is not a universal tolerance for every pump or event size. Your measurement method must be fine enough to assess the limit.
For other checks, compare the measured error with the device specification, the instrument’s resolution and the size of the chemical addition involved. A deviation that disappears when you reread a coarse cylinder is not evidence for a precise calibration adjustment.
| Result | Appropriate next step |
|---|---|
| Repeat doses meet the model’s applicable check, the line stays primed and flow stops properly | Confirm the schedule and restore the secured outlet |
| Repeated doses are similar but consistently high or low | Repeat the supported calibration with verified measuring technique |
| Readings vary substantially or the first dose after resting is low | Repair air ingress, loss of prime, restriction or head problems |
| Flow continues after stopping | Correct the reservoir/outlet relationship and tube sealing |
| Output remains wrong after a known-good tube and correct setup | Keep the channel paused and contact the manufacturer for head or motor service |
Before resuming, check how the controller handles missed doses. A paused schedule may offer to compensate for earlier events; do not accept a catch-up amount without knowing what already reached the aquarium. Keep tank testing separate from the outlet check, since correct pump output does not establish the reef’s current supplement requirement.
Keep a maintenance record that reveals drift
Save the worksheet as the baseline for that channel. Repeat an outlet check after changing the supplement, internal tube, head, external line, valve, outlet height or operating mode. Also investigate an unexplained change in tank parameters or a reservoir that empties faster or slower than expected.
During routine care, look for exposed pickups, bubbles, crystals, loose holders and changes to the sump’s highest water level. Inspect again after refilling or moving the reservoir. A refill changes the liquid level even when the tubing has stayed in place.
The useful trend is whether a comparable dose changes over time. Log the measured amount and conditions instead of recording only “calibrated.” Follow the model’s service schedule and shorten the interval between checks when you see wear or inconsistent output. There is no single monthly recalibration rule that fits every supplement and pump.
If the pump needs replacement
Replace a worn internal tube or correct the route when that solves the fault. Consider a new head or pump after the channel still fails with suitable tubing, a full prime, clear fittings and a supported calibration. Choose by the number of independent liquids, controller requirements and the kind of dosing you need.
Match the replacement to your dosing setup
-
Red Sea ReefDose 4 Wireless Four-Head Dosing Pump
Red Sea
A four-head reef dosing system with ReefBeat app control, direct-drive heads, and an individual calibration workflow for each supplement line.
- Four independently managed dosing heads with ReefBeat app integration
- Red Sea states ±0.05 mL single-drop accuracy for the dosing heads
- Calibration is performed per head and repeated after internal tube replacement
- Channels
- 4 dosing heads
- Control
- ReefBeat app / Wi-Fi
- Calibration input
- Enter the collected 4–5 mL sample, then verify a 4 mL confirmation
-
Kamoer X1 PRO-T2 Wi-Fi Stepper Dosing Pump
Kamoer
A single-channel stepper-motor peristaltic pump with Wi-Fi/app control, local controls, flow calibration, and a pump-tube life reminder.
- Single channel with a high-output KPAS100 stepper pump head
- Wi-Fi/app control plus an OLED display and rotary encoder
- Local 60-second calibration with measured-volume entry
- Channels
- 1 dosing channel
- Control
- 2.4 GHz Wi-Fi/app, OLED, and rotary encoder
- Calibration input
- Enter collected mL after a timed run; local calibration uses 60 seconds
-
Jebao Programmable Auto Dosing Pump DP-4
Jebao
A four-channel programmable dosing pump with onboard LCD scheduling and a manual calibration procedure that uses a graduated cylinder.
- Four channels with programmable daily dosing volume
- The product documentation lists 1–9,999 mL per channel per day
- The DP-4 manual describes calibration with a 100 mL graduated cylinder
- Channels
- 4 dosing channels
- Control
- Onboard LCD and timer controls
- Calibration input
- Stop calibration at 100 mL and save the displayed calibration count
Match replacement tubes and heads to the exact pump model. Each channel needs calibration and an outlet check after installation.
Red Sea ReefDose 4 suits four separate supplement lines managed in ReefBeat. Its individual head setup is useful when each liquid needs its own calibration. Use the required external tubing and the matching internal replacement assembly. Check current price on Amazon →
Kamoer X1 PRO-T2 is a single-channel stepper pump with local and app controls. Its manufacturer manual covers continuous calcium-reactor flow and calibration. It can serve one line; several independent supplements require separate channels. Verify the intended operating mode and sample capacity before calibration.
Jebao/Jecod DP-4 provides four channels with onboard scheduling. The manual calibration requires you to stop accurately at 100 mL and verify the result yourself. It suits an owner comfortable with that setup and ongoing measurement. A lower purchase cost does not reduce the need to check each line.
Frequently Asked Questions
Why is my dosing pump still wrong immediately after calibration?
Check what the saved field represents, whether the line was fully primed, and whether you tested a normal event or confused it with the daily total. A moved outlet, residual water in the supplement line or a cylinder with unsuitable graduations can also explain the difference. Repeat the measurement under the final conditions before changing another setting.
Should I enter the intended volume or the measured volume?
ReefDose, the original DŌS workflow and the X1 PRO-T2 procedures described here use the measured volume from their calibration run. The DP-4 establishes its recorded count by running until 100 mL is collected. The target volume used for scheduling is a separate value.
Can a pump be accurate at 100 mL but poor at 1 mL?
Yes. A larger sample reduces the relative effect of reading error, but it does not establish behavior at a smaller event size. Drops retained at the tip, starts, pauses and loss of prime can matter more in a small dose. Complete the built-in calibration and then verify the dose sizes allowed by the pump that you actually use.
Is a 15% underdose fixed by adding 15% to the setting?
Not with a simple time multiplier. If output is 85% of the target, the reciprocal multiplier is 1 ÷ 0.85 ≈ 1.1765. That calculation is explanatory; use the measured-volume entry or other adjustment your specific controller requires. Fix variable output or siphoning first.
Can I use one calibration for all heads?
Calibrate and verify each head separately. Tube condition, fittings, height and liquid can differ between channels. Matching model numbers or identical-looking tubing do not establish identical delivered volumes.
Is RO/DI water always the right calibration liquid?
Use the liquid specified by the model’s procedure. The DP-4 manual calls for RO/DI or distilled water; ReefDose calibrates for the supplement. After a water procedure, prime the actual additive through the full line and verify it separately. Do not assume water and a concentrated solution produce the same result.
Will moving the outlet above the sump stop a siphon?
An air gap prevents aquarium water from entering a submerged tip. It does not prevent a higher reservoir from draining toward a lower outlet if the head loses its seal. Check both liquid-level relationships and observe the line after the motor stops.
Does the pump log prove that the correct dose reached the reef?
The log records the controller’s calculated delivery. An independent outlet measurement checks the actual collected liquid. Keep both records and use water tests to decide whether the aquarium needs a change in the supplement schedule.
Sources and further reading
- Red Sea ReefDose user manual: head setup, calibration and maintenance, especially pages 11, 18–19 and 28.
- Red Sea ReefDose product information: head configuration and ReefBeat operation.
- Neptune Systems original DŌS setup guide: final installation and measured-volume calibration, pages 4–5.
- Kamoer X1 PRO-T2 manufacturer manual, archived PDF: local and app calibration, sections 3.4 and 4.5.
- Jecod DP-4 manufacturer manual, hosted by D-D The Aquarium Solution: priming, 100 mL calibration and scheduling.
- Ossila: Calibration of peristaltic pumps: tube recovery, viscosity, temperature and reference-fluid selection.
- VWR/Avantor: Peristaltic pump tubing and chemical compatibility: tubing dimensions, material compatibility and service considerations.