

 Published sources
 Product details checked
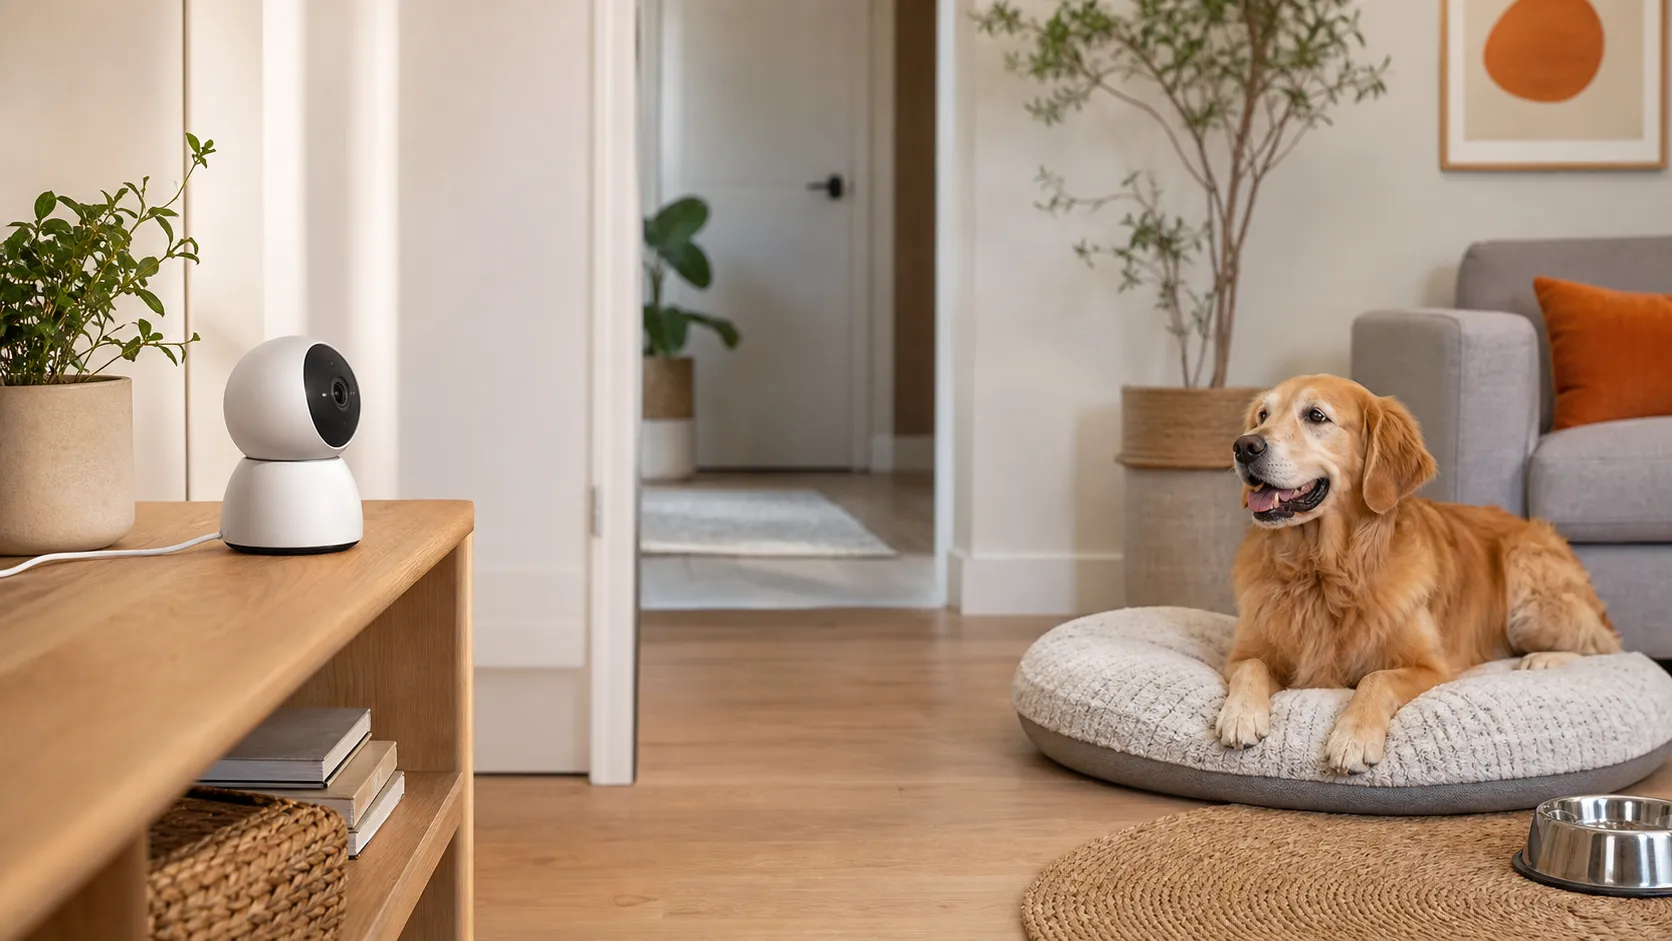
The best dog camera placement is not the place with the prettiest view of the sofa. It is the place that shows what your dog actually does when you leave: where he rests, which door or window he watches, whether he can reach his water, and what happens just before barking or pacing starts.
Quick answer: Start with a stable position about 2–4 feet (60–120 cm) above the floor for a rotating pet camera, then angle it slightly down so the dog and the surrounding floor are visible. Furbo’s official 360° guide uses that height range for maximum coverage. Keep the camera out of reach of teeth and paws, test the final spot on the camera’s actual 2.4 GHz network, and speak through the microphone only after you have checked for echo and whether your dog stays calm.
This guide is for a camera you already own or are about to place in a US home. It combines manufacturer placement and specification guidance from Furbo, TP-Link’s Tapo C225 page, and TP-Link’s Wi-Fi guidance.
You will learn how to:
- map the room before choosing a shelf, wall, or ceiling position;
- remove the blind spots that matter for safety and behavior;
- test 2.4 GHz Wi-Fi at the camera rather than beside the router;
- make two-way audio useful without creating more excitement; and
- decide when a different camera or Wi-Fi accessory solves the actual problem.
Products That Solve a Placement Problem
These are not interchangeable “best dog cameras.” Each one addresses a different placement decision: broad room coverage, active check-ins, low-cost monitoring, visible privacy control, or a weak signal at the final camera position.
Cameras and Wi-Fi help
-
TP-Link Tapo C225 Pan/Tilt Pet Camera
TP-Link
A 2K pan/tilt camera with a physical privacy mode, pet detection, color night vision, and flexible local or cloud storage.
- 2K QHD video with 360° horizontal coverage
- Physical privacy mode that covers the lens
- Pet detection, motion tracking, and microSD storage up to 512GB
- Best for
- Privacy-conscious homes and local microSD storage
- Key feature
- 2K pan/tilt + physical privacy mode
-
Petcube Cam 360
Petcube
A 1080p indoor pet camera with 360-degree pan/tilt movement, two-way audio, night vision, and a camera-off privacy mode.
- 360-degree pan/tilt movement with a 105-degree lens
- 1080p live video, two-way audio, and night vision
- Camera-off privacy mode and 2.4 GHz Wi-Fi
- Best for
- Whole-room pet monitoring with pan/tilt coverage and a visible privacy mode
- Key feature
- 360-degree pan/tilt and privacy mode
-
Furbo 360° Dog Camera
Furbo
A dog-focused rotating 1080p camera with treat tossing, two-way audio, color night vision, and barking alerts without a required subscription for core camera features.
- Rotating 360° view with automatic tracking
- 1080p video, color night vision, and two-way audio
- Treat toss and barking alerts for more active check-ins
- Best for
- Spotting barking triggers and checking on dogs when you are away
- Key feature
- 360° view + treat toss + two-way audio
-
Kasa EC70 Indoor Pan/Tilt Pet Camera
Kasa Smart
A simple 1080p pan/tilt camera that covers the essentials for live check-ins without requiring a treat dispenser or premium hardware.
- 1080p video with pan/tilt control
- Motion detection, tracking, night vision, and two-way audio
- Local microSD recording or optional cloud storage
- Best for
- Low-cost live viewing and basic motion alerts
- Key feature
- 1080p pan/tilt + local microSD
-
TP-Link AC1200 Wi-Fi Extender RE315
TP-Link
An AC1200 dual-band range extender with a signal indicator, EasyMesh support, and an Ethernet port. It can make a weak camera connection more reliable, but it does not increase the speed of your internet plan.
- 2.4 GHz and 5 GHz dual-band Wi-Fi
- Smart signal indicator helps find a workable location
- EasyMesh compatibility and access point mode
- Best for
- Improving camera coverage in a verified Wi-Fi dead zone
- Key feature
- AC1200 dual-band coverage extension
Review the linked product page before purchasing.
1. Map the Room Before You Move the Camera
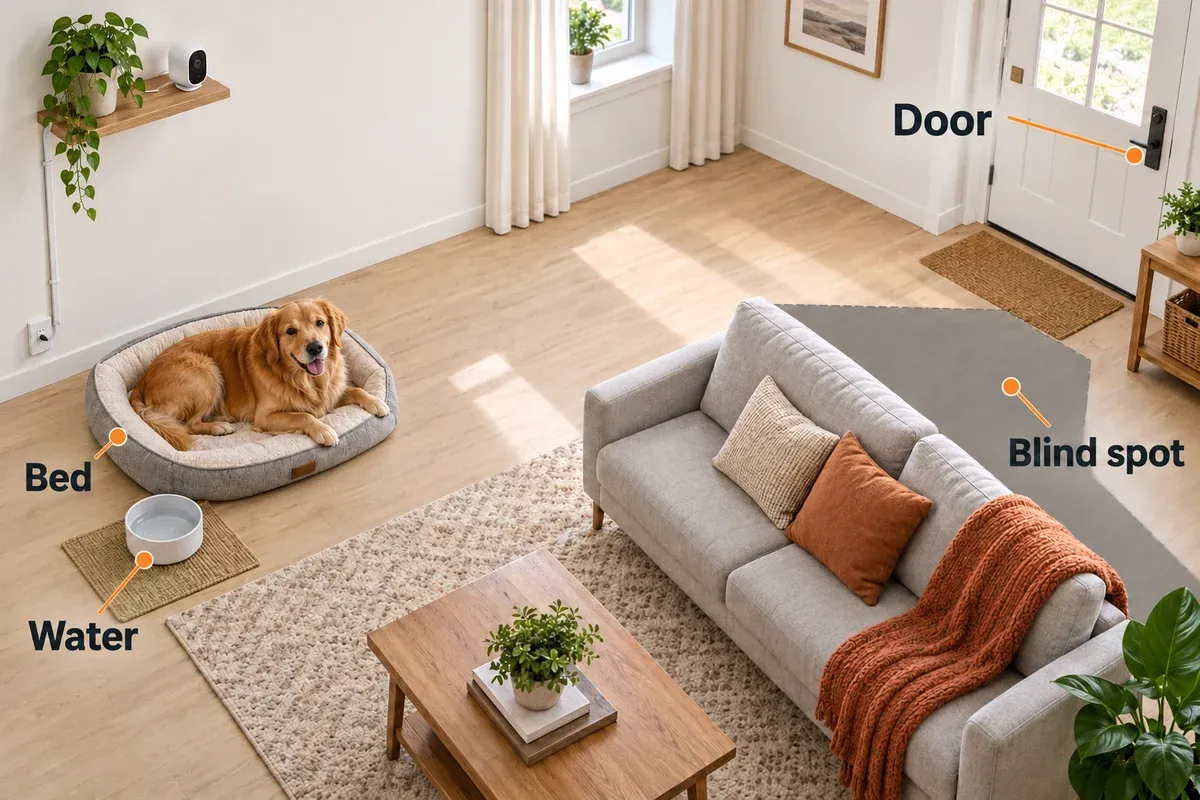
Take a quick walk through the room from your dog’s point of view. Mark the places that answer a real question rather than trying to record every square inch.
| Mark this first | Why it matters | What the camera should show |
|---|---|---|
| Bed, crate, or usual resting spot | Tells you whether your dog settles or keeps moving | The whole resting area plus enough floor to see posture and pacing |
| Main exit door or window | Shows whether barking starts with a sound, sight, or departure cue | The approach path and the door, without pointing straight into glare |
| Water bowl | Helps you notice an empty, tipped, or unreachable bowl | Bowl and the space around it, not only the rim |
| Chewable or risky objects | Lets you see whether a cord, toy, bin, or furniture edge becomes a problem | The object and your dog’s route toward it |
| Room boundary or baby gate | Shows whether your dog is staying in the intended area | Gate, latch, and the side where your dog spends time |
If the camera shows only the bed, it can miss the first minutes of pacing at the hallway or the repeated trips to a window. If it shows only the doorway, you may miss quiet distress, water access, or a dog who has settled on the other side of the room. A useful view contains both the dog and enough context to interpret what you see.
Use the room sketch below to identify the same zones in your home before choosing the final position.
2. Choose Height and Angle for the Dog, Not the Ceiling
The practical starting height
For the Furbo 360, the manufacturer’s placement guide recommends 2–4 feet (60–120 cm) off the ground for maximum coverage and 360° rotation. That is a useful starting point for a rotating pet camera because it keeps the dog large enough in frame and leaves room to see the floor.
Do not treat 2–4 feet as a universal rule for every model. A camera with a different lens, a fixed field of view, or a dog that can easily reach the shelf needs its own safety and mounting decision. The right spot is the lowest position that gives you useful behavior information while keeping the camera, power cable, and mount out of reach.
Aim slightly down, then check the edges
Set the lens so the dog occupies the middle-to-lower part of the frame, with some floor in front of the camera. A steep downward angle can hide the dog’s face and make the room look smaller; a level angle can leave the floor and a small dog below the frame.
For a pan/tilt model, test the full movement range instead of trusting the word “360°.” The TP-Link Tapo C225 specifications list 360° horizontal coverage and 149° vertical coverage, plus tabletop and ceiling-mounted options. Furniture can still block the view even when the camera itself rotates.
When you adjust the camera, check four edges in the live view:
- Can you see the floor where your dog turns around?
- Does the door remain visible when the camera pans away from the bed?
- Does the water bowl stay in frame rather than at the extreme edge?
- Is the power cable outside the dog’s reach and away from a water bowl?
The camera should be stable enough that a tail wag, a bumped shelf, or a moving treat dispenser does not change the angle. If a dog can nose the base or pull the cord, a wall or ceiling mount is safer than a taller stack of books.
3. Remove the Blind Spots That Actually Matter
Behind furniture
The gap behind a sofa, chair, or room divider is a common hiding place for a small dog and a common failure point for a camera. Move the camera sideways until the furniture edge no longer blocks the floor, or use a second camera if your dog routinely moves between two separated zones.
Doorways and windows
Face across a doorway rather than directly at a bright window. A window behind the dog can turn the dog into a silhouette during the day. At night, infrared reflections from glass can wash out an indoor camera; test the exact setup in darkness before relying on it.
If the door is the behavior trigger, include the door and the dog’s reaction area in the same frame. If the door is only a route to another safe room, keep the camera focused on the room where the dog spends most of the time.
Crates and gates
Place a camera outside the crate or pen, not inside where a dog can chew it or wrap a cable around it. The bars should not occupy most of the image. A slight diagonal view usually shows the dog, the crate door, and the surrounding floor better than a straight-on close-up.
Pan/tilt dead zones
Pan/tilt reduces blind spots; it does not remove them. The base, a wall, a lamp, a tall cabinet, and the camera’s own housing can all hide a section of the room. Create three or four saved viewpoints if the app supports them, then inspect each one at the time of day when you normally leave.
Petcube Cam 360 is a direct-brand option for this test: its current product page lists 360° pan/tilt movement, a 105° lens, 1080p video, night vision, two-way audio, and a camera-off privacy mode. It still needs the same shelf-height, cable, and furniture checks described above.
View Petcube Cam 360 →4. Test Wi-Fi at the Final Camera Position
Wi-Fi problems often look like camera problems. A stream that freezes, delayed audio, or missing alerts can come from signal loss, congestion, an app issue, or the camera’s cloud service. Start with the network before buying a replacement camera.
Why 2.4 GHz often matters
Many indoor pet cameras are designed for 2.4 GHz Wi-Fi. Furbo’s product information lists 2.4 GHz Wi-Fi, and the Tapo C225 and Kasa EC70 models also require or use 2.4 GHz. TP-Link explains the trade-off clearly: 2.4 GHz generally reaches farther than 5 GHz, while 5 GHz has more channel capacity and usually less interference. Read the 2.4 GHz versus 5 GHz comparison if you are deciding which band to use.
That does not mean 2.4 GHz is automatically reliable. Microwaves, neighboring networks, thick walls, floors, metal shelving, and a router hidden behind furniture can still create a weak or noisy link. If a camera supports only 2.4 GHz, test that band specifically rather than standing beside the router on a fast 5 GHz phone connection.
A five-minute Wi-Fi test
At the final position:
- Open live view and leave it running for two minutes.
- Pan across the room or walk the dog through the areas you need to see.
- Use two-way audio for a short sentence and listen for delays or dropouts.
- Trigger one motion or sound event and check whether the notification arrives.
- Repeat once with the room’s usual devices active.
If the feed fails only at the intended spot, first move the camera a few feet or rotate its position. A small change can remove a wall or metal obstacle without adding another device.
When a range extender helps
An extender is reasonable when the router works well nearby but the camera position has a weak signal. It should sit where it can still receive a usable connection from the router, not deep inside the dead zone. The TP-Link RE315 has a smart signal indicator intended to help find that location and offers 2.4 GHz and 5 GHz bands.
Check current price on Amazon →Do not buy an extender to fix an overloaded internet connection, a failing camera server, or an app that has notifications disabled. TP-Link explicitly notes that an extender improves coverage rather than directly increasing speed. If several rooms have dead zones, a properly placed mesh access point or wired access point may be a better long-term solution.
5. Make Two-Way Audio Useful and Calm
Two-way audio is most useful when it answers a specific question or gives a familiar, brief cue. It is not automatically comforting. Some dogs turn toward a voice and settle; others search for the person, bark at the speaker, or become more frustrated because they can hear you but cannot reach you.
Test audio while you are still home:
- speak once in a normal, quiet voice;
- wait and watch the dog’s body language;
- check whether your voice is delayed, clipped, or echoed by a nearby wall;
- keep the microphone and speaker openings unobstructed; and
- stop using the feature if it consistently increases pacing, barking, or door-watching.
Do not place the camera’s speaker against a corner, behind a curtain, or directly beside another device playing audio. Set the phone volume low enough that you can hear the response without turning the room into a loud announcement. A short cue is easier to interpret than a continuous conversation.
If you are investigating separation anxiety, the camera is an observation tool, not a treatment. The ASPCA’s separation-anxiety guidance describes pacing, persistent barking, escape attempts, and distress around departure; it also recommends gradual behavior work and qualified professional help for moderate or severe cases. Use the camera to record patterns for your veterinarian or behavior professional, not to talk a distressed dog through a long absence.
6. Protect Privacy, Power, and the Camera Itself
Placement is also a security decision. A camera pointed toward the living room may record people, conversations, visitors, and other pets even when the dog is not in the frame.
The FTC’s guidance on securing home security cameras recommends researching encryption, securing the home router, keeping camera and app software updated, using a unique password, enabling two-factor authentication when available, and considering a separate network for cameras. Apply those steps before you share the feed with a sitter or family member.
If privacy matters in a shared room, a physical privacy mode is easier to verify than an app status alone. The Tapo C225’s manufacturer says its privacy mode blocks the lens; its specifications also identify two-way audio, local microSD storage, and a tabletop or ceiling-mounted setup.
Check current price on Amazon →Keep the power adapter away from splash zones, use a cable route that cannot become a loop, and avoid placing the camera where a dog can pull the entire shelf down. Do not rely on adhesive alone for a heavy camera above a crate or bed unless the manufacturer specifically supports that installation.
A 10-Minute Placement Test Before You Leave
Run this test when the room looks and sounds normal:
- Daylight: Confirm that the dog is not a dark silhouette against a window.
- Night: Turn off the room lights and check whether night vision shows the dog, the floor, and the door without a bright reflection.
- Movement: Walk through every path the dog uses and inspect the live view at each point.
- Behavior: Leave the room briefly, then review whether the camera catches settling, pacing, barking, or door-watching.
- Audio: Use one short two-way message and note the dog’s response.
- Connectivity: Confirm live view, an alert, and any saved clip from the final position.
- Safety: Tug the cable gently, check the mount, and remove anything the dog could reach or knock over.
If the camera fails this test, move it before you change settings. A clearer angle or safer cable path usually has more value than higher resolution.
Which Setup Fits Your Room?
| Your situation | Start with | Why |
|---|---|---|
| One living room, dog moves between bed and door | Pan/tilt camera on a stable shelf or secure mount | One camera can cover the resting area and the trigger path when furniture is not in the way |
| You want barking alerts, treat toss, and active check-ins | Furbo 360 | It combines a rotating view, two-way audio, barking alerts, and treat tossing; its guide gives a clear 2–4 ft placement starting point |
| You want privacy and local recording | Tapo C225 | Physical privacy mode, 2K pan/tilt coverage, and microSD storage are useful when the camera also sees people |
| You need simple, low-cost monitoring | Kasa EC70 | 1080p pan/tilt, two-way audio, 2.4 GHz Wi-Fi, and local microSD recording cover the basics |
| Camera works near the router but not in the dog’s room | RE315 or a properly placed mesh/access point | Solve the weak link at the final position before replacing a camera that otherwise works |
| Dog uses two rooms or a long hallway | Two cameras with overlapping routes | A rotating camera cannot watch two rooms at once, and saved viewpoints do not create simultaneous coverage |
The Furbo 360 is the interaction-focused choice, the Tapo C225 is the privacy-and-coverage choice, and the Kasa EC70 is the economical baseline. For exact camera features and broader model comparison, continue to our dog camera comparison. The goal of this placement guide is narrower: make the camera you choose answer the right question from a safe, connected position.
Frequently Asked Questions
Should a dog camera be high or low?
Start lower than a ceiling-mounted security camera if you need to read your dog’s posture and movement. Furbo recommends 2–4 feet (60–120 cm) for its 360° model. Raise or mount it when a dog can reach the camera or cord, then retest the floor and the dog’s face in the frame.
Does a dog camera need 5 GHz Wi-Fi?
Not always. Furbo, Tapo C225, and Kasa EC70 use or require 2.4 GHz Wi-Fi. It usually reaches farther than 5 GHz, but it can be more crowded. Check the exact camera instructions and test the band at the camera’s final position.
Why is the video fine but two-way audio unreliable?
Audio can expose a weak connection sooner than a static image. Check the microphone and speaker openings, move the camera away from a hard corner, lower the phone volume, and test live view at the final location. If both video and audio drop, investigate Wi-Fi before replacing the camera.
Can two-way audio fix separation anxiety?
No. It may be a useful brief cue for some dogs and upsetting for others. If the camera shows persistent barking, pacing, escape attempts, or other distress, use the recording to support a gradual behavior plan with a veterinarian or qualified behavior professional.
Where should I put a dog camera in a crate?
Place it outside the crate at a diagonal angle, showing the dog, crate door, and surrounding floor. Keep the camera and cable out of reach. Do not put an electronic camera inside the crate unless the manufacturer explicitly designs and approves it for that use.
Is a Wi-Fi extender better than buying a new camera?
Only when the existing camera works reliably near the router and fails at the intended location. Move the router or camera first, then consider an extender placed where it still receives a usable signal. An extender cannot repair a faulty camera, overloaded network, or disabled notification setting.
Bottom Line
Place the camera where it can show the dog’s real routine: resting area, trigger path, water, and the floor in between. Start with a dog-level view, remove furniture and window blind spots, test 2.4 GHz Wi-Fi at the final spot, and try two-way audio while you are still home. A camera is most useful when it gives you reliable context without adding a new safety, privacy, or behavior problem.