

 Published sources
 Product details checked
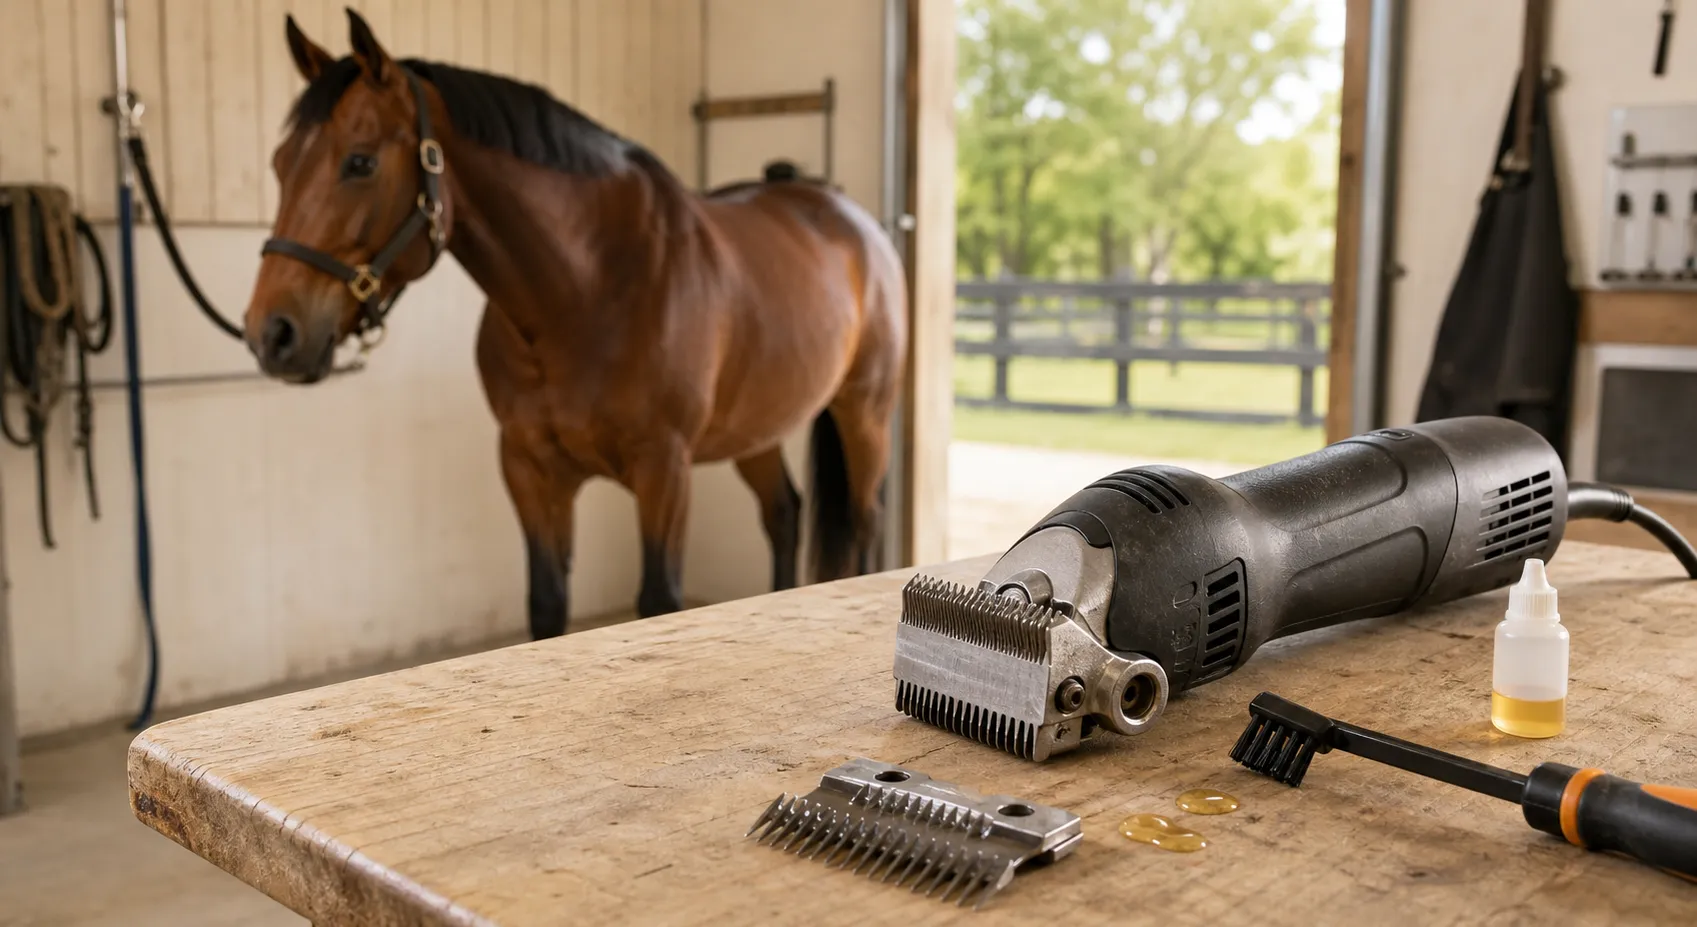
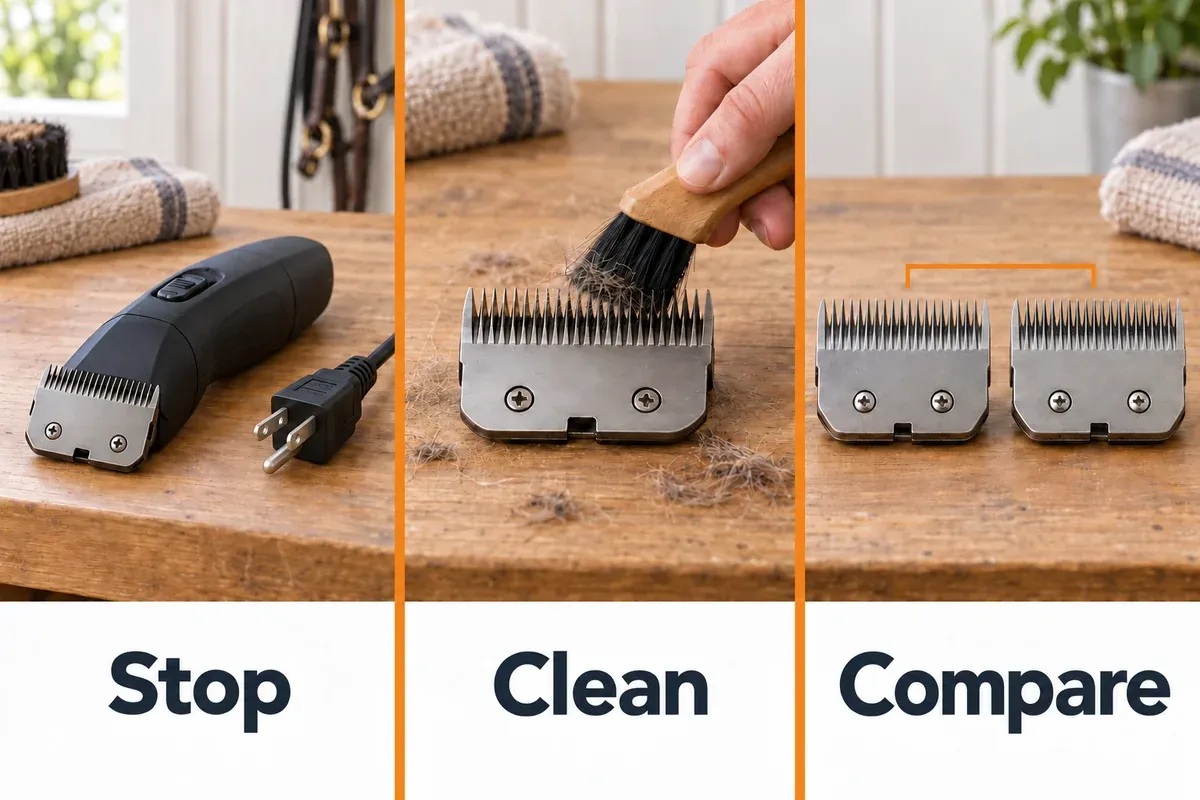
Stop clipping if the blade feels hot, pulls hair, or makes the horse uncomfortable. Switch off and disconnect the clipper, let it cool, then work through cleaning, oiling, blade fitting, and a comparison with a known-sharp compatible blade. A blade problem can often be resolved without replacing the machine.
First identify the blade system. An Oster Clipmaster or Lister Star has a different head, blade mounting, and tension procedure from an Andis AGC2 or Wahl KM detachable-blade clipper. A turn count, replacement blade, or drive part that works on one system can be wrong for another.
If there is smoke, a burning smell, damaged wiring, liquid inside the machine, or repeated shutdown after the permitted maintenance, leave it disconnected and arrange qualified service. A hot blade alone calls for cooling and diagnosis; it does not automatically mean the motor has failed.
Use the sections that match your problem:
- Immediate safety checks
- Identify your blade system
- Match the symptom to the next check
- Work through the fault step by step
- Decide what you can maintain yourself
- Sharpen, repair, or replace
- Prevent the next interruption
- Frequently asked questions
Stop and check the horse and the machine
Move the clipper away from the horse before inspecting it. Switch it off, unplug a mains machine, and disconnect a separate battery pack where fitted. If a cordless model has an internal battery, keep it switched off; opening the case to remove that battery is not a troubleshooting step.
Allow a hot blade to cool on a clean, dry surface where neither the horse nor another person can knock it over. Handle it cautiously. Do not press a blade that already seems hot against your own skin to find out how hot it is, and do not keep making passes until the horse reacts.
Check the clipped area for redness, a scratch, or a sore patch. Stop working over irritated or injured skin. If there is a suspected burn, a cut, marked pain, or continuing discomfort, contact your veterinarian for advice before resuming.
Look over the outside of the machine and its power supply. Stop testing if you find:
- Cracked insulation, an exposed wire, a damaged plug, or heat at a cable connection.
- Smoke, sparking, a burning smell, or a new grinding sound.
- A split housing, loose electrical connection, or damage after a fall.
- Water or cleaning fluid that may have entered the body, adapter, or battery pack.
- A blade with a broken, bent, or missing tooth.
- A protective cutout that trips again after the cause of the load has been addressed.
Do not immerse the clipper or cool it in water. The Oster Clipmaster instructions prohibit use with hot blades, on a wet animal, or under wet conditions. They also require damaged machines to be examined through a service route.
Do not remove an electrical housing to investigate overheating. Blade removal and a user-accessible filter are separate from the motor enclosure. A visible screw is not evidence that the part behind it is intended for owner maintenance.
The sequence below keeps the early checks simple. Identify your blade system before removing parts or copying a tension setting from another machine.
Identify your blade system
Read the model number on the machine and the markings on the blade before loosening anything. Photograph both if you will need to order a part or speak to a repairer. Keep the regional model or item number as well as the familiar product name: voltage and service parts can vary between versions.
A blade set contains a stationary lower blade and a moving upper cutter. The motor drives the cutter across the lower blade to cut hair. The way those two parts attach to the machine determines how you clean, fit, and tension them.
| System | How to recognize it | What the owner normally checks | Compatibility boundary |
|---|---|---|---|
| Oster Clipmaster | A large-animal head with a tension knob and separate top and bottom blades | Correct blade pair, alignment, blade oil points, tension, and the accessible air filter | Clipmaster blades are a dedicated format; they do not attach to an A5 hinge |
| Lister Star | Separate blades retained by a central tension bolt, spring, and nut | The cutter socket and crank roller, locating pegs, tension spring, blade oil points, and filter | Use the blade range approved for the Star; a Clipmaster pair or A5 set is not a substitute |
| Andis AGC2 detachable blade | A complete blade set slides onto a hinge and locks against the clipper | Blade seating, the exposed blade cavity, lubrication, and a compatible spare | The blade interface and the machine’s internal drive are separate compatibility questions |
| Wahl KM detachable blade, including KM10+ | A complete snap-on blade set with a latch or hinge | Attachment, cleaning, oiling, and the approved replacement blade range | Follow the exact model’s blade list; do not transfer a large-animal tension setting |
| An adjustable trimmer blade, such as a Wahl 5-in-1 | A small blade set with a cutting-length adjustment | The model’s cleaning and attachment procedure | Cutting-length adjustment does not make it an A5 blade or a Clipmaster blade |
These distinctions matter even within one brand. Oster sells both Clipmaster machines and A5 clippers. Wahl’s HorseLine booklet covers different head designs, including the Avalon and smaller adjustable-blade trimmers. Brand names alone cannot identify the maintenance procedure.
The Lister blade-fitting instructions show the crank roller, blade socket, locating pegs, and central tension assembly. The Andis AGC2 manual, pages 4–7 shows the detachable hinge and drive arrangement. Compare the drawings with your machine before following either procedure.
What “A5-style” compatibility actually means
A5-style describes a family of detachable blade interfaces. Some manufacturers explicitly approve blades from that family across named models. For example, Wahl confirms A5-style blade compatibility for the KM Cordless and lists compatible detachable-blade models. That approval applies to the stated machines and blade format; it does not turn every Wahl blade into an interchangeable part.
For the KM10+, use its own Wahl blade compatibility information, which lists Prime and Competition replacement blades. Andis supplies its AGC Super 2-Speed horse configuration with a T-84 detachable blade. Neither is the separate top-and-bottom blade arrangement used by a Clipmaster.
Before fitting a replacement, establish all of the following:
- The manufacturer approves that blade for the exact clipper model.
- The mounting bracket, hinge, and drive engagement match.
- The blade leaves the intended amount of coat and suits the clipping job.
- Any attachment comb is approved for that particular blade, including its width.
A compatible blade does not prove that a replacement drive lever, hinge, motor, or filter from another machine will fit. Those parts must be matched separately. If the blade will not seat as shown in the manual, stop rather than forcing the latch or filing a part to make it fit.
Match the symptom to the next check
Identify where the problem starts. Heat concentrated at the blade points you toward the cutting surfaces and mounting. Heat or rough noise from the body deserves a different response. Feeling the outside of the case cannot diagnose an internal electrical fault.
| What happens | First check | What the result may tell you |
|---|---|---|
| It cuts well at first, then the blade becomes hot | Pause, remove loose hair, and check lubrication and permitted tension | A dirty or dry cutting surface may be increasing friction; compare with a cool, prepared spare |
| It runs but pushes or folds the coat | Confirm the blade is the correct format and fully seated | Poor attachment can leave a sharp cutter without proper drive engagement |
| It started pulling after the blades were removed | Recheck assembly against the manual | Missing parts, misalignment, or an incomplete latch is more plausible than sudden motor failure |
| It pulls even on clean, dry coat | Check teeth, clean and oil, then compare blades | If the spare works, the original set needs cleaning, sharpening assessment, or replacement |
| It leaves lines but otherwise cuts freely | Inspect for tooth damage, then check angle, direction, and overlap | Lines can come from technique; a damaged tooth requires immediate blade replacement |
| Two prepared, compatible blade sets both fail | Recheck attachment, permitted tension, and the exposed drive connection | The problem may be in the machine; a second failure does not prove which internal part is worn |
| It shuts down, rattles abnormally, or loses speed after maintenance | Stop and check the manual’s service or overload guidance | Continued testing can conceal a drive, power, or motor fault that needs qualified attention |
Note whether the fault began after blade changing, after cleaning, halfway through a clip, or when moving to a different area of coat. That detail helps you choose the next check. Change one thing at a time so you can tell which action made a difference.
Troubleshoot in a safe order
Have the exact manual, cleaning brush, a clean cloth, the specified blade oil, and a known-sharp compatible spare ready. Keep screws, springs, and blades together on a stable surface. If you do not have a spare, complete the permitted cleaning and fitting checks, then have the blade assessed; buying several different blades is not a reliable diagnostic method.
1. Check the coat before blaming the blade
The horse’s coat should be dry and thoroughly brushed, with loose dirt removed. The Wahl HorseLine instructions, pages 5–6 explain how abrasive dirt carried between the blades can separate the cutting faces and cause pulling.
Look at the area that caused the stall. Is it damp with sweat, gritty near the legs, sticky, or tangled? A machine that cuts one clean section but struggles in a dirty section gives you a useful clue. Prepare the coat before repeating the test. Do not compensate by increasing pressure, tightening tension beyond the manual, or pushing faster.
If bathing is needed, allow enough time for complete drying before clipping. A coat that looks dry at the surface can still feel damp underneath. Avoid treating a painful skin patch or dense mat as a place to test the machine; get help with preparation if it cannot be done comfortably.
Expected result: the blade can move through the prepared coat without meeting dirt or tangles that obscure the diagnosis. If it still folds or pulls clean, dry hair, continue with the blade checks.
2. Remove contamination using the procedure for your head
Disconnect the machine and let the blade cool. Remove the blade only by the method shown in its manual. Brush away hair around the teeth and the accessible mounting area, then inspect under a good light.
Look for packed hair, grit, sticky residue, rust, and damaged teeth. A shiny blade can still be blunt at its cutting faces. Conversely, a blade that stops cutting immediately after touching dirt may simply need cleaning before you can judge its sharpness.
The cleaning method depends on the system:
- Separate large-animal blades: follow the documented removal sequence and keep the tension spring and other retaining parts safe. Clean the blade faces and accessible head surfaces without disturbing the motor housing.
- Andis AGC2 detachable blades: remove the complete set. For hair trapped between the blades, page 6 of the AGC2 manual permits sliding the upper cutter partly sideways for cleaning, then centering it again. Keep it under the tension spring and leave the spring screws alone.
- Wahl KM10+ types 1251/1264: the Wahl operating manual, pages 12–13 likewise permits limited sideways movement for cleaning. It prohibits disassembling the blade set or pushing the cutter completely out.
Do not apply that sideways-cleaning method to an unidentified blade or a different adjustable trimmer. Some sets contain a small shim or guide that can be displaced if the blades are pulled apart.
Use only the cleaning products approved for the model. Liquid cleaning or blade-dip methods require their own instructions; they are not permission to wet the body or improvise with household solvents. Keep the fluid away from the horse, dry or wipe the blade as directed, and re-oil before reuse.
Expected result: the teeth, accessible mating surfaces, and mounting area are free of visible contamination. If a tooth is bent, chipped, or missing, retire the blade from use. If dirt remains trapped where the manual does not allow access, send the blade for service rather than taking the assembly apart.
3. Restore lubrication at the actual oil points
Cleaning and lubrication are different jobs. Blade cleaner removes contamination; blade oil maintains a film between moving surfaces. Spraying a hot blade does not establish that the cutting surfaces are adequately lubricated.
First brush away loose hair. Apply the specified oil at the points in the manual, with the machine disconnected unless the particular oiling procedure explicitly requires it to run. Refit the blade before any powered distribution step, keep hands clear of moving teeth, and run only for the brief period specified. Wipe excess from the outside before returning to the horse.
| Model or system | Lubrication reference | During-use guidance |
|---|---|---|
| Lister Star | R15 oil at the blade and head points shown in Figure 5 of the Star manual | Oil every 5–10 minutes during clipping |
| Oster Clipmaster | The oil openings and blade friction points in Figure 2 of its manual | Repeat oiling every 10 minutes |
| Andis AGC2 | Front and sides of the cutter, shown in Figure G; follow its blade-care section | Oil before, during, and after use |
| Wahl KM10+ types 1251/1264 | A drop at each marked blade point in Figure 9 of the operating manual | The manual specifies every 15 minutes |
The Star manual’s lubrication diagram includes head oil points as well as the blades. Lister also provides written oiling instructions. Those head oil points are specific to that design. Pouring oil into an Andis or Wahl clipper body because another machine has a head oiler is not an equivalent maintenance step.
Treat the stated intervals as instructions for those models, not a universal timer. Pause earlier if cutting deteriorates, contamination appears, or the blade becomes uncomfortable. Cleaning can remove the oil film, so follow it with fresh lubrication even if the normal interval has not elapsed.
Use blade oil rather than cooking oil, a penetrating lubricant, or gear grease on the cutting faces. The AGC2 manual warns that spray lubricants provide insufficient oil for proper blade lubrication; its approved coolant procedure still requires clipper oil. Keep aerosol products subject to the machine’s safety restrictions. A spray sold for one clipper is not automatically suitable for another.
Expected result: after the specified distribution step, the prepared blade runs smoothly and cuts without pulling. If it rapidly heats again or still fails, stop and check attachment and tension. Adding more oil repeatedly cannot correct a blunt edge or a worn drive.
4. Check fitting and alignment before changing tension
If cutting deteriorated after the blades were changed, start here. Remove and refit the blade according to the model manual. Check that hair has not obstructed the mounting and that the moving cutter actually engages the drive.
Oster Clipmaster
Match the top and bottom blades to the Clipmaster head. Figure 1 in the Clipmaster manual places the upper blade 1/32–1/16 inch (0.8–1.6 mm) behind the ridge on the lower blade. Use that pictured reference point. It is not a universal instruction to measure the same setback from the tips of every clipper blade.
If you cannot reproduce the mounting shown in the instructions, have the head and blade pair checked. Do not alter the head or remove it from the motor body to make a blade fit.
Lister Star
With the power disconnected, check the crank roller sits in the upper blade’s socket, the lower blade sits over its locating pegs, and the tension spring is present. Use the Lister fitting sequence to check the complete assembly.
The tension nut can feel installed even if a blade is incorrectly located. Tightening harder does not move a misplaced roller into its socket or replace a missing spring.
Andis AGC2 and Wahl KM detachable blades
Slide the complete blade set onto the correct hinge or latch and follow the model’s locking sequence. Do not start clipping with a set that remains partly tilted, rattles, or fails to lock.
The Andis AGC2 attachment instructions and the Wahl types 1251/1264 instructions specify a powered final seating action. Treat this as a narrowly defined attachment step: begin removal and inspection with power disconnected, then use the exact sequence for your model, away from the horse and with fingers clear of the cutting edge. Stop if it does not engage as shown.
Expected result: the correct blade is secure and operates normally after fitting. New rattling after a blade change points you back to attachment or damage. Do not try to silence it by adjusting the blade-set spring screws.
5. Adjust tension only on a system that permits it
Tension controls how firmly the cutting faces are held together. Excessive tension adds friction and can cause heat; insufficient tension can reduce cutting and allow clogging. Adjust it only where the manufacturer provides an owner procedure.
Lister Star: after the blade assembly is correctly located, tighten the nut by hand to the documented stop, then back it off one and a half turns, using the marker as a guide. This is the Lister Star procedure, also shown in Figure 4 of its operating manual.
Oster Clipmaster: use its own resistance-based sequence. The manual describes turning the knob counterclockwise to resistance without forcing it, then clockwise two to three turns to light resistance, followed by a further half turn. Follow the Clipmaster tension instructions, with the correct blade pair fitted. Do not substitute the Star’s one-and-a-half-turn setting.
Andis AGC2 and Wahl KM detachable sets: there is no large-animal tension nut to set. Leave the blade-set tension spring and its screws in their documented arrangement. Cleaning, proper attachment, and a sharp compatible set come first; spring adjustment belongs to a blade service procedure, not a generic heat remedy.
Disconnect the machine before making a permitted adjustment. If a knob is seized, a spring is missing, or the documented position cannot be reached normally, stop and have the assembly checked. Do not force a stop or keep tightening to make blunt blades cut.
Expected result: a correctly assembled, clean, lubricated, sharp set cuts at the manufacturer’s setting. If it does not, compare blades instead of experimenting with ever-higher tension.
6. Compare with one known-sharp compatible blade
A spare becomes useful only after the coat, oiling, fitting, and permitted tension have been checked. “New” alone is not enough: the spare must be undamaged, approved for the machine, and prepared for use.
Use the same operator and a small, suitable area of clean, dry coat. Prefer the same blade type and intended cut length so differences in blade width or coat removal do not confuse the comparison. With all covers and required filters fitted, run the clipper briefly as its manual allows, then make a short, gentle test pass. Stop immediately if it pulls, sounds abnormal, or heats rapidly.
Interpret the result:
| Comparison result | What you have established | Next step |
|---|---|---|
| The prepared spare cuts normally; the original does not | The original blade set is implicated | Have its sharpness and condition assessed; replace damaged teeth or an unserviceable set |
| The original works after cleaning and refitting | Contamination or attachment was contributing | Resume cautiously and maintain the cleaning and oiling routine |
| Both prepared sets fail in the same way | A problem common to the machine or setup remains | Recheck engagement, documented tension, power supply, and accessible drive; arrange service if unresolved |
| One set is a different format or cannot lock | The comparison is invalid | Identify the correct approved blade before further testing |
| Either test brings smoke, a burning smell, or repeated shutdown | Routine blade troubleshooting is no longer appropriate | Disconnect and send the clipper for examination |
This comparison narrows the fault; it does not prove the motor is healthy or identify a particular worn drive part. Do not keep clipping with a spare if the body remains abnormally hot or the protective cutout keeps tripping.
If you cannot make a safe test on the horse, have a repairer assess the clipper and both blade sets together. Repeated pulling is not a useful test condition.
7. Inspect the accessible drive connection
The blade drive transfers movement from the motor to the cutter. Depending on the machine, the connecting part may be called a lever, drive tip, roller, or yoke. A sharp blade cannot cut properly if that connection no longer engages.
With the clipper disconnected and the blade removed by its normal procedure, inspect only what is already accessible:
- Hair packed around the exposed drive opening.
- A visibly cracked, missing, or worn contact part.
- A bent or damaged hinge, latch, or mounting bracket.
- A cutter socket that does not engage with the correct drive connection.
- Damage that explains why a blade cannot seat securely.
Compare the visible arrangement with the manual’s drawing. Do not run the clipper with its housing open or touch the drive while it moves. Running every model with the blade removed is also not a universal diagnostic instruction; leave an exposed mechanism unpowered unless its specific manual requires otherwise.
For the AGC2, the Andis drive-replacement section, page 7 identifies failure with more than one blade as a reason to consider the drive assembly. It gives a particular replacement procedure for that model. Use it only if the manual matches your machine and you can complete that documented owner task. Otherwise, ask an authorized repairer.
The Clipmaster instructions explicitly reserve removal of the head from the motor housing for authorized service. For a Wahl KM10+, the operating manual directs unresolved faults to its service center. Sharing a detachable blade format with an Andis does not give a Wahl owner permission to use the Andis drive procedure.
Expected result: accessible debris is removed and the correct blade seats without obvious drive or mounting damage. If wear or damage is present, order or service the exact part for the model. If nothing visible explains the failure, that is a reason for further assessment, not permission to dismantle the body.
8. Check airflow and power without opening the body
Start with the openings shown in your manual. Where the machine has an owner-removable intake filter, disconnect it and clean or replace the filter by that procedure. Brush external hair away from vents, keep the openings unobstructed during use, and refit every required cover before testing.
A Clipmaster and a Star have filter-care requirements. That does not mean every detachable-blade clipper has the same removable filter. If your model shows no user-accessible filter, do not remove casing panels to search for one.
Do not use water to wash an unidentified filter, insert tools through ventilation openings, or force debris farther into the body. If the filter cannot be cleaned by the permitted method, obtain the correct replacement or ask for service. A machine with a required filter must not be run without it.
Check the voltage and frequency on the rating label, including the adapter where present. The US Andis AGC2 T-84 model is specified for 120 V, 60 Hz. It must not be connected directly to a 230 V supply simply because a travel plug fits. Use the manufacturer’s regional version or approved supply arrangement.
For a cordless machine, check charging and the permitted battery connection before deciding it has a mechanical fault. Never test with a damaged battery, charger, or cable. If a corded machine loses power, do not wiggle a damaged cable to reproduce the fault; disconnect it and have it examined.
Use extension leads only as the model’s safety instructions allow. Keep cables clear of the horse, sharp edges, and damp ground. A tripped breaker or protective outlet, a hot plug, or repeated power interruption needs assessment before another attempt.
Expected result: the supply matches the label, accessible cooling openings are clear, and there is no visible power-system damage. Continued overheating or loss of speed after these checks belongs with a qualified repairer.
If the clipper stops and later restarts
Some models have overload protection; not every shutdown is a thermal cutout. A jammed blade, poor lubrication, excessive tension, battery state, or an electrical fault can produce superficially similar symptoms.
The Star operating manual requires the cause of an overload to be corrected before restarting. Its reset must never be held down to defeat the protection. Disconnect, inspect, and carry out the permitted maintenance first. Follow the matching reset instructions only after the problem has been addressed.
If the protection trips again, stop the session and arrange service. Do not bypass a cutout, tape a reset button down, or make repeated restarts your clipping routine.
What you can maintain and what needs service
Use the manual’s user maintenance section to decide what is permitted. A parts diagram identifies components; it does not authorize removal. An online video for a similar model is not a substitute for the instructions supplied for your machine.
| Task | Owner action when the exact manual allows it | When to use a service route |
|---|---|---|
| Brush hair from blades and exposed mounting surfaces | Switch off, disconnect, and follow the blade-removal method | Dirt remains inaccessible without dismantling the body |
| Clean and oil a detachable set | Use approved products and the specified limited cutter movement | A spring, shim, or blade component is missing or displaced |
| Set large-animal blade tension | Follow the head’s exact sequence after correct assembly | The adjustment is seized, cannot reach its normal position, or parts are damaged |
| Clean or replace a removable intake filter | Use the designated filter access and refit it correctly | Access requires opening the electrical enclosure |
| Replace a blade drive | Only the exact user procedure and matching replacement part, such as the documented AGC2 task | No matching owner procedure, uncertainty about assembly, or internal damage |
| Diagnose wiring, a motor, switch, charger, or battery fault | Inspect externally and disconnect a suspect machine | Electrical diagnosis, rewiring, internal battery work, or motor repair is required |
| Sharpen or adjust blade-set components | Send the set for a professional assessment | Teeth are damaged, the cutting faces are pitted, or the set needs alignment or spring work |
The AGC2’s internal motor mechanism is factory-lubricated. Gear grease supplied with another clipper is not a reason to open or lubricate it. Likewise, a service interval or head-greasing instruction for one large-animal machine cannot be copied to another design.
If you do not have a manual for an older machine, send the manufacturer or repairer the model label and photographs of the head and blades. Until its maintenance limits are established, restrict your work to external inspection and cleaning that does not disturb assemblies.
Sharpen, repair, or replace
Choose the repair after the diagnosis. A worn blade and a defective motor can both cause poor cutting, but they require different remedies.
Sharpen a sound blade set when its edges are the problem
If the prepared spare works and the original still pulls, ask a specialist whether the original set can be sharpened. Send the matched top and bottom components together for a large-animal set, and identify the machine they belong to.
Tell the sharpener whether the blade was recently serviced, dropped, or suddenly stopped cutting after contamination. A freshly sharpened set that immediately fails may need its grinding, assembly, or fit checked; it is not proof that the clipper needs replacing.
Do not use a household file, abrasive paper, or an improvised grinding method on precision cutting faces. The Oster motor-and-blade manual explains why its blade geometry requires the correct sharpening method. A broken tooth, substantial pitting, or a set the specialist considers unserviceable calls for replacement.
Replace only the blade or wear part that has failed
The Oster 83AU top and 84AU bottom blade pair belongs to the Clipmaster system. Oster identifies the 83AU as a Clipmaster top blade and the 84AU as its Clipmaster bottom blade. Confirm the pair against your head before buying. Replacing those blades is appropriate when the fault has been isolated to an unserviceable set.
Check current price on Amazon →The Andis UltraEdge T-84 is a complete detachable blade that leaves 3/32 inch (2.4 mm) of coat, as specified on the Andis T-84 page. On an approved machine it can replace a faulty T-84 or provide a like-for-like spare. It will not fit a Clipmaster head or repair a worn machine drive.
Check current price on Amazon →For a drive, hinge, filter, or latch, obtain the exact model-specific part and use the permitted fitting or service route. Ask the repairer to assess the blade set as well as the body if both may be contributing.
Replace the machine when repair or its intended use no longer makes sense
Replacement becomes reasonable when safe repair is unavailable, essential parts cannot be obtained, repeated faults remain after a proper assessment, or the machine is unsuitable for the clipping work you need. Compare the repair quotation with a suitable replacement and the condition of the whole machine. A damaged cord by itself may be professionally repairable.
If replacing, decide on the head and workload before choosing a brand:
Oster Clipmaster Variable Speed
A dedicated large-animal system with adjustable tension and a 700–3,000 strokes-per-minute range. It suits someone choosing that head format for body clipping and willing to maintain its separate blade pair and filter. Existing A5 blades will not transfer to it.
Check current price on Amazon →Andis AGC Super 2-Speed with T-84
A corded detachable-blade configuration for horse and livestock coat work. Its blade can be exchanged as a complete set. Check the T-84’s cut length and the regional power specification.
Check current price on Amazon →Wahl KM10+
A brushless corded clipper supplied with a #10 Prime blade. It suits a detachable-blade workflow with Wahl’s approved blade range. A different head format changes blade storage, maintenance, and which existing accessories you can retain.
A larger motor or a faster speed does not correct dirt, damaged teeth, incorrect attachment, or unsuitable blades. Before replacing a machine that struggles only in a dense coat, check whether its approved blade range includes a more suitable coat-cutting option and whether the manufacturer rates it for that work.
A maintenance routine for each clipping session
Keep a small kit together: the exact manual, brush, clean cloths, specified oil, and a labeled compatible spare. Label blades by system, model suitability, and cut length so a hurried change does not introduce a new fault.
Before the horse is clipped
Prepare a dry, clean coat and a dry, uncluttered working area. Check the blade teeth, attachment, permitted tension, cable or charger, and any required filter. Oil at the correct points before starting.
Have a competent helper if the horse cannot stand comfortably while you clip. Stop to address the horse’s reaction instead of assuming every movement is bad behavior. The British Horse Society’s clipping skills guidance includes equipment preparation, checking blade temperature during use, and attention to the horse’s behavior.
During the clip
Pause regularly to check blade warmth with the machine switched off and to remove hair. Oil at the model’s interval and after cleaning. Change to a prepared, cool compatible blade when necessary; keep the cut length consistent if you want an even finish.
Keep the blade flat as directed, work at a pace the machine can cut comfortably, and do not press harder to overcome pulling. A sudden change in noise, resistance, or cut quality should prompt a stop while the problem is still small.
Switch off during breaks. Resting a running clipper on a towel or other soft surface can obstruct its cooling openings. Set the disconnected machine where the horse cannot stand on the cord or knock it into water.
After the clip
Disconnect the machine, remove loose hair, clean the blade by its approved procedure, and apply storage oil as directed. Keep the kit dry and avoid tightening the cord around the body. Send blades for attention before the next session if the spare comparison showed that the original set was failing.
Brush away loose clipped hair and reassess the horse’s protection for the weather. University of Minnesota Extension’s winter-care guidance explains how the coat traps insulating air and why a clipped horse may need blankets and shelter in cold weather. Use our horse blanket temperature guide for clipped and unclipped coats to consider coat, weather, and shelter together.
Before sending the clipper for service
Write down the model and regional item number, blade type, and when the failure occurs. Include whether cleaning and refitting helped, whether a prepared spare behaved differently, and whether there was a cutout or abnormal noise.
Ask whether the repairer wants the suspect blade set sent with the machine. A fault that appears only under cutting load can be harder to reproduce when the body arrives without its blades. Describe a damaged cable or suspected liquid ingress clearly and leave the machine disconnected.
Frequently asked questions
How hot is too hot for horse clipper blades?
The manuals do not provide one universal blade-temperature limit for every machine, blade, and skin-contact situation. Check frequently and stop if the blade is becoming uncomfortably hot. Use a cool compatible spare or allow it to cool, then investigate friction. A successful cooling break does not explain the cause of rapid reheating.
Why do freshly sharpened blades still pull hair?
Sharpness is only one part of cutting. The blade may be dirty, dry, incorrectly assembled, insufficiently seated, or tensioned by the wrong procedure. The sharpening itself may also need checking. Compare it with a known-good blade of the same approved type; if only the sharpened set fails, return that set for assessment with details of the clipper.
Can I tighten an A5 blade to stop overheating?
Do not use its spring screws as an overheating adjustment. Follow the blade-care procedure for the exact detachable set, then check mounting and compare with a sharp compatible spare. A blade spring that needs attention belongs with a blade specialist or the manufacturer’s service procedure.
Are an Andis T-84 and Oster 84AU interchangeable?
No. The T-84 is a complete detachable set. The 84AU is the lower component of a Clipmaster blade pair. Similar numbers do not identify the same mounting or drive connection. Use the model’s approved parts list.
Can cooling spray replace blade oil?
Use it only if both the machine and product instructions permit it, and retain the required blade-oiling step. Andis distinguishes coolant from adequate lubrication in the AGC2 manual. Do not assume aerosol use is allowed on a Star or another machine with different restrictions.
Should I run the clipper without the blade to see whether the motor is faulty?
Only if the exact manual includes that test. Removing a blade can expose a moving drive, and running without load does not reproduce a cutting fault. The safe comparison in this guide uses a correctly assembled clipper with a prepared compatible blade.
Does restarting after cooling prove the clipper is safe?
No. Restarting only tells you it can run again. Identify and correct the reason for the interruption through the permitted checks. If a cutout, power loss, abnormal heat, or rough noise returns, stop and arrange service.
Can a dog clipper be used on a horse?
Check the exact model’s animal-use and workload guidance. A detachable blade can fit while the motor, blade choice, or intended duty is unsuitable for a full body clip. Choose an approved equine setup for the work and keep smaller trimming tasks separate from the demands of a dense coat.
Manuals and further reading
Use the manual that matches the model and rating label on your machine. Regional versions and later revisions may have different parts or instructions.
- Oster Clipmaster, Showmaster, and Shearmaster instructions: use the Clipmaster section for its alignment, tension, oiling, filter, and head-service boundary.
- Andis AGC2 Use & Care: pages 4–7 cover attachment, lubrication, blade care, and the model’s drive procedure.
- Wahl Star C102 original operating manual, manufactured by Lister and Lister’s fitting, tension, and oiling instructions.
- Wahl animal hair clipper operating manual, types 1251/1264: manufacturer manual hosted by a retailer; English blade care and troubleshooting are on pages 12–13.
- Wahl HorseLine instructions: use the section for the named model, including Avalon, Adelar, Figura, or Bravura.
- Oster universal motor and blade instructions: model numbers are listed on the document; its maintenance does not apply to every Oster machine.
- British Horse Society clipping skills guidance and University of Minnesota Extension’s winter-care guidance.