
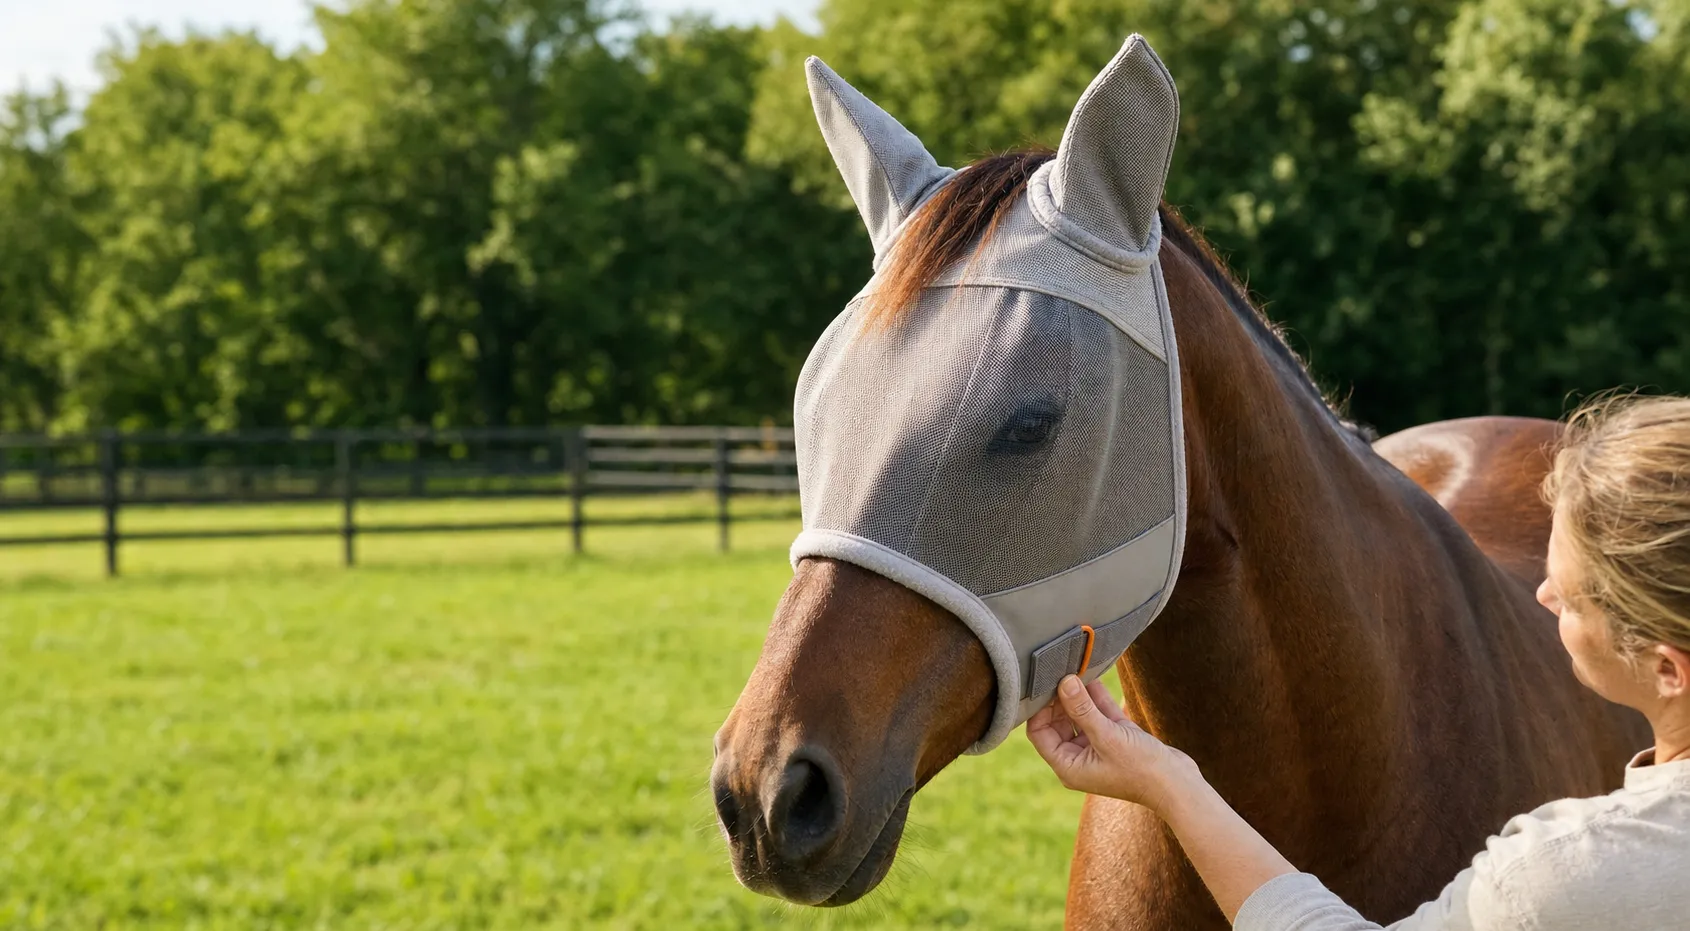

 Published sources
 Product details checked
A fly mask can be the right size on the label and still be the wrong fit for an individual horse. A narrow jaw, prominent cheekbones, long ears, a deep forelock, or a different eye shape can turn a comfortable mask into one that slips, presses, or rubs.
Quick answer: Measure the horse’s head against the manufacturer’s chart, then check the finished fit in five places: eyes, muzzle, throatlatch, ears, and poll. The mesh must stay clear of the eyes and lashes, the lower edge must leave room for grazing, and the closure should be moderately snug rather than tight. Recheck the mask after movement and at least once every day.
If you are still deciding between ear, nose, and UV coverage, start with our horse fly mask comparison guide. This article focuses on the part that usually decides whether a mask works in real life: measuring, adjusting, and catching rubbing before it becomes an injury.
This guide draws on the measurement and fit checks from Kensington’s horse fly mask sizing guide, the four-zone inspection described by Equus, and veterinary-reviewed care guidance from PetMD. It is a practical fit guide, not a diagnosis of an eye or skin condition.
Quick fit checklist
Before you leave a new mask on for turnout, confirm:
- The eye openings or structured eye panels sit around the eyes without touching the lashes.
- The mask is centered and does not rotate when the horse lowers its head or walks.
- The lower edge does not land on the bony cheekbone or press into the muzzle.
- You can fit one to two fingers between the mask and the jaw or throatlatch, depending on the closure design.
- Ear pockets or ear holes allow the ears to move without pulling downward or creasing at the base.
- The horse can chew, graze, blink, and look around without the mask shifting.
- The inside is clean, dry, smooth, and free of damaged mesh or rough stitching.
If the mask touches the eye, causes squinting, or leaves a hot, open, swollen, or painful rub, remove it. Do not solve an eye-clearance problem by tightening the closure.
How to measure a horse for a fly mask
What you need
Use a soft measuring tape, a helper, a calm horse, and a note on your phone or in the tack room. Remove the halter for the measurement. Stand the horse squarely on level ground, keep the head in a natural position, and measure twice.
Kensington’s guide uses five measurements rather than relying on a breed label or one universal “horse” size. That approach is useful because brands place the lower edge, eye panels, ear pockets, and closures in different positions.
The five measurements that matter
| Measurement | How to take it | What it helps you compare |
|---|---|---|
| A. Poll to mask endpoint | Measure from the top center of the poll, between the ears, down the center of the face to the point where the mask should end. | Overall mask length and nose coverage. |
| B. Head circumference | Start near the poll, run the tape around the head and under the jaw, then return to the starting point. | Room around the forehead, cheeks, and jaw. |
| C. Nose circumference | Measure around the nose where the lower portion of the mask will sit. | Muzzle comfort and whether the lower edge will gap or press. |
| D. Ear length | Measure from the base of each ear to its tip. Use the longer or wider ear when the two sides differ. | Ear-pocket depth and whether ear coverage will pull. |
| E. Nose length | Measure from just below the eye area to the intended end of extended nose coverage. | Long-nose masks and UV protection for pale or pink muzzle skin. |
Not every manufacturer asks for all five. Use the exact measurement path shown on the product’s chart when it differs. The goal is not to make the numbers fit a generic table; it is to compare the horse with the specific cut and coverage you are buying.
Avoid the common measuring mistakes
- Do not measure over a halter. The added thickness can make a mask look smaller on paper than it will be on the bare head.
- Do not pull the tape tight. It should touch the coat without compressing the soft tissue.
- Do not use height or breed as a substitute. A tall Arabian, a broad Quarter Horse, and a fine-headed Thoroughbred can all need different proportions.
- Do not measure only the old mask. It may be stretched, distorted, or a different brand’s size system.
- Do not ignore the coverage version. A no-ear mask, an ear mask, and a long-nose mask can have different length and circumference requirements even within one brand.
When measurements land between sizes, compare the eye and jaw dimensions first. If one dimension needs more room and another does not, a different cut is often safer than forcing the next size up.
How to put on and adjust a fly mask
The best adjustment starts with a clean mask and a dry face. Dirt, dried sweat, and rough mesh can create friction even when the size is correct.
1. Check the mask before it touches the horse
Run your fingers over the inside edge, seams, eye panels, ear pockets, and closure. Look for broken mesh, hard folds, curled binding, loose threads, or a hook-and-loop section that no longer lies flat. Replace or repair damaged gear before use; sharp or loose fibers near the eye are not a “break-in” issue.
2. Center the crown and forelock
Place the top of the mask behind the ears and center it over the poll. Let the forelock lie naturally through its opening or across the top as the design intends. Do not trap a thick forelock under a narrow seam and then tighten the closure to hold the mask in place.
The mask should sit forward enough to stay over the face, but not so far forward that the front edge presses into the eyes or upper cheek. A mask that immediately slides backward is often too large, too smooth for the head shape, or too loose at the closure.
3. Check the eyes from three angles
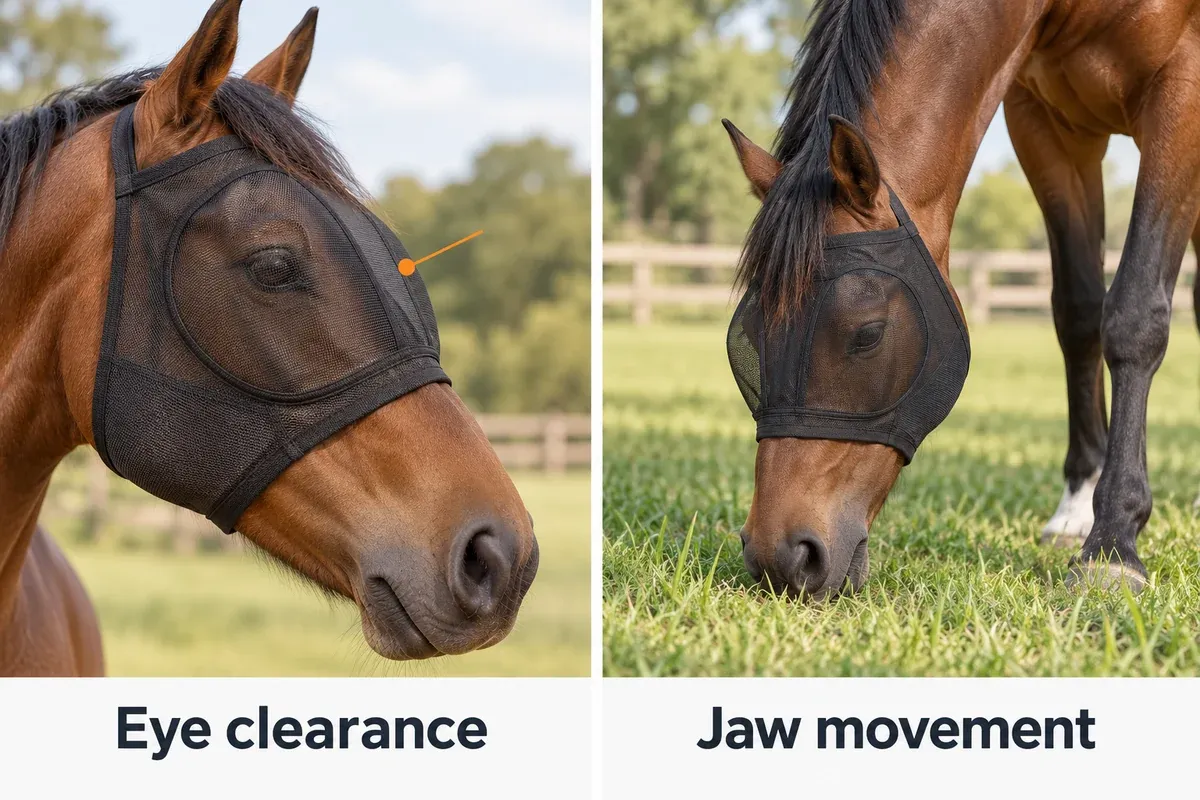
Inspect the eye area from the front, each side, and slightly from behind. The roomiest or structured part of the mask should sit over the eye socket. Mesh, darts, seams, and fringe must not touch the eyeball or lashes when the horse blinks.
Equus recommends replacing a mask when the eye area interferes with even the lashes. Kensington likewise warns that inadequate eye room can cause rubbing and injury. If the horse squints, tears, holds an eye closed, or becomes unusually light-sensitive, remove the mask and contact a veterinarian rather than adjusting it tighter.
4. Position the muzzle edge below the cheekbone
The lower edge should protect the face without resting on the sharp or bony part of the cheek. Equus gives about 1½ inches below the cheekbone as a practical reference for the edge, with enough room at the jaw for grazing. Treat that as a fit check, not a universal measurement: the mask’s own shape and the horse’s head determine the final position.
Ask the horse to lower its head as if grazing. The mask should not pull the cheeks upward, catch the lips, or make the horse open and close its jaw against a tight edge.
5. Set the ear pockets without pulling the ears
For an ear mask, guide each ear into its pocket without twisting the fabric. The pocket should be long enough for the ear to move, but not so loose that it collapses over the ear or drags the mask sideways. If the horse pins or repeatedly shakes its ears only after the mask goes on, inspect the pocket before assuming it simply dislikes ear coverage.
For a horse that cannot tolerate anything around the ears, an earless design is usually a better starting point. More coverage is not automatically more comfortable or more protective if the horse removes it, rubs, or refuses to wear it.
6. Adjust the closure for stability, not pressure
Fasten the closure under the jaw or at the throatlatch after the mask is in the right position. A general rule from PetMD and Kensington is to leave room for one to two fingers between the closure and the jaw or straps. Equus also recommends a couple of finger widths at the throatlatch so the horse can lower its head without the mask pulling tight.
The closure should stop the mask from sliding, not clamp it to the face. If the mask only stays in place when it is tight enough to leave a deep line in the hair, the problem is likely the size or cut.
7. Test normal movement before turnout
Let the horse lower its head, walk, turn, chew, and graze in hand. Watch the eye panels, cheek edge, ear pockets, and closure as the head changes position. Then inspect the mask after about 30 to 60 minutes of movement or controlled turnout.
Look for rotated fabric, new hair laid sharply in one direction, dampness under the trim, grit inside the mask, or a closure that has shifted. A mask that looks perfect while the horse stands still but rubs during grazing is not fitted correctly.
The two checks below test the fitted mask rather than the size on its label. If the mesh touches the lashes or the edge pulls during grazing, remove the mask and reassess the size or cut.
Too small, too large, or the wrong shape?
Rubbing is not always solved by buying a larger size. Use the pattern of movement and the location of the hair or skin change to identify the likely cause.
| What you see | More likely cause | First action |
|---|---|---|
| Mesh or seam touches the lashes | Too small, wrong eye shape, or the mask has slid forward | Remove it immediately and compare a different size or cut with more eye clearance. |
| Deep line under the jaw or at the throatlatch | Closure is too tight, or the mask is too short through the jaw | Loosen to the one- or two-finger check; if it will not stay secure, change the size or style. |
| Rub on the bony cheekbone | Lower edge ends too high or the mask rotates | Re-center it and check the edge position; replace the cut if the edge returns to the bone. |
| Hair loss behind the ears or at the poll | Ear pocket is too short, top is too tight, seam is rough, or mask is too small | Inspect the pocket and seam, then compare the ear and head measurements. |
| Forelock is crushed or worn | The crown or seam traps the hair, or the mask lacks a forelock opening | Try a forelock-friendly design; do not use extra tightness to hold the hair down. |
| Mask sags, rotates, or leaves cheek gaps | Too large, too long, or not structured for the horse’s head | Check the smaller size and a different shape; do not rely on a tighter closure alone. |
| Horse rubs the mask off but no contact rub is visible | Eye irritation, dirt, flies, anxiety, or a mask that shifts during movement | Remove it, clean and inspect the mask and eyes, then retry only after the cause is clear. |
If both sides show the same light flattening of hair with no redness, heat, swelling, or sensitivity, it may be normal contact rather than an injury. Still check the area daily. Hair loss, a scab, or a sore means the repeated friction has gone too far.
Where horse fly masks rub and what to do
Around the eyes or lashes
This is the highest-priority fit problem. Do not pad, tape, or tighten near the eye. Remove the mask, look for dirt or damaged mesh, and check both eyes in good light. Squinting, tearing, discharge, swelling, cloudiness, or a closed eye needs veterinary attention; a fly mask should never be used to hide an eye problem.
The Brooke Welfare Interpretation Manual on equid eyes specifically warns that fly masks can cause abrasion or contamination when they rub or are not kept clean. That is why eye clearance and daily inspection come before insect coverage.
At the jaw, cheek, or muzzle
Check whether the lower edge is ending on a bony point, whether the closure is tight, and whether the horse is chewing or grazing when the rub appears. A soft fleece edge may make a correctly positioned mask more comfortable, but it cannot create missing space. If the edge keeps landing on the cheekbone, choose a different cut rather than adding more pressure.
Behind the ears, at the poll, or through the forelock
These areas usually point to length, ear-pocket shape, a rough seam, or a crown that is too tight. Compare the actual ear and poll measurements with the brand’s chart. A forelock-friendly opening can reduce hair pressure, but it will not make a narrow crown fit a broad forehead.
When the mask is clean but the horse still rubs
Separate two behaviors: rubbing because the mask is causing discomfort, and rubbing because flies, an eye problem, or a new object is bothering the horse. Remove the mask and inspect the contact zones first. If the horse has no visible injury and is simply nervous about application, the DVM-reviewed guidance from Chewy suggests using calm, reward-based introduction rather than forcing the mask onto the face.
Do not add loose cords, elastic, or improvised straps to stop a horse from removing a mask. They can create an entanglement risk. Generic halters should also not be left on for turnout just to hold a mask in place; use a mask specifically designed for halter or bridle use when that is the intended job.
Linked options by fit problem
These products are included as fit-oriented alternatives, not as a second “best fly masks” ranking. None can make a mask safe when the eye opening touches the lashes or the shell pinches the jaw.
Fit-focused mask options
-
Manna Pro Pro-Force Horse Fly Mask, No Ears
Manna Pro
A lightweight, adjustable no-ear fly mask with UV protection. It is a practical baseline for checking whether the problem is coverage preference or a poor fit around the eyes, jaw, and closure.
- No ear coverage for horses that dislike ear pockets
- Fit use
- A simple no-ear mask when adjustable closure fine-tuning matters
- Sizing
- See product page
-
Harrison Howard All-Round Mesh Horse Fly Mask with Fleece Padded Edging
Harrison Howard
A mesh mask with fleece-padded edging and five size options. The padding can soften contact at the edge, but it is only a comfort layer; it cannot make an eye area or closure that is too tight safe.
- Fleece-padded edging for softer contact
- UV-protective mesh construction described
- Fit use
- A correctly sized mask where a soft edge may reduce mild cheek or jaw friction
- Sizing
- See product page
-
Kensington UViator CatchMask Horse Fly Mask, No Ears
Kensington
A premium no-ear UViator CatchMask with forelock-freedom web trim and 90% UV blocking according to the product documentation and Kensington's guide. Its design is useful when eye clearance, forelock pressure, or bridle compatibility is the main fit concern.
- 90% UV blocking intended for the UViator line
- Forelock-freedom web trim
- CatchMask design for handling and bridle-oriented use
- Fit use
- Forelock-sensitive horses or riding setups that need a no-ear CatchMask design
- Sizing
- See product page
Review the linked product page before purchasing.
Manna Pro Pro-Force: simple adjustable no-ear baseline
That adjustability helps with a mask that is secure but not tight. It does not solve a mesh panel that sits too close to the eye, and the no-ear/no-nose design is a limitation for horses that need those areas protected.
Best fit: A horse that tolerates earless coverage and needs an affordable, adjustable mask to compare against a slipping or overly tight current model.
Skip if: The horse needs ear or muzzle coverage, or the three-size range does not match the recorded head measurements.
Check current price on Amazon →Harrison Howard All-Round Mesh: soft fleece-padded edging
The Harrison Howard All-Round Mesh model is the most directly relevant option when the underlying size is correct but a hard or abrasive edge is contributing to a mild cheek or jaw rub.
Fleece padding is a contact-layer feature, not a substitute for eye clearance. Keep the fleece clean and dry because a damp or dirty edge can increase friction. If the horse already has a sore, a closed eye, or a mask that pinches, remove the mask and solve the fit problem before trying a padded version.
Best fit: A horse with a correctly measured head that needs a softer edge around the face, cheeks, or jaw.
Skip if: The mask rotates, the eye panels collapse, the lower edge sits on the cheekbone, or the closure must be tightened to keep the mask on.
Check current price on Amazon →Kensington UViator CatchMask: forelock freedom and high UV blocking
The Kensington UViator CatchMask is a premium alternative for a different fit problem: a horse that needs generous eye clearance, has a pressure-sensitive forelock, or needs a no-ear mask designed around handling and bridle use. Kensington’s own fly mask guide lists 90% UV blocking for the UViator line, a streamlined fit for bridle use, and a one- or two-finger adjustment at the straps.
Best fit: A horse that needs no-ear coverage, forelock-friendly construction, higher UV filtering, or a CatchMask-style setup for riding and handling.
Check current price on Amazon →Daily inspection and cleaning
PetMD recommends checking a fly mask for dirt and damage regularly, and Chewy’s DVM-reviewed guide advises removing the mask at least once a day to clear debris and check for injuries. That daily removal is more useful than a one-time perfect adjustment because a horse can sweat, roll, encounter mud, or stretch a closure during turnout.
Use this short routine:
- Remove the mask and inspect the eyes, eyelids, cheeks, jaw, poll, and behind the ears.
- Feel the mask’s inside surface for grit, dried sweat, rough threads, broken mesh, or a hard fold.
- Wash according to the manufacturer’s instructions with a horse-safe soap, then air-dry fully.
- Keep a clean spare available when the first mask is wet or being washed.
- Replace the mask when the eye mesh is damaged, the trim becomes rough, the closure no longer holds, or the shape no longer stays clear of the eyes.
Do not put a damp, muddy mask back on a horse just because the flies are active. Moisture and debris turn a small fit issue into a friction and contamination problem.
When to stop using the mask and call a veterinarian
Remove the mask and seek veterinary advice promptly for:
- Squinting, persistent blinking, tearing, discharge, swelling, cloudiness, or a closed eye
- Marked light sensitivity or a sudden change in behavior
- A hot, open, swollen, bleeding, or painful rub
- A rub that keeps spreading or does not improve after removing the source of friction
- Repeated mask removal accompanied by head shaking, face rubbing, or obvious distress
The PetMD eye-care guidance notes that eye problems can worsen quickly. A fly mask can protect a healthy eye from insects, but it cannot treat a scratch, ulcer, infection, or other cause of pain.
Frequently Asked Questions
How tight should a horse fly mask be?
A mesh mask should be moderately snug and stable, with about one to two fingers of room between the closure and the jaw or straps. It should not leave a deep pressure line, restrict chewing or grazing, or need to be tightened to compensate for a poor size or cut.
Should the mesh touch a horse’s eyelashes?
No. Even light contact can irritate the eye, especially when the mask moves during blinking, grazing, or rolling. Check from the front and both sides; if the eye area touches the lashes, remove the mask and choose a different size or shape.
Will sizing up stop fly mask rubbing?
Sometimes, but not automatically. Sizing up can help a broad forehead, prominent facial bones, or a closure that cannot leave finger room. It can also make the mask sag, rotate, and expose the cheeks. If only one dimension is wrong, a different cut is often safer than simply going larger.
Is fleece trim enough to prevent rubbing?
Fleece can soften contact when the mask already fits correctly and the edge is clean. It cannot create eye clearance, widen a tight jaw, stop a mask from rotating, or protect a sore. Treat fleece as a comfort feature, not a fit correction.
Can a horse wear a fly mask all day or overnight?
Some horses can wear a correctly fitted mask for long periods, including overnight, but the mask still needs to be removed and checked at least daily. Turnout conditions, dust, rain, sweating, herd behavior, and the horse’s individual eye or skin history may require more frequent checks or shorter wear.
How long should I test a new fly mask?
Start with a calm, short in-hand session, then observe the horse lowering its head, walking, turning, and chewing. For a first turnout, check the mask after about 30 to 60 minutes and inspect the skin and eyes. Do not make the first test an unattended all-day session.
When should a fly-mask rub be checked by a veterinarian?
Ask a veterinarian when the skin is open, hot, swollen, painful, draining, or not improving after the mask is removed. Eye symptoms such as squinting, tearing, cloudiness, discharge, or holding the eye closed deserve prompt attention even if the rub looks minor.
Bottom line
The safest fly mask is not the tightest one and not automatically the largest one. Measure the horse against the exact product chart, keep the eye panels clear, leave finger room at the closure, position the lower edge away from the cheekbone, and watch the mask in motion. A soft trim or forelock-friendly design can help with a specific pressure point, but no accessory replaces a correct size, clean contact surface, and daily inspection.
For coverage comparisons and the existing product roundup, see Best Horse Fly Masks. If the problem is actually a blanket rubbing at the shoulder or withers, use the separate horse blanket rubbing diagnosis guide instead.
Sources and further reading
- Kensington: How to Measure Your Horse for a Fly Mask — five head and coverage measurements, sizing decisions, and signs of an undersized or oversized mask.
- Kensington: Fly Mask Guide — eye clearance, cheekbone position, earless versus ear coverage, and strap adjustment.
- Equus: Making Sure Your Horse’s Fly Masks and Boots Fit — practical checks for eyes, muzzle, throatlatch, ears, cleaning, and replacement.
- PetMD: Why Do Horses Wear Masks? — daily inspection, two-finger closure guidance, and eye symptoms that need veterinary care.
- Chewy: Keep Pests Away With Horse Fly Masks and Boots — DVM-reviewed fit and maintenance guidance, including daily removal.
- The Brooke: Welfare Interpretation Manual, Chapter 2: Eyes (PDF) — abrasion and contamination risks from poorly fitted or dirty fly masks.