

 Published sources
 Product details checked
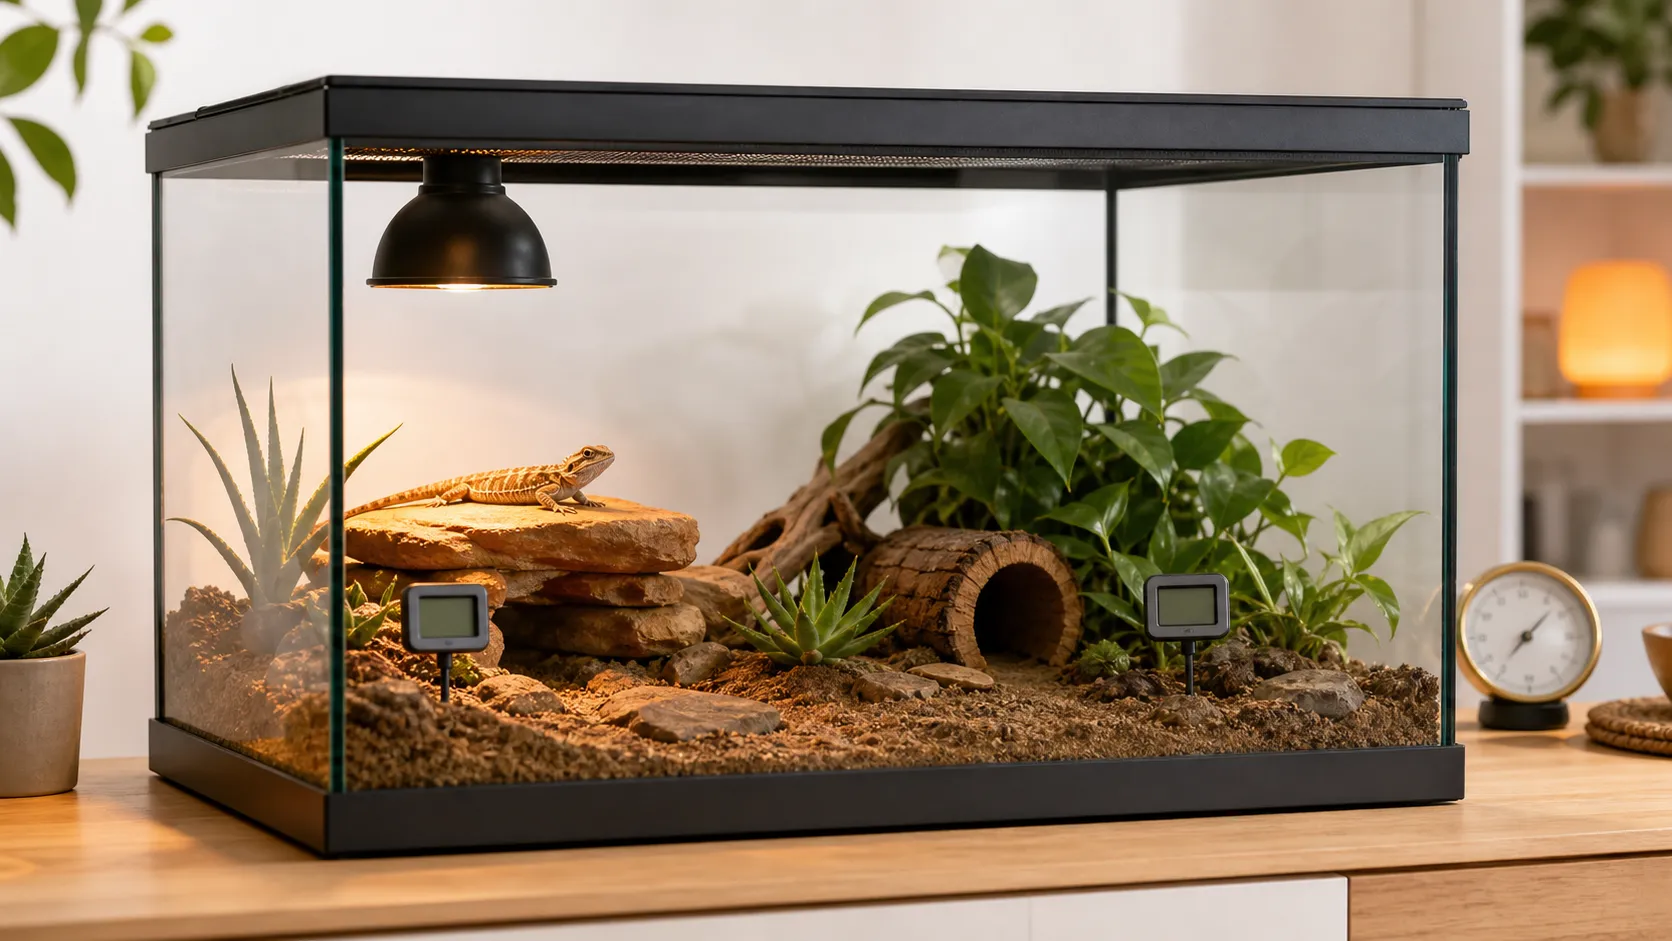
A reptile hygrometer can display a believable number and still tell you the wrong story. A sensor at the lid, in a mist stream, under a heat lamp, or beside a water bowl is measuring its own microclimate—not the humidity your reptile experiences in its hide or on its usual perch.
Quick answer: Place the sensor at the animal’s normal activity height in the zone you want to understand. Use one sensor for a defined cool-side baseline only when the enclosure is small and the care plan allows it; use two independent sensors to compare warm and cool sides in a larger or strongly zoned enclosure. Calibrate every sensor in a sealed container against a known 75% RH reference, then compare them side by side before mapping them to different locations. Use an infrared thermometer for surfaces, not for air humidity.
Humidity is species-specific and location-specific. The Merck Veterinary Manual’s reptile housing guidance recommends using hygrometers and explains that both overly dry and overly humid conditions can create health problems. Its species husbandry table makes the more important point: target ranges vary substantially between reptiles. This guide explains how to get a trustworthy reading; it does not replace a current species care sheet or an exotics veterinarian.
In this guide, you’ll learn:
- Where to place a hygrometer on the warm side, cool side, and inside a humid hide
- Why warm- and cool-side relative humidity readings can legitimately differ
- When a digital gauge is more useful than an analog dial
- How to perform a 75% RH calibration check and record an offset
- How to compare several sensors without confusing sensor error with a real gradient
- Which product options fit each measurement job—and what they do not measure
What a reptile hygrometer actually measures
Most enclosure hygrometers report relative humidity (RH): the amount of water vapor in the air compared with the maximum that air can hold at its current temperature. RH is therefore not a fixed amount of water. Warm air and cool air can show different percentages even when the enclosure has the same overall moisture source.
That is why a warm-side reading and a cool-side reading are not supposed to be identical. Heating often lowers the displayed RH on the warm side, while a shaded, less ventilated cool side may read higher. The difference becomes more pronounced after misting, when a water bowl is refilled, or when wet substrate is close to one sensor. A difference is useful information only when the sensors themselves have been checked.
There is no universal “good reptile humidity” number. For example, the Merck table lists different ranges for corn and rat snakes, boas, ball pythons, leopard geckos, and bearded dragons. The RSPCA leopard gecko guidance specifies a relatively dry cool end, while its crested gecko guidance describes a lower normal range with temporary increases after misting. The RSPCA royal python care sheet also places the hygrometer at the cool end and distinguishes a brief humidity boost from persistently wet conditions.
Use the species target to decide whether a reading is acceptable. Use placement and calibration to decide whether the reading deserves trust.
Where to place a reptile hygrometer
Place the sensing element—not merely the display—where the reptile breathes, rests, climbs, or shelters. For a probe model, the probe is the sensor. For an all-in-one digital or analog gauge, the gauge body must be in the intended microclimate unless the manufacturer explicitly provides a remote sensor.
The best position depends on the animal’s behavior:
- Terrestrial reptiles: Place the sensor at the height of the animal’s body in the usable air space, often toward the cool side. Do not bury it under substrate or press it against the floor if the animal rests above it.
- Arboreal reptiles: Place the sensor at the height of the main perch or sleeping area. A floor reading can miss the warmer, drier air where the reptile spends most of its time.
- Species with a humid hide: Measure the general enclosure air separately from the humid hide. A humid hide is meant to create a localized retreat, not to turn the entire enclosure into a wet chamber. The RSPCA’s hide guidance explains this localized-use principle.
- Large or strongly zoned enclosures: Use two sensors so the warm and cool sides are not inferred from a single number.
A practical placement map
| Zone | Sensor position | What it tells you | Avoid |
|---|---|---|---|
| Cool-side air | Animal height, shaded and away from the water bowl | Baseline humidity in the main retreat area | Lid, ventilation exhaust, or a damp corner |
| Warm-side air | Animal height near the warm hide, but outside the direct heat beam | How the heated zone changes RH | Directly under the lamp or against a hot surface |
| Humid hide | Just inside or at the entrance, depending on the care plan | Whether the local retreat is staying humid | Using this reading as the whole enclosure average |
| Arboreal perch | At the height of the normal sleeping or feeding perch | The microclimate the animal actually uses | Measuring only at the dry floor |
| External display | Outside the enclosure, with the probe routed safely inside | A readable display without placing electronics in spray | Treating the outside display temperature as the inside temperature |
Keep the probe out of direct spray, condensation, and standing water unless its documentation specifically rates it for that use. “Remote probe” does not automatically mean “waterproof probe.” Route and secure the cable so the reptile cannot chew it, move it, wrap around it, or pull the sensor into a different zone. Check the location after every change to substrate, decor, hides, or misting direction.
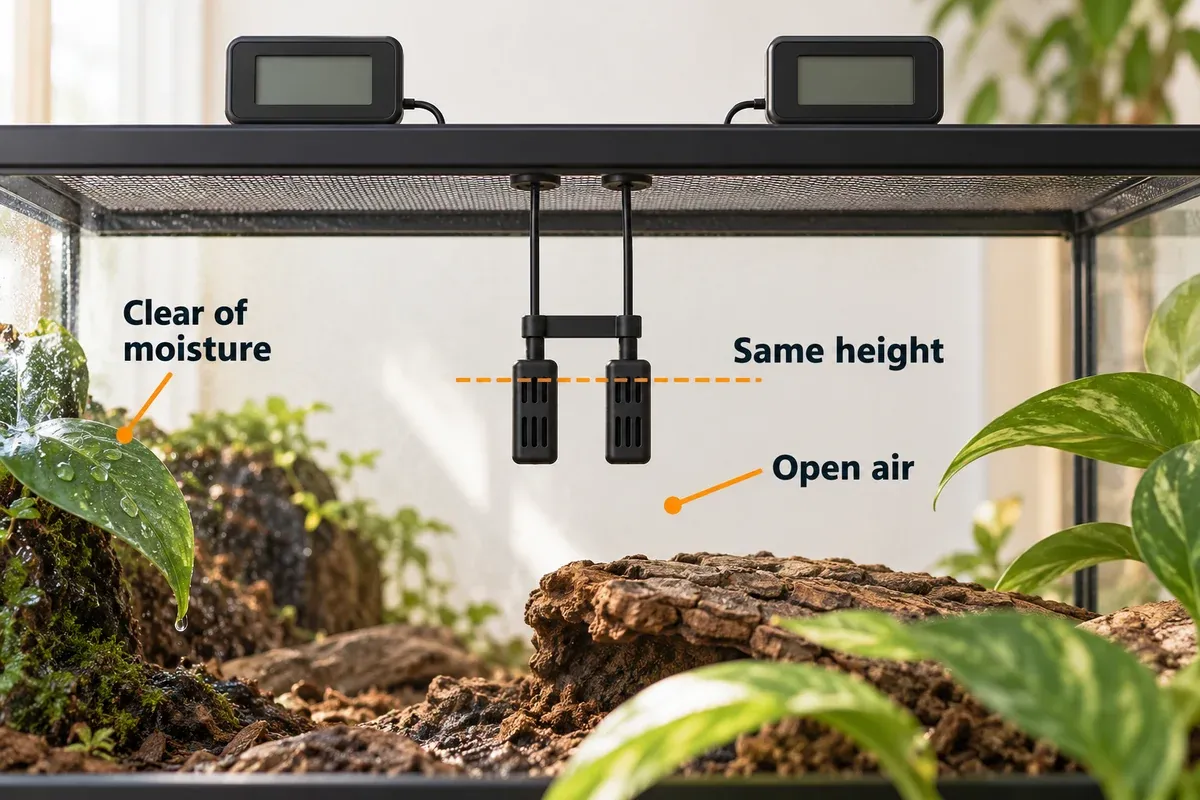
The example below keeps both sensing elements in the same unsprayed air space. Use a known reference separately when checking calibration.
Warm side versus cool side: how to read the difference
If your enclosure has a thermal gradient, it can also have a humidity gradient. A warm side that is more ventilated and heated may display a lower RH than a shaded cool side. That does not automatically mean the warm side is dangerously dry or that the cool side is dangerously wet.
The useful question is not “Which side should show the target number?” It is “What humidity does my species need in each usable area, and is the animal able to choose between them?” A single sensor cannot answer that for both ends.
For a two-sensor setup:
- Use the same model where practical, or calibrate different models before comparing them.
- Place both probes at approximately the same height and away from direct spray.
- Record morning, evening, and post-misting readings for at least 24 hours.
- Note room temperature, misting time, water-bowl changes, and whether the animal was using a hide.
- Compare the readings with the species-specific care plan rather than trying to make both displays match.
| Pattern | Likely interpretation | First check |
|---|---|---|
| Warm side lower, cool side within target | A normal microclimate difference may be present | Confirm both sensors are at animal height and calibrated |
| Both sides low | Room air, excessive ventilation, dry substrate, or insufficient moisture source may be contributing | Check the species target, room RH, substrate, and ventilation together |
| Cool side high all day | Poor air exchange, wet substrate, or a sensor beside the bowl may be keeping the local zone damp | Check for condensation, stagnant corners, and bowl placement |
| One side changes sharply after misting | The sensor may be too close to the spray path or wet surface | Move the sensor to representative air space and retest |
| Two sensors disagree in the same location | Sensor offset, battery, response time, or drift is more likely than a real gradient | Run a sealed side-by-side comparison |
Avoid solving a high reading by simply closing ventilation. The Merck Veterinary Manual’s reptile husbandry guidance warns that reducing ventilation to retain humidity can contribute to skin and respiratory problems. Correct the local cause while preserving the species’ need for fresh air.
Analog versus digital hygrometers
Digital hygrometers
Digital sensors are usually the practical primary monitor because the number is easier to read, the display can sit outside the wet zone, and many models offer min/max memory or a history log. A probe model also lets you place the sensor at animal height while keeping the electronics accessible.
The trade-off is that a digital display can look precise without being accurate. A reading of 54% is not automatically better than an analog dial pointing near 55%. Check the sensor against a reference, replace weak batteries, and record the correction if the device has no adjustment function.
Zoo Med’s Digital Combo Thermometer Humidity Gauge is an example of a digital unit with independent remote probes for temperature and humidity. That design is useful when you need the sensor at one enclosure location and the display outside the enclosure. It is still a measurement tool, not proof that the displayed RH is accurate without a calibration check.
Analog hygrometers
Analog dials are simple, do not need a battery, and can serve as a quick visual backup. They are often harder to read precisely, may have a coarse scale, and can drift after transport or long exposure to enclosure moisture. A dial that has always shown “about 60%” has not necessarily been verified.
Zoo Med’s Precision Analog Thermometer shows the typical dual-gauge format with separate temperature and humidity scales. Treat that type of gauge as an instrument that needs independent verification, not as a self-validating decoration.
For most keepers, the sensible combination is a calibrated digital sensor for the primary reading plus an analog gauge only if it has been checked and gives a useful second indication. Do not use an unverified analog dial to “correct” a digital sensor just because its number looks more familiar.
How to calibrate a hygrometer with a 75% RH reference
A calibration check does not change the sensor’s electronics. It tells you whether the sensor reads high or low at a known humidity and lets you adjust it or record an offset.
The official Boveda calibration instructions use a sealed test environment and a 75% RH reference. Follow the instructions for your specific reference pack; the following workflow captures the important control points.
- Remove the sensor from the enclosure. Let visible condensation dry from the outside. Do not calibrate a sensor while it is sitting in wet substrate, under a mist nozzle, or beside a water bowl.
- Use an airtight bag or container. Put the hygrometer and reference pack in the sealed environment without letting the sensor touch the pack. Do not add water, substrate, or an open dish.
- Keep the test at a stable room temperature. The Boveda instructions specify roughly 65–75°F for the test. Keep the container out of direct sun and away from heaters.
- Wait at least 24 hours. Opening the bag early changes the test environment. If the display is slow to settle, give it more time.
- Read the sensor before opening the container. If the reference is 75% and the display reads 68%, the sensor is reading 7 percentage points low. Record an offset of +7. If it reads 82%, record −7.
- Adjust only if the device provides an adjustment. Use the manufacturer’s procedure. For an analog screw, make small changes; never force it. For a digital sensor without adjustment, keep the written correction beside the enclosure log.
- Seal and retest. After an adjustment, repeat the 24-hour test. A first adjustment is not proof that the new position is correct.
- Return the sensor to the enclosure and label it. Write the date, reference point, observed value, and correction on your care log.
The 75% reference is a test point, not a reptile target. A sensor that is accurate at 75% can still be less accurate at 30–40% because sensors may have non-linear error. If humidity control is especially important, a second reference point such as a 32% kit can reveal more of the sensor’s behavior. Boveda recommends repeating the check periodically; a six-month interval is a useful routine, with an extra check after a battery leak, a sensor gets soaked, the display is dropped, or readings suddenly change.
Do not calibrate inside the terrarium. The animal, substrate, heat gradient, ventilation, and water sources make the enclosure a poor reference environment.
How to compare multiple sensors without fooling yourself
Before assigning three sensors to three zones, find out how they compare in one controlled location. Otherwise, you cannot tell whether a 12-point difference comes from the enclosure or from the instruments.
Side-by-side comparison protocol
- Calibrate each sensor, or at least run the same sealed reference test for each one.
- Put the sensors together in the same sealed container with the reference pack. Keep probes separated and do not block the sensing openings.
- Wait until all displays have stabilized. Give slow analog gauges extra time rather than comparing the first numbers you see.
- Record every display and calculate its correction relative to the reference.
- If one unit remains a large outlier after a second test, replace it or keep it only as a clearly labeled rough indicator.
- Place the verified sensors in the warm and cool zones one at a time. Mark their exact positions with a photo.
- Apply the recorded correction when interpreting the enclosure log. Do not average unverified displays into a new “middle” number.
For example:
| Sensor | Reading in a 75% test | Working correction | Meaning in the enclosure |
|---|---|---|---|
| A | 75% | 0 points | Use the displayed value |
| B | 71% | +4 points | Add four points to later readings |
| C | 80% | −5 points | Subtract five points from later readings |
The correction is a practical record, not a claim that the sensor is perfect across its entire range. Recheck after moving a sensor from a dry cool side into a wet hide, because condensation and contamination can permanently change a sensor’s response.
Tools matched to the measurement problem
These products solve different parts of the measurement workflow. The table is intentionally not a generic “best hygrometers” ranking.
Tools matched to the measurement problem
-
Veanic 2-Pack Mini Digital Thermometer/Hygrometer with Probe
Veanic
Two compact digital thermometer/hygrometer displays with external probes for comparing separate enclosure zones without using the thermostat display as the only reading.
- Two displays make warm-side and cool-side placement practical
- External probe reports temperature and humidity at the chosen location
- the product documentation specifies a -58°F to 158°F temperature range
- Best for
- Independent warm- and cool-side ambient checks on a small budget
-
Govee Smart Bluetooth Thermometer Hygrometer H5074
Govee
Product selected for the stated use case; confirm fit with the manufacturer's specifications.
- Historical readings, alerts, and export in the phone app
- Bluetooth range is described as up to 262 feet in open conditions
- Useful for spotting overnight humidity trends rather than only reading one moment
- Best for
- Trend tracking, phone alerts, and a second humidity check
-
Boveda One-Step Hygrometer Calibration Kit 75% RH
Boveda
A sealed 75% RH test pack for checking digital or analog hygrometers before changing a ball python enclosure.
- Controlled 75% RH calibration test
- Useful for digital and analog hygrometers
- Helps identify a bad sensor before a substrate or ventilation reset
- Best for
- Checking whether a hygrometer is reading accurately
-
Etekcity Lasergrip 774 Infrared Thermometer
Etekcity
Non-contact infrared thermometer with laser targeting, adjustable emissivity, and a 12:1 distance-to-spot ratio.
- Reads surface temperature quickly without moving hides or touching the reptile
- 12:1 distance-to-spot ratio is practical for a terrarium
- Adjustable emissivity improves readings across slate, glass, and other surfaces
- Best for
- Calibrating basking and cool-side surface temperatures
Review the linked product page before purchasing.
Veanic 2-pack: a low-cost warm/cool comparison
Check current price on Amazon →the product documentation specifies an external probe, a temperature range of −58°F to 158°F, and stated accuracy of ±2°F and ±5% RH. That makes it useful for mapping two ambient zones on a budget. The probe is not water-resistant, so keep it out of direct mist and standing water. It also does not replace an infrared check of the basking surface.
Govee H5074: useful history, not a control system
The Govee H5074 Bluetooth Thermometer Hygrometer is a better fit when a single display hides the problem. The app can show history, alerts, and exported readings, making overnight changes and post-misting spikes easier to see.
Check current price on Amazon →Walls, glass, and enclosure placement reduce the useful range. This sensor is for observing trends; it is not waterproof by default and it is not a misting controller or a substitute for a species-specific humidity plan.
Boveda 75% kit: check the instrument before changing the enclosure
The Boveda One-Step Hygrometer Calibration Kit 75% RH is the small purchase that can prevent a large, unnecessary enclosure redesign.
Check current price on Amazon →Use it in a sealed bag or container with the sensor for at least 24 hours. It checks the gauge; it does not humidify the terrarium, and it does not prove accuracy at every humidity level. Keep the pack out of the enclosure and follow the official instructions linked above.
Etekcity Lasergrip 774: verify surfaces, not humidity
The Etekcity Lasergrip 774 is included because a humidity reading is often blamed for a temperature problem. Its infrared sensor checks the surface of a basking ledge, warm hide, or cool decor without touching it.
Check current price on Amazon →The 12:1 distance-to-spot ratio is practical for enclosure checks. It measures surfaces, not air temperature or humidity, and it cannot accurately measure through glass. Keep the laser away from eyes and follow the device safety instructions.
Troubleshooting misleading hygrometer readings
The reading stays high
Check whether the sensor is in the spray path, touching wet substrate, beside the water bowl, or trapped in a poorly ventilated corner. Look for condensation on the enclosure and for substrate that stays wet longer than the species plan calls for. If the whole enclosure is persistently humid, improve the underlying air exchange rather than covering vents until the display falls.
The reading stays low
Move the sensor out of the direct heat beam and away from a fan or ventilation outlet. Check room humidity, substrate moisture, misting timing, and whether the sensor is sitting higher than the animal’s normal retreat. A low display at the lid does not prove that the cool hide is equally dry.
Two sensors disagree by a lot
Put them together in the same sealed calibration environment. If they disagree there, the issue is calibration, battery, drift, response time, or a damaged sensor. If they agree in the container but differ in the enclosure, the enclosure really does have a microclimate difference—or one sensor is being hit by spray, heat, or a wet surface.
The number changes too quickly
Fast changes usually mean the sensor is close to a local event: mist, a bowl, a hot beam, a door opening, or a ventilation current. That may be useful if you are intentionally logging that event, but it is not a representative baseline. Move the sensor to animal-level air space and log the event separately.
The sensor reads normally but the reptile is shedding poorly
Do not diagnose from the hygrometer alone. Check the species target, the humid-hide condition, hydration, skin or eye changes, temperature gradient, and other husbandry factors. If a health problem persists, contact an exotics veterinarian. A single RH number cannot rule out a husbandry or medical problem.
A simple 24-hour hygrometer check
Use this protocol after calibration and after any major enclosure change:
- Write down the species-specific humidity plan and whether it calls for a humid hide or a temporary post-misting increase.
- Place calibrated sensors at the cool-side and warm-side animal heights. Keep them away from direct spray.
- Photograph the positions so you can put them back in the same places.
- Record room temperature and RH, enclosure readings, and the time of each misting or bowl refill.
- Check at minimum after the enclosure has stabilized, in the morning, in the evening, and after the normal misting event.
- Use an infrared thermometer separately for the warm surface and cool surfaces.
- Compare corrected readings with the species plan. Do not chase a warm-side number by removing the cool retreat or by making the entire enclosure wet.
- Change one variable at a time, then repeat the log long enough to see the new daily pattern.
This creates a useful baseline. It also shows whether the enclosure is briefly reaching a target after misting or staying there all day, which are different husbandry situations.
Frequently Asked Questions
Where exactly should a hygrometer go?
At the animal’s normal activity height in the microclimate you want to monitor. For a terrestrial reptile that is often the cool-side air or the entrance to a usable hide; for an arboreal reptile it is usually the main perch height. Avoid the lid, direct heat, direct spray, and wet substrate.
Should I put one hygrometer on the warm side and one on the cool side?
Use two when the enclosure is large, strongly ventilated, or divided into obvious zones. One sensor cannot describe both ends. Calibrate them together first so a real gradient is not confused with sensor error.
Is digital better than analog?
Digital is usually easier to read and log, especially with an external probe. Analog can be a useful battery-free backup. Neither is trustworthy just because it is new; verify both against a reference and record any offset.
Can I calibrate the sensor inside the terrarium?
No. The enclosure is not a controlled reference because the heat gradient, ventilation, substrate, animal, bowl, and misting pattern are all changing. Use a sealed bag or container with a known RH reference.
Does a 75% calibration result mean my reptile needs 75% humidity?
No. 75% is the reference point used to check the instrument. Set the enclosure from the species-specific care plan, not from the calibration number.
Why do my warm- and cool-side readings differ?
Temperature, airflow, decor, substrate, water sources, and misting create different microclimates. A moderate difference can be real and useful. A large disagreement between sensors in the same location points to calibration, battery, or sensor drift.
How often should I recalibrate?
Use a six-month check as a practical routine, and test sooner after a sensor gets wet, a battery leaks, the display is dropped, a season changes the room conditions, or a reading suddenly stops matching the enclosure pattern.
Can an infrared thermometer check humidity?
No. Infrared thermometers measure surface temperature. They are useful for basking ledges and hides, but they do not measure air RH.
Sources and related guides
The strongest references used for this guide are:
- Merck Veterinary Manual: Providing a Home for a Reptile for enclosure gradients, hygrometers, ventilation, and general husbandry risks.
- Merck Veterinary Manual: Important Husbandry Requirements for Selected Reptiles for species-specific humidity ranges.
- Merck Veterinary Manual: Management and Husbandry of Reptiles for ventilation and humidity context.
- RSPCA leopard gecko guidance, RSPCA crested gecko guidance, and the RSPCA royal python care sheet for practical species examples.
- Boveda’s official hygrometer calibration instructions for the sealed 75% RH test process.
- Zoo Med’s digital combo gauge and analog precision gauge pages for manufacturer-described sensor formats.
For connected husbandry decisions, see the reptile thermostat probe placement guide, crested gecko humidity setup guide, and ball python humidity troubleshooting guide.
Bottom line
Place the sensor where the reptile actually uses the enclosure, calibrate it before trusting the number, and compare sensors side by side before assigning them to warm and cool zones. A calibrated digital probe plus a written 24-hour log is more useful than several unverified gauges. Keep the species target, ventilation, humid hide, and temperature surfaces in the same decision—not just the percentage on one display.