

 Published sources
 Product details checked
A canister filter that will not prime is usually not a dead filter. After cleaning, the water path may contain air, a hose may be drawing air through a tiny split, or a gasket may no longer be sealing. A kinked intake hose, closed quick-disconnect, clogged intake strainer, or dry impeller well can create the same symptom.
Quick answer: Unplug the filter, keep the canister below the aquarium’s water level, straighten every hose, confirm the intake stays fully submerged, and fill or prime the canister according to its manual. Check that the valves are fully open. If the filter still hums without flow, inspect the motor-head O-ring, intake connections, impeller, shaft, bushings, and filter media in that order. Never run a canister pump dry just to clear an airlock.
In this guide, you will learn:
- How to tell an airlock from an intake-side air leak or clogged media
- The safe order for restarting a canister filter after maintenance
- How to inspect and lubricate an O-ring without damaging the seal
- When a hose, quick-disconnect, impeller, or filter foam is the likely replacement
- Which model-specific parts can help and what each one does not fix
- When to stop troubleshooting and replace the complete filter or ask for service
The Prime Rule: Make the Water Path Continuous
The prime rule: The intake line must stay full of water from the aquarium to the canister, and the canister must sit below the tank waterline. If air can enter on the suction side, the pump may hum normally while moving little or no water. A dry motor does not prove that the motor has failed.
Start with the symptom rather than buying a part. The same filter can fail to prime for different reasons after different maintenance jobs.
| What you see | Most likely cause | Test with the filter unplugged | First fix |
|---|---|---|---|
| The intake hose is mostly air-filled and the canister stays empty | Broken siphon, hose loop, high canister position, or closed valve | Lower the canister and inspect the entire intake path from the tank to the valve block | Straighten the hose, submerge the intake, open the valve, and use the model’s manual-prime method |
| The canister fills, then loses prime overnight | Intake-side air leak at a hose, connector, or O-ring | Look for a hard, split, flattened, twisted, or dirty seal; remember that an air leak may not drip water | Clean and seat the seal, apply a thin film of aquarium-safe silicone, or replace the exact part |
| The filter fills but only hums, clicks, or vibrates | Air trapped at the impeller, debris, worn shaft, or damaged impeller | Remove power, close the valves, and inspect the impeller well and rubber supports | Remove grit and hair; replace the model-matched impeller or service kit if worn |
| Flow starts and then becomes weak | Blocked intake, collapsed hose, clogged foam, or packed fine media | Check the strainer, hose bends, outlet, and mechanical media separately | Clean the restriction and preserve established biological media |
| The return line spits bubbles or the filter gurgles continuously | Air entering before the pump or a high spot holding air | Watch the intake line while the pump is off; inspect each joint and hose end | Reseat or replace the leaking connection and route the hose with fewer high spots |
| Water leaks around the lid or valve block | Pinched gasket, cracked housing, damaged connector, or overfilled canister | Do not power the filter; dry the outside and locate the first wet joint | Replace the damaged seal or fitting before restarting |
Safe Restart Checklist After Cleaning
1. Protect the aquarium first
Unplug the canister before opening a valve block, motor head, or impeller cover. If the filter will be off for more than a short inspection, keep fish oxygenated with surface agitation or a battery air pump. Do not leave livestock in a stagnant tank while repeatedly testing a pump.
2. Put the canister below the waterline
An external canister relies on a water column and gravity-assisted siphon. Set it on a stable, dry surface below the aquarium. A long rise from the tank to the canister, a canister on a high shelf, or a hose that climbs and falls in a loop makes priming harder and traps air.
3. Check the intake before touching the motor
The intake strainer must be underwater and clear of a vortex, floating debris, and substrate. Make sure the intake tube has not shifted above the surface during cleaning. Inspect the hose for sharp bends, flattened sections, soft spots, and a loose connector. The intake side deserves priority because a small suction leak can admit air without leaving a visible puddle.
4. Open the water path fully
Make sure the quick-disconnect or AquaStop block is seated and its valves are in the operating position. Follow the exact valve sequence in the filter’s manual; never force a stiff lever. Before disconnecting a full canister, close the valves so water does not siphon onto the cabinet.
5. Prime without power
Use the filter’s manual-prime handle, button, or fill procedure if it has one. Some canisters require the canister body and intake line to be filled before the motor is switched on. Wait for water to reach the return line in a continuous stream. Do not use the electrical pump as a dry siphon.
6. Release trapped air carefully
When the canister is full and the water path is open, gently rock the canister a small amount from side to side if the manual permits it. A few bubbles may escape during startup. Stop if the unit leaks, rattles violently, or runs without water movement. Never shake a heavy, water-filled canister or lift it by the hoses.
7. Start the pump only with water at the impeller
Once water is reaching the canister and the return path is open, plug in the filter. Listen for the change from air-heavy gurgling to steady water movement. If the motor only hums, switch it off promptly and inspect the impeller instead of repeatedly cycling it.
8. Recheck every seal after the first restart
Look at the motor-head seam, valve block, hose ends, and return connection for moisture. A leak that appears only after pressure builds is a reason to shut the filter down and correct the seal. Do not tighten plastic fittings indefinitely; over-tightening can distort a gasket or damage a threaded part.
Airlock or Air Leak? Use the Pattern of the Failure
The words are often used interchangeably, but the repair is different. An airlock is trapped air that interrupts flow. An air leak is a place where air enters the intake path continuously.
A temporary airlock
An airlock is more likely when the filter stopped immediately after cleaning, the intake hose is otherwise intact, and the canister fills when you use the correct prime procedure. You may hear a short burst of gurgling and then see a steady return. Removing power, confirming the water path, and releasing air according to the manual usually solves it.
A suction-side air leak
An intake-side leak is more likely when the filter loses prime after hours, the return spits bubbles continuously, or the motor noise changes when you move a hose. Check the motor-head gasket, intake hose connector, quick-disconnect O-rings, hose ends, and any valve block before blaming the motor. Because the intake is under suction, air can enter without water visibly leaking out.
Fluval’s 07 Series support guidance specifically calls out motor-head O-ring maintenance, the intake rubber hose connector, hose routing, and air near the intake. Use your model’s manual for the exact service sequence and part number.
A restriction after the pump
If the canister primes but the return flow is weak, look at the intake strainer, packed foam, fine polishing pad, outlet, and hose bends. A clogged filter can reduce flow, but it does not explain every empty intake line. Diagnose the water path before replacing media.
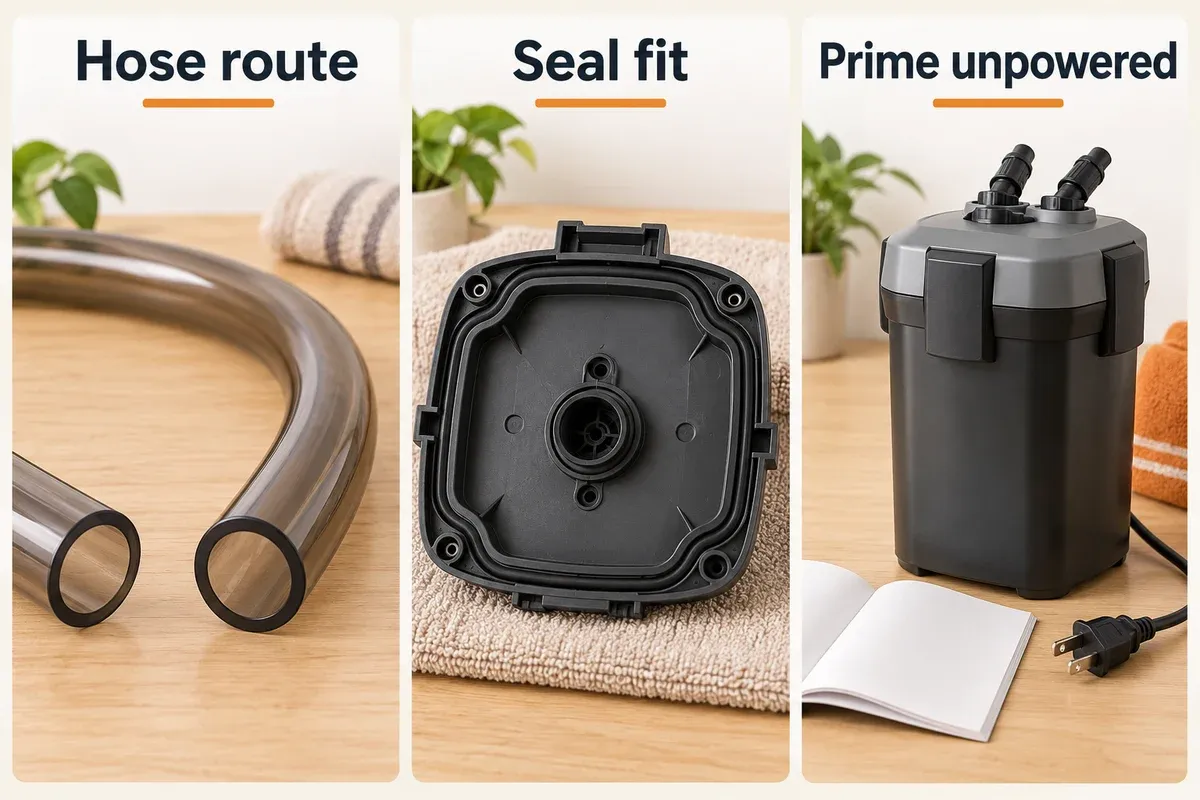
These checks address common places where air enters or remains trapped before you restart the motor.
O-Ring, Hose, and Quick-Disconnect Troubleshooting
Motor-head O-rings and gaskets
Open the filter only after unplugging it and closing the valves. Remove the gasket without stretching it, wipe away grit and old residue, and inspect it under good light. Replace it if it is cracked, permanently flattened, swollen, brittle, or too loose in its groove. A gasket that looks intact can still fail if it is twisted or pinched during reassembly.
Use a thin film of aquarium-safe silicone lubricant on a clean seal when the manufacturer allows it. Fluval’s maintenance guidance names its A325 silicone lubricant for this job; it is not a glue and cannot restore a damaged O-ring. You can Check current price on Amazon → after confirming that your manual permits lubrication.
Do not use petroleum jelly, cooking oil, automotive grease, or household sealant. Those products can swell rubber, contaminate the aquarium, or make a later inspection harder. Lubricant should help the seal seat; it should never compensate for the wrong size.
The Check current price on Amazon → is a lower-cost third-party option intended for several Fluval 04, 05, 06, and 07 models. Treat the compatibility claim as something to verify against your exact model and part number, not as a universal seal.
Intake hose and connector
Run your fingers along the whole intake hose. Replace it if it is hard, split, collapsed, permanently kinked, or loose on the connector. Pay special attention to the last few inches near the canister and the intake rubber connector, where repeated bending can create a small leak.
Route the hose in a smooth path with no tight loop or high pocket that can hold air. Cut a replacement hose squarely and push it fully onto the correct fitting. A hose that is technically close in diameter can still leak or slip when the pump creates suction.
For compatible Fluval 306/307 and 406/407 systems, the Check current price on Amazon → is a model-specific starting point. The Check current price on Amazon → is a bulk option only when your measured fitting actually requires 5/8-inch inside diameter. Do not buy either by appearance alone.
Quick-disconnects and AquaStop valves
A quick-disconnect can look connected while its internal valve is only partly open or its O-ring is dirty. Close the valves before separating the block, inspect the O-rings and mating surfaces, and reseat the block squarely. If a lever is stiff, do not force it; grit, a swollen seal, or a cracked valve may be the underlying problem.
For a Fluval 307 or 407, the Check current price on Amazon → is a more defensible repair than a generic connector. It does not include hose, so confirm the intake length and fittings separately.
Impeller, Shaft, and Bushing Checks
If the canister fills but the pump only hums, clicks, or vibrates, inspect the impeller after the intake and seals pass inspection. Unplug the filter, close the valves, drain the motor-head area safely, and follow the manual to remove the impeller cover.
Check for:
- Hair, gravel dust, snail shells, and other grit around the rotor
- A chipped or swollen magnet
- A bent or worn ceramic shaft
- Missing, cracked, or loose rubber bushings
- A damaged impeller cover or pump-well surface
Clean the well and parts with water and a soft brush. Do not scrape ceramic or force a stuck shaft. A clean impeller can restore flow; a worn shaft, cracked magnet, or damaged cover needs the exact replacement part.
For the Fluval 307, the Check current price on Amazon → bundles the impeller, shaft, rubber supports, cover, and gasket. The Check current price on Amazon → is a different fit. For an FX5 or FX6, the official part number is A20206; the Check current price on Amazon → should not be substituted for a 07-series rotor.
Fluval’s FX maintenance notes also identify the impeller as the pump’s key moving part and point owners toward the spare bushing and maintenance procedure. The FX replacement-parts list is the safer reference when a part number is unclear.
When Clogged Media Is the Real Restriction
Media can restrict flow after a high-bioload week, a substrate disturbance, or a cleaning interval that was too long. If the canister primes normally but the return weakens quickly, inspect the intake strainer and the first mechanical layer before changing the whole filter.
Rinse reusable foam and biological media in water removed from the aquarium. Chlorinated tap water and a complete media replacement can remove useful bacteria. Replace the mechanical layer first, and change biological media gradually when possible. The correct response to poor flow is not automatically a new pump.
The Check current price on Amazon → and Check current price on Amazon → are model-matched consumables. They can help when foam is collapsed or exhausted, but they will not repair an intake-side air leak or a failed impeller.
Model-Specific Parts for This Troubleshooting Guide
The table is organized by the failure it can address, not by a claim that every canister needs a replacement part.
Prime-related parts: seals, hoses, valves, and impellers
-
Fluval Silicone Lubricant A325
Fluval
Fluval's aquarium silicone lubricant for O-rings and gaskets. Use a thin film on a clean, correctly seated seal; it cannot repair a split hose, flattened gasket, or cracked valve.
- Fluval A325 maintenance lubricant
- Recommended by Fluval's 07 Series maintenance guidance
- Useful for motor-head, AquaStop, and other serviceable seals when the manual allows it
- Fit / target
- Fluval filter O-rings and gaskets; verify manual
-
Captain O-Ring A20063/A20064 Fluval Canister Seal (2-Pack)
Captain O-Ring
Two replacement lid O-rings for the described Fluval canister filter families. A correctly sized seal can stop air entry and leaks that present as recurring gurgling after priming.
- Two replacement seal rings
- A20063/A20064 part references in the product documentation
- Fluval 04, 05, 06, and 07 series compatibility stated
- Fit / target
- Fluval 304/305/306/307 and 404/405/406/407 (manufacturer claims)
-
Fluval 307 Motor Head Maintenance Kit
Fluval
Model-specific motor-head service kit for the Fluval 307 A446. It bundles the magnetic impeller, ceramic shaft and rubber supports, impeller cover, and gasket instead of making you guess which small pump part failed.
- For Fluval 307 / A446
- Impeller, ceramic shaft, rubber supports, cover, and gasket included
- Useful when noise and lost flow follow service or visible wear
- Fit / target
- Fluval 307 / A446
-
Fluval 407 Motor Head Maintenance Kit
Fluval
The 407-specific service kit combines the magnetic impeller, ceramic shaft and rubber support, impeller cover, and gasket. It is a sensible repair choice when the pump is otherwise intact.
- For Fluval 407 / A449
- Impeller, shaft, rubber support, cover, and gasket included
- Useful for worn shafts, noisy rotors, and aged motor-head seals
- Fit / target
- Fluval 407 / A449
-
Fluval FX5/FX6 Magnetic Impeller Assembly
Fluval
The A20206 magnetic impeller assembly for Fluval FX5 and FX6 filters. It addresses a worn rotor, magnet, or shaft assembly after the impeller well and bushings have been cleaned and checked.
- Fluval A20206 model number
- Compatible with FX5 and FX6
- Fit / target
- Fluval FX5 / FX6
-
Fluval Ribbed Hosing A20015, 9.8 Feet
Fluval
Fluval's A20015 ribbed hose intended for the 306/307 and 406/407 families. It is the safer replacement path when the original intake hose has gone hard, split at a connector, or developed a permanent kink.
- 9.8-foot replacement hose
- intended for Fluval 306/307 and 406/407
- Useful for an intake-side air leak or collapsed hose path
- Fit / target
- Fluval 306/307 and 406/407 families
-
Fluval 307/407 Intake and Output Replacement Kit
Fluval
A model-specific intake/output replacement kit for the Fluval 307 A446 and 407 A449. It is a better choice than forcing a generic valve onto a worn AquaStop connection, but it does not include replacement hose.
- For Fluval 307 / A446 and 407 / A449
- Replaces the intake/output connection hardware
- Useful when a valve block or connector is cracked, stiff, or leaking air
- Fit / target
- Fluval 307 / A446 and 407 / A449
Review the linked product page before purchasing.
Measured-size hose, valve, and media options
-
FZONE Aquarium Tubing, 3 Meter, 5/8 Inch ID
FZONE
A 3-meter clear aquarium hose with a described 5/8-inch inside diameter. It is a flexible bulk replacement option when the original hose is damaged, but the diameter must match the filter fitting exactly.
- 3-meter clear tubing
- 5/8-inch inside diameter described
- Useful for a measured water path rather than a guessed universal fit
- Fit / target
- See product page
-
OASE ShutOff Valve, 16/22 mm Hose Connections
OASE
A dual shutoff valve with quick-release coupling for OASE's 16/22 mm hose size.
- 16/22 mm hose connections
- Dual shutoff and quick-release design
- Useful for a compatible OASE hose path, not a random Fluval fitting
- Fit / target
- OASE systems using 16/22 mm hose
-
Fluval 306/307 Bio Foam Value Pack
Fluval
A six-piece replacement foam pack for the Fluval 306/307 media layout. It can restore flow when clogged foam is the restriction, but it is not a substitute for fixing an empty intake line or air leak.
- Six-piece value pack
- For Fluval 306/307
- Bio-Foam Max, Bio-Foam, and Bio-Foam+ layers described
- Fit / target
- Fluval 306 / 307
-
Fluval 406/407 Bio Foam Value Pack
Fluval
A nine-piece foam value pack for the Fluval 406/407 media layout. Use it when the model-matched foam is physically spent or restricting flow after cleaning, not as the first answer to a priming failure.
- Nine-piece value pack
- For Fluval 406/407
- Bio-Foam Max, Bio-Foam, and Bio-Foam+ layers described
- Fit / target
- Fluval 406 / 407
These are supporting parts, not universal upgrades. Match the inside diameter, valve format, or filter model before checkout.
How to Choose the Smallest Correct Repair
Use this order when you are deciding whether to buy a part:
- Read the model label. A Fluval 307, 407, FX5, and FX6 do not share every pump or seal part. Record the model and any part number printed in the manual.
- Find the first failed point. If the intake never fills, start with hose routing, connectors, and O-rings. If water reaches the motor but the rotor does not move, inspect the impeller.
- Prefer a complete model-specific service kit when several small parts are worn. A kit can be less frustrating than replacing a shaft and then discovering the cover or gasket is also damaged.
- Measure before buying generic tubing or valves. Inside diameter, outside diameter, connector shape, and valve size all matter. A hose that slides on is not automatically a sealed hose.
- Replace the complete canister only when the housing or motor is the problem. Cracks, a burning smell, electrical trips, a leaking pump body, or no movement after a clean and correct impeller replacement are stronger reasons to stop repairing small parts. For a replacement comparison, see our guide to the best canister filters.
If the filter is operating again but the aquarium remains hazy, do not assume the priming repair solved water quality. Use the symptom-based guide to cloudy aquarium water causes, and see aquarium filter noise troubleshooting if the restart leaves a rattle or vibration.
What the Symptom Reveals
Community discussions are useful for spotting patterns that manuals do not always explain clearly: a filter that will not restart after a water change, a hose that looks connected but admits air, or an impeller that becomes noisy after years of service. The Reddit priming discussion described in the content brief is anecdotal and model-specific.
A successful trick on one canister can create a leak, spill, or dry-run risk on another. The repeatable test is still the same: power off, make the water path continuous, check the seal and hose, then inspect the impeller.
Frequently Asked Questions
Why won’t my canister filter prime after cleaning?
Cleaning often changes the exact conditions that let the filter prime. A hose may be looped, the intake may not be fully submerged, the valve block may not be fully open, or the motor-head gasket may be twisted or dry. Rebuild the water path without power, then check for intake-side air entry before replacing the pump.
Can I run a canister filter dry to clear an airlock?
No. A dry run can overheat or damage the impeller and its bushings. Fill and prime the filter according to its manual, wait for water to reach the pump, and switch off quickly if there is no flow. A few air bubbles during a wet startup are normal; a pump running without water is not a priming method.
Why does my canister filter prime and then stop?
The filter may have a continuing intake leak, a high point that collects air, a blocked strainer, a collapsing hose, or media that becomes restrictive as water moves through it. Check the intake line and hose first. If the canister stays full but the motor hums, move to the impeller and pump well.
How do I know if the O-ring is bad?
Look for cracks, flattening, swelling, brittleness, twists, grit, or a seal that no longer sits naturally in its groove. Also inspect the mating plastic for a hairline crack. A clean O-ring can sometimes be lubricated and reseated; a permanently deformed or damaged one should be replaced with the correct size.
Can I use Vaseline on an aquarium-filter O-ring?
Avoid petroleum jelly unless the manufacturer specifically says otherwise. Use the aquarium-safe silicone lubricant named in your filter manual, and apply only a thin film to a clean seal. Lubricant is for seating and maintenance, not for filling a crack or making the wrong O-ring fit.
When should I replace the impeller?
Replace it when the magnet, rotor, shaft, rubber supports, or cover is visibly damaged or worn, or when a clean, correctly assembled pump still clicks, grinds, or fails to move water. Match the exact model and part number. Do not install a similar-looking impeller from another filter family.
Can clogged filter media stop a canister from priming?
Clogged media can severely reduce flow, but it is not the first explanation for an intake hose that never fills. Test priming and water movement with the intake, valves, hose, and impeller confirmed first. Then rinse or replace the mechanical layer while preserving established biological media.
Do I need a new canister filter?
Usually not after one failed restart. A seal, hose, valve block, clogged strainer, or impeller is often a smaller repair. Replace the complete unit or contact the manufacturer when the motor housing is cracked, the pump has an electrical fault, it leaks after the correct seal is installed, or it still will not move water after the model-matched impeller and water path have been checked.
Bottom Line: Restore the Water Path Before Replacing the Pump
Most canister filters that will not prime need the water path restored, not a new motor. Unplug the unit, lower it below the aquarium, straighten the intake hose, open the valves, fill the canister without power, and inspect the gasket and connectors. Then clean the impeller and check the mechanical media.
Buy the smallest model-matched part that explains the failure: silicone lubricant for a clean serviceable seal, an O-ring or hose for an air leak, a quick-disconnect assembly for damaged valve hardware, an impeller kit for a worn rotor, or replacement foam for a genuine flow restriction. If the housing or motor is damaged, stop adding small parts and move to a complete replacement.