

 Published sources
 Product details checked
A canister filter usually tells you that it needs maintenance through reduced flow, a dirty intake, trapped air, or a noisy impeller—not because every piece of media needs to look new. Brown sludge in a coarse sponge is a sign that the sponge is doing mechanical work. It is not, by itself, proof that the biological filtration has failed.
Quick answer: Unplug the filter and keep the established media wet in water removed from the aquarium or properly dechlorinated water. Clean the clogged mechanical pads, housing, impeller, intake, and hoses; gently swish biological media instead of scrubbing it; and replace only worn foam, exhausted chemical media, or disposable fine pads. Do not replace every media layer and perform a sterile deep-clean at the same time.
In this guide, you will learn:
- Which filter parts should be rinsed, brushed, replaced, or left alone
- How to clean filter pads and hoses without turning a normal service into a biological reset
- How to protect established foam and ceramic media while still removing trapped debris
- How to inspect the impeller, O-rings, valves, and hose path after opening the canister
- What to monitor after restarting the filter, and when a water-quality problem needs urgent action
The rule that protects your cycle
Clean the restriction, not the entire history of the filter. Remove the debris that is reducing flow, but keep mature biological surfaces wet and intact whenever they are still usable.
A canister contains several jobs that are often mixed together under the word “media”:
| Filter part | Normal maintenance | What you are protecting |
|---|---|---|
| Coarse sponge or prefilter | Squeeze or swish until the water path opens; replace it if collapsed, brittle, or permanently clogged | Flow and the useful surfaces of a mature sponge |
| Fine filter pad or floss | Rinse a reusable pad lightly, or replace a disposable pad when it is loaded or falling apart | Mechanical polishing, not the entire biological cycle |
| Ceramic or other porous biological media | Keep it wet and gently agitate it in removed aquarium water; clean only when flow is restricted | Established nitrifying bacteria and porous structure |
| Activated carbon or other chemical media | Replace or regenerate according to the product instructions when it is exhausted | The chemical function, not nitrifying capacity |
| Hoses, strainer, baskets, housing, and impeller well | Brush and rinse with water; inspect for cracks, air leaks, and trapped debris | A continuous, leak-free water path |
| O-rings and gaskets | Clean, inspect, and apply only the lubricant approved by the manufacturer | The seal that keeps the intake from drawing air and the canister from leaking |
The split is not absolute: bacteria also live on mature sponges and other wet surfaces. The practical point is that a dirty mechanical pad can be serviced more aggressively than established porous media, while a media basket should not be dried, bleached, scrubbed, or replaced simply because it is brown.
Why a sterile “complete clean” can destabilize a cycled aquarium
The nitrogen cycle depends on microbial communities attached to wet surfaces. A canister filter is one of the most concentrated places in the aquarium for those surfaces, but it is not the only place bacteria live. A full replacement of every mature sponge and ceramic layer, followed by chlorinated rinsing or a long dry pause, removes several layers of biological continuity at once.
That does not mean you should leave a clogged filter untouched. A blocked mechanical pad can reduce circulation and oxygen exchange, and a dirty impeller well can reduce flow or create noise. It means the cleaning job should be divided by function:
- Restore the water path by cleaning the intake and mechanical media.
- Preserve the biological media while it is out of the canister.
- Replace expendable media only when it is actually spent.
- Restart the filter full of water and check the aquarium rather than assuming the service was harmless.
For a stable tank, this is usually a more useful goal than making every basket look factory-clean.
When should you clean a canister filter?
Use the filter’s behavior as the primary schedule. Aquarium Co-Op notes that frequency depends on clogging, tank size, bioload, and feeding; its general rule of thumb is roughly every one to three months, while a larger canister on a lightly stocked aquarium may go three to six months. Treat those ranges as prompts to inspect, not as a mandatory calendar.
Clean sooner when you notice:
- A clear loss of return flow after the intake and water level are confirmed
- A prefilter, strainer, or coarse pad visibly packed with detritus
- Debris bypassing a torn pad or collecting in the impeller well
- Gurgling, repeated air in the return, or a hose that has become hard and kinked
- A polishing pad that is dark, collapsed, or blocking the first media basket
- A smell or visible film in a hose that is accompanied by reduced flow
Do not use “the media is brown” as the only trigger. A mature filter often has brown media and stable water. If the tank already has measurable ammonia or nitrite, sick fish, a recent medication course, or a recent large media change, postpone nonessential deep work or prepare backup aeration and testing first.
Set up a low-risk cleaning session
Choose a time when you can watch the filter for at least 10 minutes after restart. Have these items ready:
- A clean bucket reserved for aquarium use
- Water removed during the aquarium’s normal partial water change
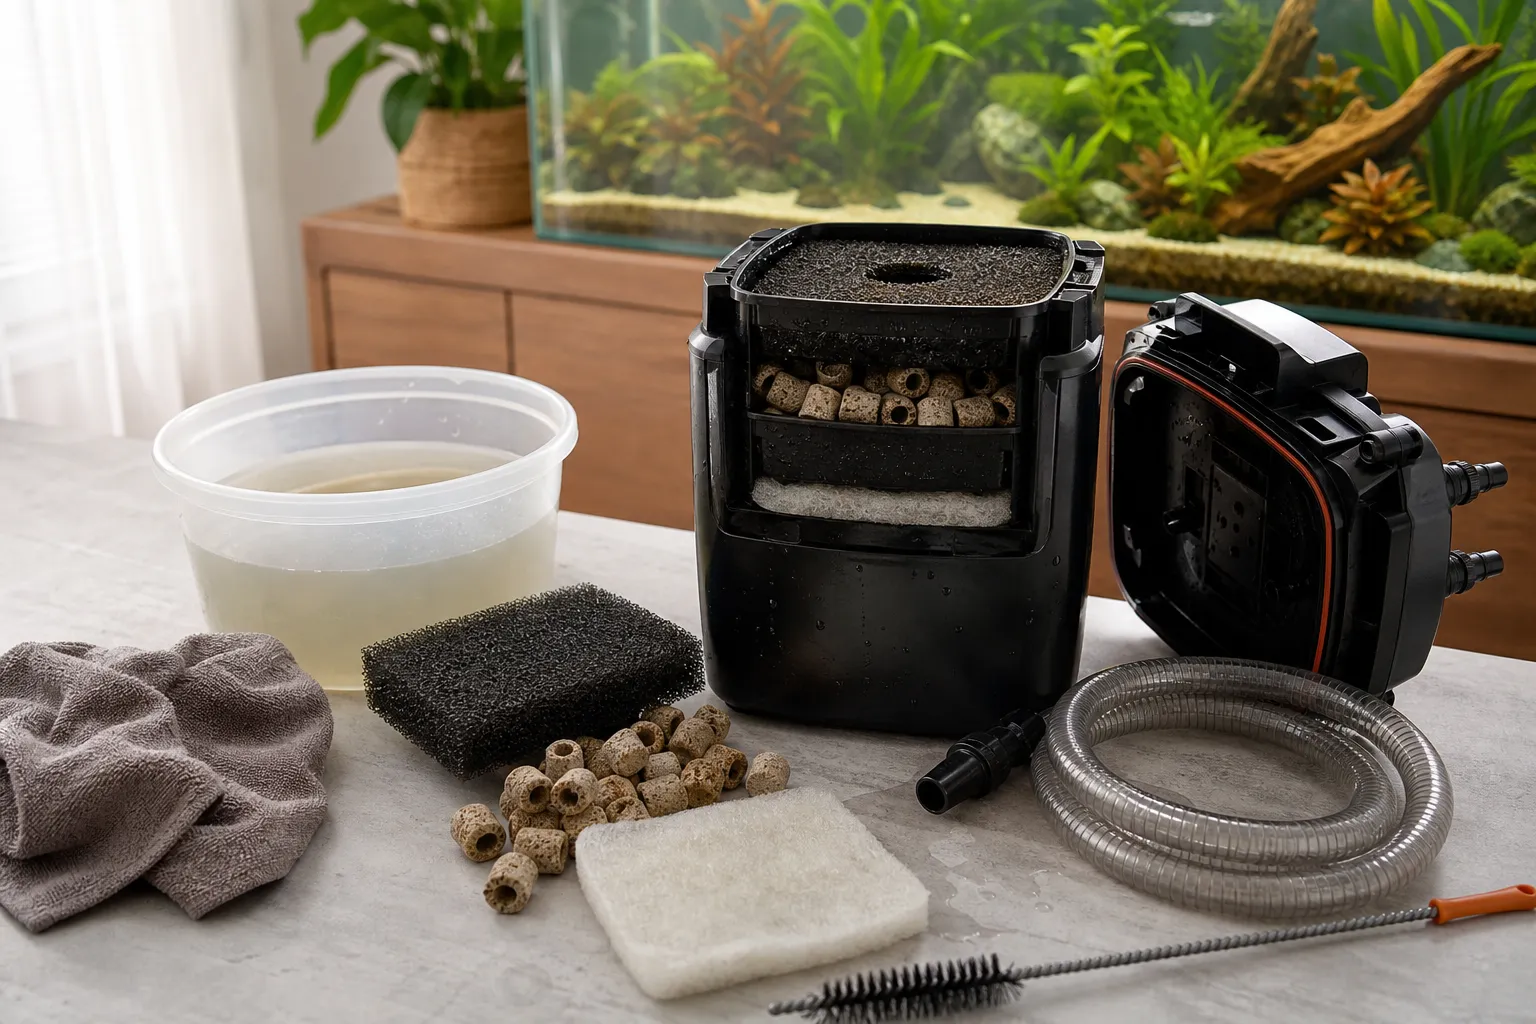
- A towel, tray, or shallow pan for the canister head and wet media baskets
- A model manual or a photo of the media order before opening the filter
- A clean aquarium-safe hose brush and a soft toothbrush for hard plastic parts
- New model-matched foam or a fine pad only if the existing part is worn
- A water conditioner if any replacement water will be added
- An ammonia and nitrite test if the tank is heavily stocked or the service is substantial
Turn off the heater and filter before lowering water or moving equipment. Close the filter’s shutoff valves or AquaStop if the model has them, and keep the canister below the aquarium’s waterline while you work. Do not catch the fish just to clean the filter; leaving them in the established aquarium avoids an unnecessary second disruption.
Supplies worth having on hand
The products below are maintenance tools and model-specific replacements, not a reason to replace healthy biological media. Match the filter model, hose connection, and media shape before ordering.
Canister-filter cleaning supplies and replacement media
-
SLSON Aquarium Filter Brush Set
SLSON
A flexible double-ended hose brush set with a 61-inch handle and ten brush sizes. It is useful for removing hose biofilm and trapped detritus; it is not a reason to scrub established biological media until it looks new.
- 61-inch flexible double-ended brush
- Ten different brush sizes for hoses and narrow fittings
- Soft nylon bristles with a stainless-steel core
- Best for
- Cleaning canister hoses, intake tubes, strainers, and narrow ports
- Fit / use
- Aquarium hoses, intake tubes, strainers, and narrow ports
-
Fluval Ribbed Hosing A20015, 9.8 Feet
Fluval
Fluval's A20015 ribbed hose intended for the 306/307 and 406/407 families. It is the safer replacement path when the original intake hose has gone hard, split at a connector, or developed a permanent kink.
- 9.8-foot replacement hose
- intended for Fluval 306/307 and 406/407
- Useful for an intake-side air leak or collapsed hose path
- Best for
- Fluval 306/307 and 406/407 hose replacement
- Fit / use
- Fluval 306/307 and 406/407 families
-
Fluval 306/307 Bio Foam Value Pack
Fluval
A six-piece replacement foam pack for the Fluval 306/307 media layout. It can restore flow when clogged foam is the restriction, but it is not a substitute for fixing an empty intake line or air leak.
- Six-piece value pack
- For Fluval 306/307
- Bio-Foam Max, Bio-Foam, and Bio-Foam+ layers described
- Best for
- Replacing collapsed or exhausted foam in a Fluval 306/307
- Fit / use
- Fluval 306 / 307
-
Fluval 406/407 Bio Foam Value Pack
Fluval
A nine-piece foam value pack for the Fluval 406/407 media layout. Use it when the model-matched foam is physically spent or restricting flow after cleaning, not as the first answer to a priming failure.
- Nine-piece value pack
- For Fluval 406/407
- Bio-Foam Max, Bio-Foam, and Bio-Foam+ layers described
- Best for
- Replacing collapsed or exhausted foam in a Fluval 406/407
- Fit / use
- Fluval 406 / 407
-
Fluval Silicone Lubricant A325
Fluval
Fluval's aquarium silicone lubricant for O-rings and gaskets. Use a thin film on a clean, correctly seated seal; it cannot repair a split hose, flattened gasket, or cracked valve.
- Fluval A325 maintenance lubricant
- Recommended by Fluval's 07 Series maintenance guidance
- Useful for motor-head, AquaStop, and other serviceable seals when the manual allows it
- Best for
- Lubricating clean aquarium-filter O-rings and gaskets
- Fit / use
- Fluval filter O-rings and gaskets; verify manual
Review the linked product page before purchasing.
The SLSON brush set is for hoses, intake tubes, strainers, and narrow ports. It should not be used to scrub ceramic rings or to polish every surface until the filter is sterile. If a ribbed hose has gone hard, split at a connector, or developed a permanent kink, the Check current price on Amazon → is a model-specific option for the 306/307 and 406/407 families; other canisters need their own measured replacement.
For Fluval owners, the Check current price on Amazon → and Check current price on Amazon → are useful when a matching foam layer is collapsed or physically spent. They are not instructions to discard every established layer during one service. The Check current price on Amazon → belongs on a clean, intact seal only when your filter’s manual permits it; Fluval specifically warns against petroleum jelly and vegetable oil because they can damage rubber seals.
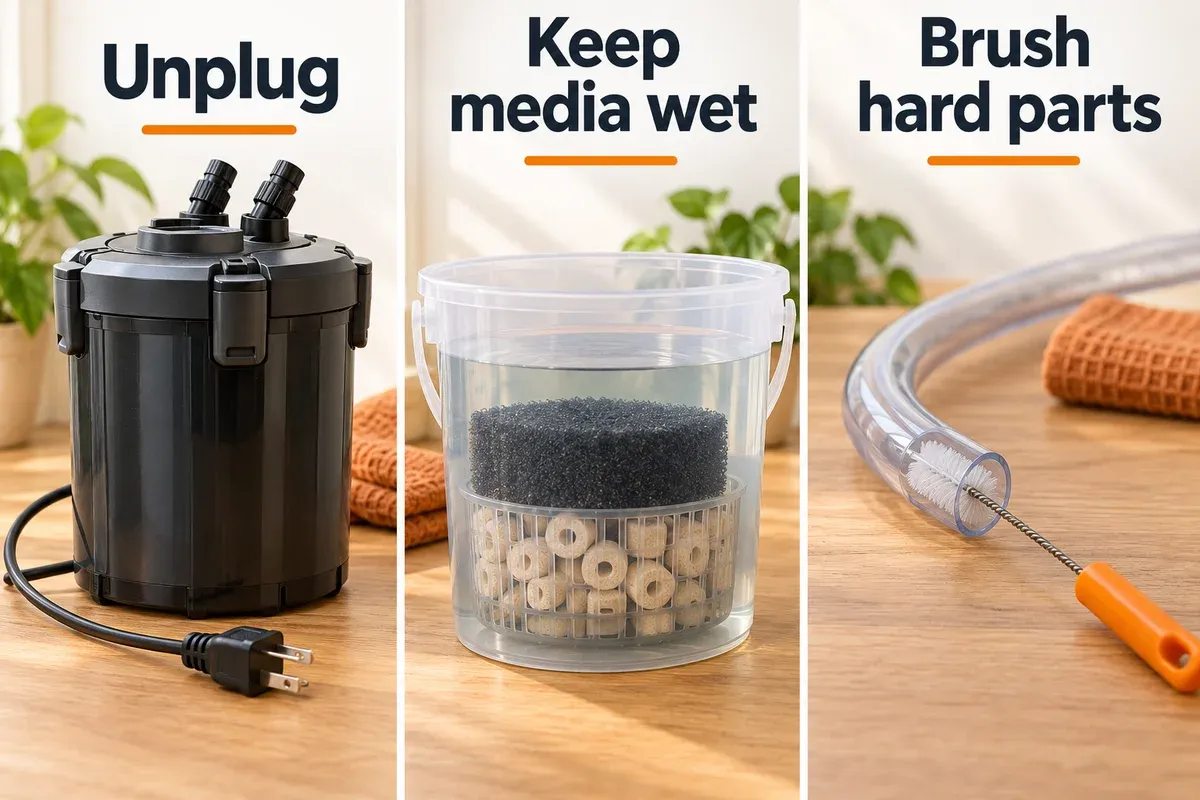
The distinction below keeps useful biological surfaces protected while you clear the restricted water path.
Step-by-step: clean the canister without sterilizing it
1. Turn off the equipment and preserve the water
Unplug the filter and heater before opening the canister. Close the valves, place a towel under the connections, and disconnect the hoses according to the manual. Keep the canister and media baskets upright so dirty water does not run over the motor head or electrical connection.
Use a bucket of removed aquarium water for the media. If you are not doing a water change, prepare water that has been treated with a suitable dechlorinator and brought close to the aquarium’s temperature. Untreated tap water is a poor choice for established biological media because chlorine or chloramine can damage the organisms you are trying to preserve.
2. Clean the intake before opening every basket
Inspect the intake strainer and any prefilter sponge first. A blocked intake can look like a canister problem even when the media is fine. Remove leaves, hair algae, and large debris by hand, then swish a coarse prefilter in removed aquarium water until water can pass through it again.
If the prefilter is crumbling or permanently compressed, replace it with the correct size. Do not wrap the intake in a very fine pad as a makeshift solution; it can load quickly and starve the pump. Clean or replace the intake protection based on flow and livestock, especially in tanks with shrimp, fry, or heavy feeding.
3. Open the canister and keep the media wet
Move each basket into the bucket of aquarium water. If the media order is not obvious, take a quick photo before separating the baskets. Keep foam, ceramic rings, and other porous media submerged or at least continuously wet while you clean the housing.
Do not leave a basket on a dry towel while you work on the impeller. Do not let the media sit in direct sun or in hot water. The goal is to remove detritus while keeping the established surfaces biologically continuous.
4. Service coarse foam and filter pads by function
Start with the coarsest mechanical layer. Squeeze or swish it in the bucket until the main flow path opens and loose debris is removed. You do not need clear rinse water. A little remaining brown color is normal and preferable to destroying a mature sponge through repeated aggressive scrubbing.
Fine filter floss or a polishing pad has a different job. If it is a reusable pad and still holds its shape, rinse it lightly. If it is disposable, collapsed, torn, or packed with fine waste, replace it. Fine material belongs where it can be removed easily; it should not be used as the only biological support in a stocked tank.
Replace foam when it has lost its shape, tears when squeezed, sheds pieces, or remains restrictive after a reasonable rinse. When selecting an Check current price on Amazon →, confirm the canister model and basket layout. If only one mechanical layer is spent, replace that layer and keep the other established media in service.
5. Gently swish biological media
Put ceramic rings, sintered media, and mature biological foam in the bucket of removed aquarium water. Move the basket slowly or lift and lower it once or twice to release loose sediment. Do not scrub every ring, boil the media, use bleach, or rinse it under untreated tap water.
Seachem’s guidance is useful here: biological media should be rinsed gently in old tank water and can last indefinitely unless contaminated or neglected, while mechanical media can be rinsed or replaced when it is worn. Aquarium Co-Op gives the same practical distinction: squeeze sponges, gently agitate bio-rings, and replace chemical media when it is used up.
A dark film is not automatically a problem. If water can still move through the media and the material is intact, preserving it is usually more valuable than making it bright. Replace biological media in stages only when it is broken, chemically contaminated, or genuinely unusable. Never replace all established biological layers in one cleaning simply because you purchased new media.
6. Handle chemical media separately
Activated carbon, phosphate media, resins, and other chemical media are not the foundation of the nitrogen cycle. Replace or regenerate them only according to the product’s instructions and the reason you are using them. Carbon that has reached the end of its useful life is an expendable insert; it is not a reason to discard healthy foam or ceramic media.
If medication, copper, or another contaminant has entered the aquarium, follow the medication and water-treatment instructions before deciding what to discard. Do not assume that adding a bottled bacteria product makes it safe to replace every mature media layer. Preserving the existing media and testing the water is the more reliable first response.
7. Clean the housing, impeller, and hoses
Rinse the empty canister, baskets, lid channels, intake strainer, and impeller well with aquarium-safe water. Do not use dish soap, bleach residue, glass cleaner, or scented household products. Any cleaner left in the housing can return to the aquarium when the filter restarts.
Use the flexible Check current price on Amazon → through the hoses and narrow intake ports. Push gently and pull the brush back out rather than forcing it around a sharp bend. Remove the impeller if the manual allows it, then clean the well, shaft, bushings, and cover with a soft brush. Check for gravel, plant fragments, hair, cracks, and a worn or bent shaft.
Clean hoses when a visible film is accompanied by reduced flow, or as part of a periodic service. A white or translucent film on some hose connectors can simply be biofilm; Fluval describes this as harmless and says the hosing and connectors can be cleaned as normal maintenance. The important warning sign is not the color alone but whether the hose is narrowing, leaking air, or preventing a stable prime.
Inspect every O-ring and gasket for flattening, cuts, grit, or a section that has slipped out of its groove. Clean the seal and its channel. If the manufacturer approves a silicone lubricant, apply a very thin film to the clean seal. Grease does not repair a split hose, cracked valve, or flattened gasket, and petroleum-based household products can shorten rubber life.
8. Reassemble in the original order and prime safely
Rebuild the baskets in the order specified by the filter manufacturer. In many canisters, water meets coarse mechanical media before finer polishing media, while biological and chemical layers occupy later positions; the exact arrangement still belongs to your model’s manual. Make sure no pad is folded against the lid or blocking a basket’s outlet.
Seat the O-ring evenly, close the latches without forcing one side, and reconnect the hoses without high loops or sharp bends. Fill the canister with conditioned water if the manual calls for a filled canister, open the valves, and use the built-in priming method. Do not plug in a canister pump while the motor chamber is dry.
When water is moving continuously through the intake and return, plug in the filter. Watch the return for flow and trapped air, and check every connection with a dry finger or paper towel. A few bubbles after opening a canister can be normal; a persistent air stream, empty intake hose, or leaking motor-head seam means the filter should be unplugged and the seal, hose path, and valve positions checked again.
After restart: check the filter and the aquarium
Stay with the system for the first 10 minutes. Confirm that:
- The canister is not leaking at the lid, valves, hose connectors, or motor head
- The intake remains submerged and the return has a steady flow
- The impeller is not rattling, grinding, or repeatedly losing prime
- The heater is covered to the manufacturer’s minimum water level before it is switched back on
- Fish are behaving normally and no animal is gasping at the surface
Do not “fix” trapped air by running the pump dry. Follow the model’s priming instructions and, if permitted by the manual, gently tilt the canister to release air. If the filter still will not prime, use the troubleshooting sequence in Canister Filter Won’t Prime rather than repeatedly opening a healthy media stack.
If the service involved a full mechanical-media replacement, a long interruption, or any accidental drying of biological media, test ammonia and nitrite later the same day and again over the next 24–72 hours. The target in a normally cycled freshwater aquarium is zero ammonia and zero nitrite; Seachem recommends regular testing and warns that large or poorly controlled changes can contribute to instability. Keep feeding light while you confirm that readings remain normal.
| What you notice after cleaning | What it usually means | What to do |
|---|---|---|
| Slight haze, steady flow, normal fish behavior | Fine particles were disturbed during service | Give the filter time to collect the particles; do not reopen it immediately |
| Flow is still weak but there is no leak | Intake, fine pad, hose, or impeller restriction remains | Unplug safely and inspect the water path from intake to return |
| Persistent bubbles or gurgling | Air leak, loose connection, low water level, or incomplete prime | Check hose routing, valves, O-ring, and water level; never run the pump dry |
| Measurable ammonia or nitrite, lethargic fish, or gasping | The aquarium needs a water-quality response, not another sterile filter clean | Use conditioned, temperature-matched water, increase aeration, keep established media wet and running if safe, and test daily until stable |
| Electrical smell, hot motor, cracked housing, or an active leak | Equipment safety problem | Unplug the filter and use a safe backup filter or air source; do not keep testing a damaged unit |
What to replace—and what not to replace on a schedule
Replacement media is useful when it solves a specific restriction or fit problem. It is not a routine subscription for every basket.
Filter pads and foam
Replace a mechanical pad when it is torn, collapsed, shedding, or still blocks flow after cleaning. Coarse foam is often reusable for a long time. Fine floss may be replaced more often because it is designed to catch the smallest particles and can clog quickly. If a pad is carrying a lot of debris, that is a reason to service the mechanical stage sooner—not a reason to remove healthy ceramic media.
Biological media
Replace ceramic rings or porous media only when they are broken, chemically contaminated, or so packed with irreversible debris that water cannot pass through. If you do need new biological media, change one portion at a time and keep usable old media in the canister. Never discard all established biological media on the same day as a large water change, deep substrate clean, and filter restart.
Hoses, connectors, and valves
Replace a hose that is hard, split, kinked, flattened, or drawing air. Measure the inner diameter and check the connector design; “fits over the barb” is not enough for a safe, quiet intake. The Fluval A20015 product information is a logical option for compatible 306/307 and 406/407 systems, but it should not be treated as a universal hose.
Brushes and lubricants
Use a brush to clean the water path, not to sterilize the biological media. Use only aquarium-safe lubricant approved by the manufacturer and only on a clean, intact seal. If the O-ring is flattened or cracked, replacement is more appropriate than adding more lubricant.
Common mistakes that cause avoidable problems
Rinsing every basket under untreated tap water
This is convenient, but it can expose established biological media to chlorine or chloramine. Keep biological media wet in removed aquarium water or properly dechlorinated water instead.
Replacing all foam, ceramic media, carbon, and floss at once
That may make the filter look new while removing several different functions simultaneously. Replace the part that is spent, keep mature media in place, and stagger necessary changes.
Scrubbing until the media is white
The goal is usable flow, not a sterile appearance. Brown biological media can be normal; a clogged mechanical pad should be cleaned because it restricts flow.
Using dish soap, bleach, or household cleaner
Even a small residue can return to the tank. Water and a dedicated aquarium brush are enough for most housing, hose, strainer, and impeller maintenance.
Combining every large maintenance job
Avoid pairing a full filter strip-down with a 100% water change, deep substrate vacuum, major décor rearrangement, and a complete media replacement unless there is a specific contamination or emergency reason. Smaller, separated jobs are easier to diagnose and less disruptive.
Running the canister dry to clear an airlock
A dry impeller can overheat, rattle, or wear the shaft and bushings. Prime the filter according to its manual and inspect the intake-side seal if air keeps returning.
A practical maintenance rhythm
The following is a starting framework, not a fixed rule. Let flow, bioload, food, plants, and the manufacturer’s instructions decide the exact timing.
| Part | Check it | Service it when |
|---|---|---|
| Intake strainer or coarse prefilter | Weekly or whenever livestock and debris load are high | The intake is visibly covered or flow changes |
| Coarse mechanical foam | At normal water changes | The water path is restricted or the foam no longer recovers |
| Fine pad or floss | Every time you notice polishing loss or a flow drop | It is loaded, collapsed, torn, or disposable and spent |
| Hoses and quick-connects | Every few months and whenever the filter gurgles | Film, kinks, cracks, air leaks, or a hard hose changes the flow |
| Impeller and impeller well | Every few months or when noise/flow changes | Debris, wear, a damaged shaft, or a sticky rotor is found |
| Biological media | Only when flow through the basket is restricted | Gentle swishing no longer restores passage, or the media is damaged/contaminated |
| Chemical media | According to the product’s purpose and instructions | It is exhausted, contaminated, or no longer needed |
Frequently Asked Questions
Can I rinse canister-filter media under tap water?
Do not rinse established biological media under untreated tap water. Swish it in water removed from the aquarium or in properly dechlorinated water close to the aquarium’s temperature. Mechanical pads that are being discarded are a different case, but there is rarely a reason to expose reusable biological media to chlorinated water.
Should I replace all canister-filter media at once?
No. Replace only the pad, foam, chemical insert, or damaged biological media that has a specific reason to be replaced. Keep established biological media wet and change unavoidable biological media in stages.
How often should I clean a canister filter?
Inspect it based on flow and debris. Many aquariums need attention around every one to three months, while a larger canister on a lightly stocked tank may run three to six months. A sudden flow drop, clogged intake, noisy impeller, or persistent air is a more useful signal than the calendar.
Is brown canister-filter media bad?
Not automatically. Brown material in a coarse mechanical sponge is usually trapped detritus; brown color on biological media can be a normal mature film. Clean the mechanical restriction and gently swish biological media, but do not scrub or replace it solely for its color.
Can I use dish soap to clean the canister housing or hoses?
No. Use aquarium-safe water and a dedicated brush. Soap, bleach, and household cleaners can leave residues that are unsafe for fish, invertebrates, and beneficial microbes.
Do I need bottled bacteria after cleaning the filter?
Not automatically. If you preserved the established media and the filter was not left dry or exposed to chlorine, monitor ammonia and nitrite rather than adding a product as a substitute for good maintenance. If readings rise, respond to the water-quality problem and keep the surviving biological media running if the equipment is safe.
What if the canister will not prime after I clean it?
Check the water level, intake submersion, hose routing, shutoff valves, O-ring, quick-disconnect, impeller well, and media order. A tiny intake-side air leak can prevent a stable prime even when the pump still hums. Use the full canister-filter priming troubleshooting guide before buying a replacement filter.
Should I clean hoses every time I clean the media?
No. Clean them when visible buildup is restricting flow, the hose has become hard or kinked, or the filter shows signs of an air leak. Repeatedly disturbing a sound hose adds work without improving filtration.
Bottom line
A safe canister-filter cleaning is selective. Clear the intake and mechanical restriction, keep biological media wet, replace only media that is worn or exhausted, and clean hoses and the impeller without introducing soap or household oils. Restart the filter full of water, check for leaks and stable flow, then monitor ammonia and nitrite if the service was substantial.
For related problems, see why an aquarium filter makes noise, how to diagnose a filter that is too strong, and how to choose a canister filter. The best maintenance routine is the one that restores flow without erasing the mature biological surfaces that make the filter useful.
Sources and further reading
- Fluval USA: 07 Series FAQ — manufacturer guidance on foam, hosing, seals, and silicone lubricant
- Seachem: Guide to Caring for the Freshwater Tank — media roles, water changes, and testing context
- Aquarium Co-Op: How to Clean an Aquarium Filter — practical media-cleaning sequence and service intervals
- Aquarium Co-Op: How do I clean an aquarium filter without killing bacteria? — concise distinction between mechanical, biological, and chemical media
- Aqueon: Aquarium Cleaning Checklist — safe shutdown, media handling, and restart reminders